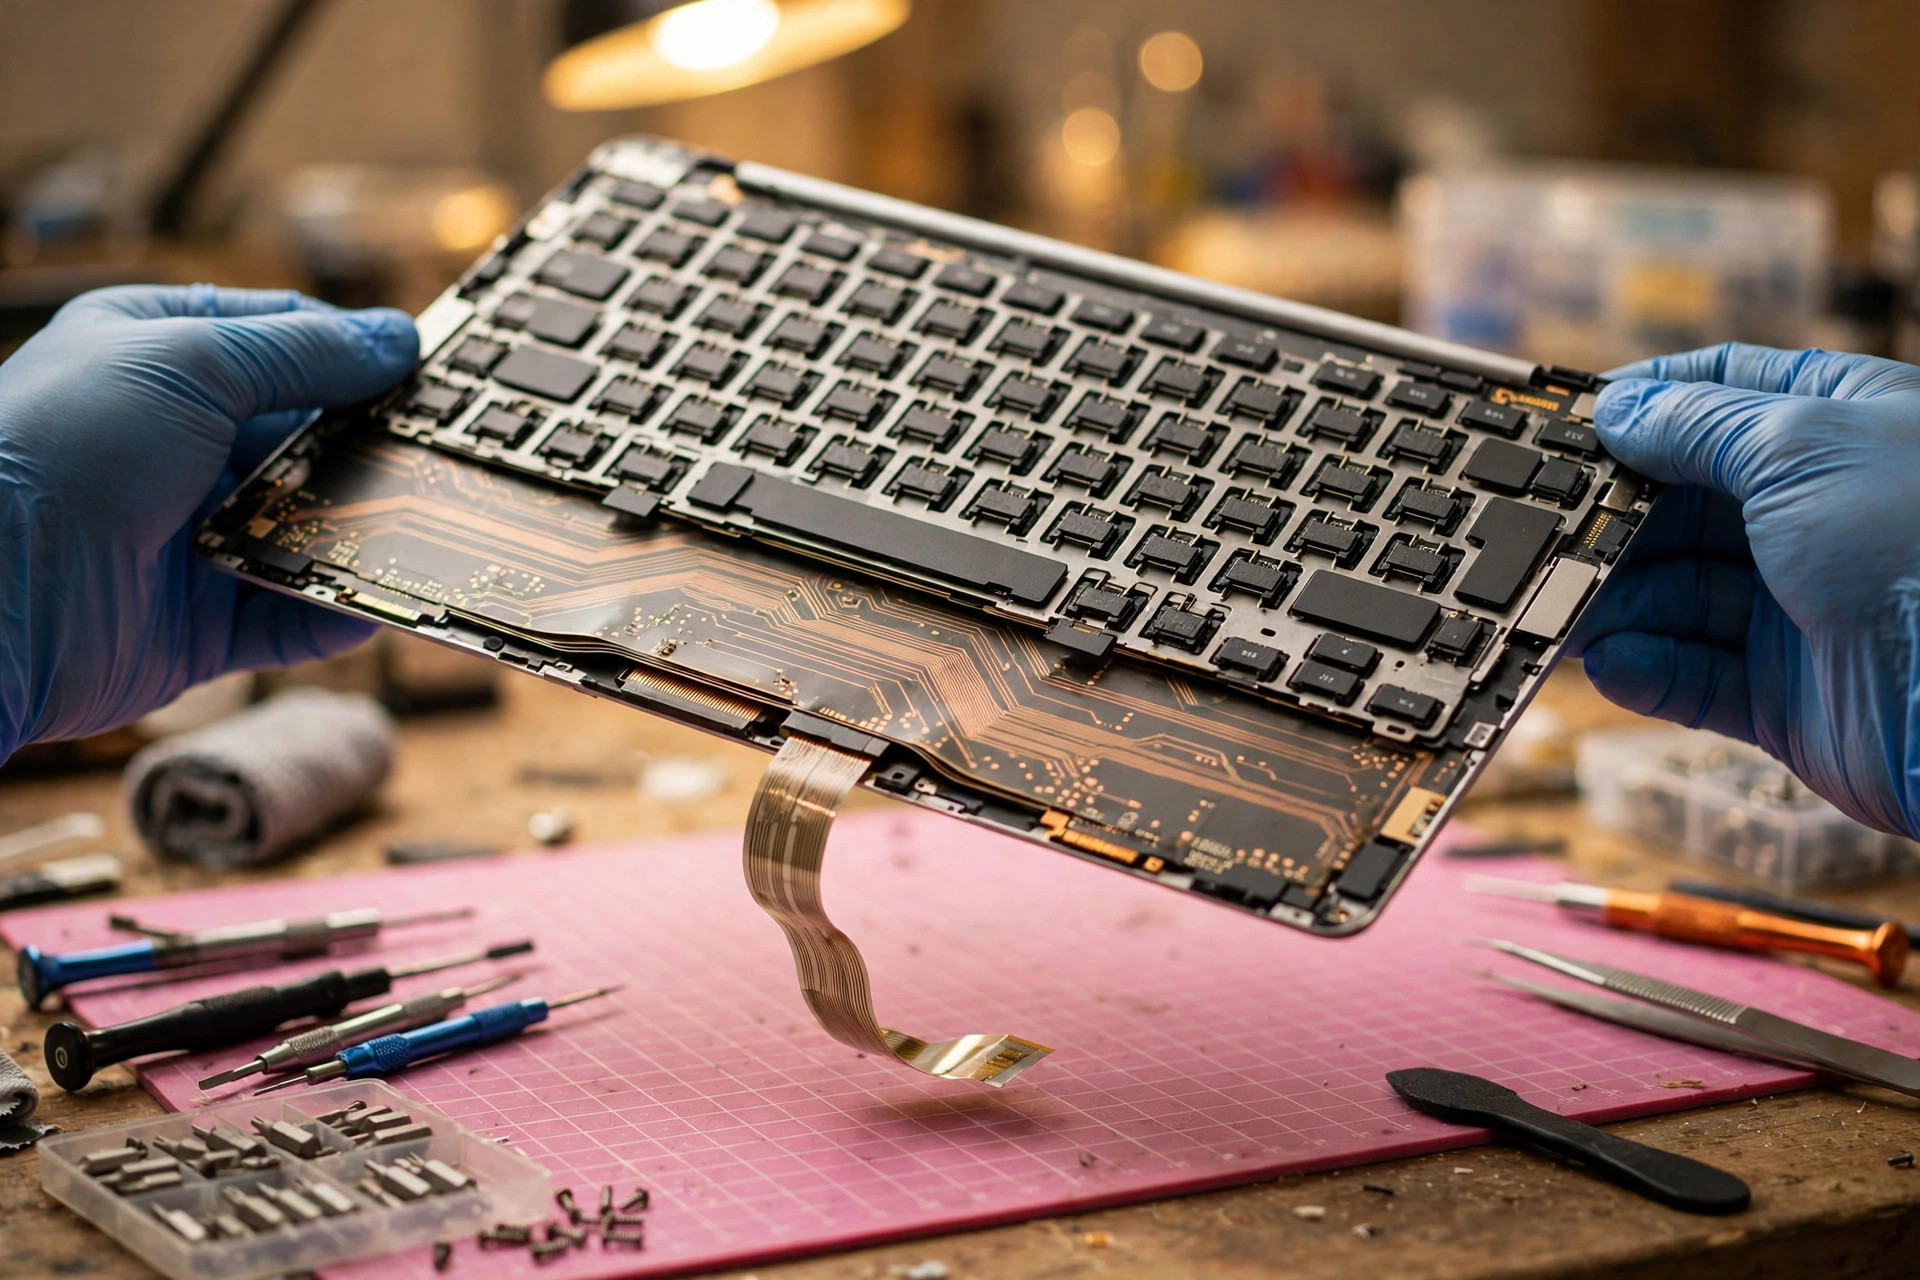
A laptop keyboard key that will not type no matter how hard you press it, a whole row of keys dying together, one press producing two letters, a backlight that glows while no character appears, or a spill that seems harmless on the day and then takes more keys every week: the reader's first reaction is often to reinstall the driver, reset the system, or conclude that the whole keyboard has burned out. This article focuses on one layer only: the physical layer of the laptop keyboard module itself. The physical layer means the keycap, the scissor switch, the rubber dome, the three-layer membrane, the silver-ink traces, the metal base plate, the backlight layer, the flex cable and its gold fingers, and the zero-insertion-force socket and embedded-controller input on the mainboard — whether any of them is broken, worn, fatigued, oxidised, sulphidised, corroded, deformed, loose, or jammed by a foreign object. When the physical layer fails, no amount of software work will genuinely fix it. Conversely, when the input method, keyboard layout, accessibility setting, or driver is at fault, replacing the keyboard module will not help either.
This article has a clear division of labour with the basic guide. The basic guide handles what most readers meet first: a driver not updated, the wrong keyboard layout, an input method switching by itself, an accessibility setting switched on by accident, or a problem that appeared after a system update. This is the advanced guide. It assumes the basic elimination has already been done, and focuses on whether the keyboard itself is broken, which layer is broken, how to prove which layer it is, and whether to repair, replace, or switch to an external keyboard. Every operation in this article that involves disassembly, measurement, opening a zero-insertion-force latch, reseating a flex cable, swapping a flex cable, soldering, replacing a module, replacing a flex cable, or inspecting the mainboard is for professional inspection only; readers must not attempt them. Things a reader can safely do are limited to visual inspection after shutting down and disconnecting power, an external keyboard comparison, an on-screen keyboard comparison, pre-boot diagnostics, and cleaning dry dust with compressed air held upright. If you smell burning, see smoke, or feel abnormal heat or a swollen battery, stop using the device immediately. If liquid ingress is suspected, disconnect power first and do not repeatedly power on to test. Never prise a keycap off with force, and never use glue to stick a keycap back on.
The geometry of the symptoms is itself diagnostic evidence, and that is the most important principle in this article. One dead key points to that key's mechanical part or contact point. A dead row or column points to a broken matrix row or column trace. A dead region points to a few pins of the flex cable or a section of silver-ink trace. A fully dead keyboard with a working external keyboard points to the module, the flex cable, the socket, or the embedded-controller input side. A fully dead keyboard with a dead external keyboard as well points to the operating system, the driver, or the mainboard. Learn to read the pattern and you will not mistake a broken trace for a driver problem; ignore the pattern and you will try one key at a time and reinstall drivers for days while nothing changes.
1. Start With the Right Mental Model: A Keyboard Is a Seven-Layer Stack, Not a Single Part
A laptop keyboard is not one board plus a pile of buttons. It is a seven-layer stack: keycap, scissor switch, rubber dome, three-layer membrane, metal base plate, backlight layer, and flex cable, connected to a zero-insertion-force socket and an embedded controller on the mainboard. Any layer can fail, the symptoms differ by layer, and the repair differs completely. Replacing a keycap will not fix a broken membrane trace, blowing air will not fix a fatigued rubber dome, and reinstalling a driver will certainly not fix a broken flex cable. The first step in diagnosis is always the same question: which layer?
How a keyboard works can be told in three steps. First, mechanical force transfer: a finger presses the keycap, the scissor switch holds the keycap level as it travels straight down, and the rubber dome is squashed flat. Second, electrical contact: the dome pushes the top membrane layer through a hole in the spacer layer, the top contact touches the bottom contact, and the circuit closes. Third, scanning and reporting: the embedded controller sends a signal down each row of the matrix in turn, reads every column, works out which intersection has been pressed, and hands the key event to the operating system. A break at any of these three steps produces the same surface symptom — nothing happens when you press — but where the break sits decides whether the fix is one keycap, one scissor switch, or a whole module.
Laptop keyboards are especially fragile, not because the principle is different, but because of size and environment. A scissor switch is two thin pieces of plastic. A membrane silver trace is less than a millimetre wide, printed on flexible plastic film. A flex cable is thin and short, and its bend is stressed every time the lid opens. The machine is regularly heated, humid, shaken, and squeezed in a backpack. A mechanism that might take years to appear on a desktop keyboard can appear sooner on a laptop, and its symptoms are more easily confused with a driver problem. Once that is understood, the reason this article keeps insisting on layered elimination becomes clear: without layers, you will treat the wrong layer with the wrong method.
2. Keyboard Module Structure: The Complete Chain From Keycap to Mainboard
2.1 The Stack, Top to Bottom
A typical scissor-switch laptop keyboard stacks up as follows. This order is directly supported by patent documents: a scissor-switch key patent lists the key structure as keycap, scissor-type connecting member, elastic element, membrane switch, and base plate, with the elastic element between the keycap and the membrane switch, deforming when pressed to trigger the membrane switch and generate an electronic signal; a narrow-key switch patent lists the same stack — base plate, membrane bottom layer, spacer layer, membrane top layer, elastomeric dome, scissor mechanism, keycap.
| Layer | Part | Function | What happens when it fails |
|---|---|---|---|
| 1 | Keycap | The surface the finger touches; clips underneath grip the scissor switch | Clip breaks, so the cap is loose, falls off, or tilts |
| 2 | Scissor switch | Two interlocking plastic cross pieces that keep the keycap travelling vertically | Breaks or unclips, so the key tilts, jams, or does not spring back |
| 3 | Rubber dome | A silicone dome that provides spring return and tactile feel, and pushes through the membrane when flattened | Fatigue, hardening, or tearing, so the feel goes soft or stiff and a hard press is needed to register |
| 4 | Three-layer membrane | Top film, spacer layer, bottom film, with silver-ink conductive traces and matrix contacts | Silver trace breaks or oxidises, so one key, a whole row, or a whole region fails |
| 5 | Metal base plate | An aluminium or steel plate that supports the module, holds the scissor clips, and resists bending | Deforms, so travel is inconsistent across keys and scissor switches unclip |
| 6 | Backlight layer | LED light bar, light guide plate, reflector sheet, and shading sheet | Light bar, guide plate, or light-bar cable fails, so part or all of the backlight goes dark |
| 7 | Flex cable | The membrane traces extended into a flat cable, with gold fingers into the mainboard | Oxidises, breaks, or is inserted crooked, so a region or the whole keyboard fails or works intermittently |
| 8 | Mainboard side | Zero-insertion-force socket and embedded-controller scanning | Socket latch breaks or the controller input is damaged, so the whole keyboard or a group of keys fails |
2.2 The Scissor Switch: How Two Pieces of Plastic Stabilise a Thin Keyboard
A scissor switch is two plastic pieces joined at a central pivot into an X shape, one end clipped to the underside of the keycap and the other end clipped to slots in the metal base plate. Pressing the key folds the X flat and the keycap travels straight down; releasing it lets the rubber dome push it back up. A laptop has to be thin, so it cannot use the full-travel rubber dome of a desktop keyboard; the scissor switch compresses travel to about 1 to 2.5 mm while keeping the keycap from rocking side to side. A scissor keyboard still uses the same three-layer membrane for its electrical part — the scissor is only a mechanical stabilising layer, and that matters: a broken scissor can sit on a perfectly healthy electrical layer, and a broken membrane can sit under a perfectly healthy scissor. Neither can be used to diagnose the other.
Large keys are different because of the stabiliser bar. Space, Shift, and Enter have a stabiliser or balance wire as well as the scissor switch, so that pressing one end does not lift the other end. Removing a large keycap means dealing with both ends of the stabiliser first; it cannot be prised off like an ordinary small key. The butterfly switch is a different species: Apple MacBook laptops from 2015 to 2019 used a butterfly mechanism instead of a scissor switch, with travel of about 0.55 mm and the mechanism close to the top case, so a single crumb could jam a key; the 2018 revision added a thin silicone membrane to keep crumbs out; the Magic Keyboard from 2020 returned to the scissor switch. The same symptom — one jammed key — is a design-level weakness on a butterfly machine and usually a foreign object or a broken scissor on a scissor machine, and the repair and the outlook are different.
2.3 The Rubber Dome: The True Source of Feel and Return
The rubber dome does three jobs at once: it is the tactile spring, collapsing suddenly to give the tactile peak; it is the return spring, pushing the keycap back up when released; and it is the force transmitter, carrying finger pressure down to the top membrane layer. The material is a silicone or rubber dome sheet, one continuous sheet aligned with every contact pad. Some designs have a conductive pill at the bottom of the dome that shorts two traces directly when pressed fully; most laptop designs have the dome pressing the top film, which passes through the spacer hole to touch the bottom film.
Silicone changes with age: it can harden, so more and more force is needed to press the key; less commonly it can go soft and lose its return, collapsing and not springing back; fatigue can also tear it. That explains why an old machine feels more and more tiring to type on, and it is not imagination. The most-used keys show symptoms first, because they have the most cycles: Space, Enter, and common letters. The process is gradual — the feel goes soft, then a key sometimes needs two presses, then it needs a deliberate hard press to register. That order, feel first and function second, is the biggest difference between dome failure and membrane failure: a membrane trace dies suddenly with previously normal feel, while a dome deteriorates gradually in feel first. The dome is one continuous dome sheet and cannot be replaced one dome at a time, so a torn or severely fatigued dome usually means replacing the whole module.
2.4 The Three-Layer Membrane: Top Film, Spacer, Bottom Film, Silver Traces, Matrix Scanning
This layer is the keyboard's circuit board, and it is also the most misunderstood layer. The top and bottom layers are flexible plastic film, such as PET, printed with conductive traces; the middle layer is a spacer with a hole at every key position, normally holding the two layers apart so they cannot touch. Pressing a key makes the dome push the top layer through the spacer hole, the top contact touches the bottom contact, the circuit closes, and the controller registers one press; releasing the key lets the dome spring back, the layers separate, and the circuit opens.
The conductive traces are silver-ink paste printed on the plastic film. The top silver lines run under each row of keys and the bottom silver lines run under each column. Silver is the mainstream choice because silver paste forms a dense conductive network after curing, with stable resistance in a normal environment; copper paste is cheaper, but in flake and polymer thick-film inks it oxidises very easily, and the oxide layer drives resistance sharply upward. That material choice directly decides the failure mode: silver paste does not fail by never failing, it fails by sulphide or chloride film formation plus physical breakage, not by the rapid oxidation seen in copper. Pure silver has the highest conductivity but tends to form sulphide and chloride films; those films can be broken up by a wiping action, so silver contact design relies on the slight wipe of every closure to keep contact clean. Membrane contacts get a slight wipe on every press, but if the film is too thick or contact pressure is too low, the wipe fails, resistance rises, and the signal becomes intermittent. Dome fatigue lowers contact pressure, which in turn accelerates membrane contact oxidation: two layers of failure drag each other down, and that chain reaction is worth remembering.
Matrix scanning works like this: a keyboard does not run one independent wire per key to the controller, which would need more than eighty pins. Instead it uses a row-and-column matrix: every key sits at the intersection of one row line and one column line; the controller energises each row in turn, a process called strobing, and reads all the columns at the same time, so the row and column with a signal identify the pressed key. A 10 by 10 grid can control 100 keys with 20 pins. Debounce is another key idea: a physical contact does not close cleanly once, it bounces on a microsecond scale — touch, lift, touch again several times. The controller firmware waits a short time to confirm the signal is stable before counting one press. A common default in open firmware is about 5 ms, but that figure is not a published specification for every laptop embedded controller, and honesty requires saying so. A worn or contaminated contact can bounce for 8 to 25 ms, crossing the roughly 5 ms debounce window, so one press produces two letters — that is key chatter.
Ghosting is an inherent property of a matrix without diodes: press three keys forming an L shape at once, and current can flow back through the pressed keys, making the controller think a fourth unpressed key was pressed too. Laptop membrane keyboards are generally not full n-key rollover, so some key combinations failing to register during gaming is often a matrix design limit, not a fault. The reverse is the warning sign: a single ghost key appearing by itself, with nobody pressing it, points to a short circuit or a conductive liquid residue path.
2.5 The Metal Base Plate
The base plate supports the whole module, provides the scissor clips, and supplies bending stiffness. On a backlit model the base plate has holes: at each keycap position there is a broken hole that lets the backlight pass through the base plate and membrane to the keycap. That detail matters: the base plate is not a solid sheet, it is a sheet with dozens of holes, and under deformation or pressure the hole edges can become stress concentration points, and they are also one path by which liquid passes through. A slight bend in the base plate shifts individual scissor clips, so keycaps tilt or unclip; a severe bend makes travel inconsistent across a row of keys. Base plate deformation rarely happens on its own; it usually accompanies a drop or heavy pressure.
2.6 The Backlight Layer: LEDs, Light Guide Plate, Reflector, Shading Sheet
The backlight is not a few lights under the keyboard; it is an independent optical stack. The light source is an LED light bar, with the LEDs mounted on a flexible circuit board. The light guide plate is a transparent plate that carries light sideways from the LEDs at its edge, then bends it upward through microstructures on the plate so the whole keyboard lights evenly. A reflector sheet sits under the guide plate and reflects downward leakage back up; a shading sheet sits above it and blocks light everywhere except the holes that let the keycap legends shine through. The backlight is controlled by the embedded controller, not by the Windows driver. Brightness steps vary by model, so one model's four steps must not be written as universal.
Many models give the backlight its own flex cable, separate from the keyboard signal cable. Service manuals list three sockets to release separately when removing a keyboard or top case: keyboard cable, backlight cable, and touchpad cable. That independence explains the most important diagnostic fork: backlight on but keys not typing means the backlight circuit is healthy and the problem is in the signal layer; backlight off but keys normal means an independent backlight-layer fault. The backlight and the keys are two independent circuits, and that sentence should be remembered.
2.7 The Flex Cable and the Zero-Insertion-Force Socket
A flat flexible cable is the membrane traces extended into a tail, with several parallel gold fingers at its end inserted into a zero-insertion-force socket on the mainboard. Zero insertion force means opening the latch first, pushing the cable in with no resistance until it bottoms out, then closing the latch to press the contacts tight; removing it means opening the latch first, or the gold fingers and contacts will be damaged by pulling. A manufacturer's service manual warns explicitly: do not touch the gold fingers with bare hands; turn the latch to 90 degrees when connecting, push the cable fully and evenly in, then close the latch; always release the latch before removing the cable, or pulling the cable will damage the pins and cause equipment failure.
Gold plating on the fingers matters because it improves conductivity, wear resistance, corrosion resistance, and reliability; gold and tin must not be mixed, because gold and tin form corrosion in the electrochemical series and shorten the life of the connection, so gold goes with gold and tin with tin. That is the material basis for understanding both why reseating once can fix a keyboard and why reseating repeatedly can finish it off: every insertion is a small wear event, and once the gold plating wears through, the base metal underneath is exposed and corrodes faster.
One manufacturer's official technical note says its ThinkPad keyboards have three signal cables, two wide keyboard cables and one narrow TrackPoint cable; the two keyboard signal cables have a graphite coating that is damaged by scratching; pulling a cable out without releasing the zero-insertion-force latch tears the coating off; cables must not be folded into a permanent crease; and a cable pinched by the top case causes intermittent or persistent failure. That document is one of the most valuable first-hand repair guides in this batch, because it directly links several dead keys to keyboard signal cable damage.
2.8 Keycap Clips
The underside of a keycap has small plastic posts or hooks that grip the top of the scissor switch, and the bottom of the scissor switch clips into the base plate. The keycap never touches the switch directly; it transmits force through the scissor switch. The clip is the thinnest plastic part in the whole module, and every keycap removal is one more bending fatigue cycle. A loose keycap is usually a clip or a scissor retainer that no longer grips; if the keycap and hinge are intact, aligning it and pressing gently produces a click as it clips back; if it will not grip, the hinge or the keycap clip may have cracked, bent, or gone missing, and the matching part must be replaced. Never use glue on a keycap: glue seeps into the contact point and kills the key permanently, and if the silicone dome has already torn off, glue will not save it.
3. Failure Mechanisms, Item by Item
Each section below follows the same format: mechanism, process, symptom fingerprint, how to tell it apart, and repair reality. Readers do not need to memorise the whole mechanism table, only the fingerprints: which symptom goes with which mechanism, and which repair fits.
3.1 Scissor Switch Breakage and Clip Wear
The mechanism is two thin plastic pieces, with the pivot and the clip positions as stress concentration points. Several million press cycles (an indicative figure, with no primary source for a specific cycle rating), plus sideways force — especially when a finger does not press straight down, but on the edge of a key — plus heat inside the machine making the plastic brittle, lead to a cracked pivot, a rounded clip hook, or one piece breaking off. The process has three stages: at first the keycap rocks slightly and sits higher on one side when pressed; then one side stops springing back and the key only registers when pressed dead centre; finally the scissor breaks and the keycap tilts to one side or falls off entirely.
The symptom fingerprint is one key with abnormal mechanical feel: no click when pressed, shorter travel, a tilted cap, and a key that registers at the centre but not at the edge. That centre-works-edge-fails pattern is characteristic of scissor failure, because the scissor's job is to transfer off-centre force to the centre. The way to tell it apart is a visual check of whether the scissor is complete, whether both pieces are still interlocked, and whether the base-plate slots are deformed; removing a keycap to check must be left to professional inspection, and readers must not prise it off by force. If the scissor is intact but the cap will not grip, the problem may be in the keycap clip rather than the scissor. In repair reality, a single scissor switch or clip can be replaced on its own, but it must be the same model and the same orientation — scissor switches differ left from right and front from back and are not interchangeable — and if the base-plate slot has broken too, the whole module must be replaced.
3.2 Rubber Dome Fatigue, Hardening, and Tearing
The mechanism is a silicone dome going through one compression-and-return cycle on every press. Long-term cycling plus heat ageing goes in two opposite directions: hardening, where the rubber stiffens and needs more and more force to press, with a harder feel; or softening and fatigue, where it loses its return, collapses, and does not spring back. Ageing of silicone is a limiting factor in the life of a rubber-dome keyboard; a very old keyboard can need excessive force to operate, and a dome can also tear from fatigue.
The symptom fingerprint is one key, or a few frequently used keys, with feel changing first and function changing second. Pressing feels soft, hard, or without return, while the keycap looks intact and the scissor looks intact. The way to tell it apart is to compare travel and return with the neighbouring key; if a dome is suspected, pressing the dome directly with a finger after removing the keycap — again, a job for professional inspection — will show whether it springs back or feels clearly different. The trap is mistaking dome fatigue for a dirty keyboard: blowing air or cleaning will not restore elasticity to fatigued silicone. In repair reality, the dome is one continuous dome sheet and cannot be replaced one dome at a time, except by taking a part from a donor keyboard, so a torn or severely fatigued dome usually means replacing the whole module.
3.3 Membrane Silver Trace Breakage, Oxidation, and Sulphidation
This is the core mechanism of the whole batch and deserves the most detail. Mechanism A is physical breakage: the PET film is flexible, and long-term bending, pressure, and base-plate deformation produce micro-cracks in the silver traces. At first the crack is an intermittent contact that only conducts when pressed hard; later it breaks completely. Cleaning a liquid spill badly, for example with a hard brush, can also scrape a silver trace apart. Mechanism B is chemical deterioration: a film of silver sulphide or chloride forms on the silver paste surface. That film can be broken up by the wiping action of contact closure, so silver contact design relies on the wipe of every closure to keep contact clean. But if the film is too thick or contact pressure is too low, the wipe fails, resistance rises, and the signal comes and goes. Mechanism C is creep corrosion: corrosion products spread across the surface and, in severe cases, merge and short adjacent traces. The research behind this was on printed circuit boards rather than keyboard membranes, but the mechanism transfers directly to silver traces: corrosion does not only break a trace open, it can also short neighbouring traces, which explains why a spill can later produce pressing A and getting B, or keys typing by themselves. Mechanism D is humidity acceleration: at high humidity, more water can condense on cold surfaces; excess moisture on exposed conductors can cause short circuits; water with dissolved salts can cause corrosion, including atmospheric corrosion, electrolytic corrosion with dendrite growth, and galvanic corrosion. With Hong Kong's annual average relative humidity at 78 percent, these mechanisms sit in their active range for much of the year.
The symptom fingerprint depends on which trace breaks: a single contact oxidising gives one intermittent key; one row or column trace breaking gives a whole dead row or column; several traces corroding gives a dead region plus ghost keys. The way to tell it apart is that a broken silver trace is very hard to see with the naked eye — the trace is less than a millimetre wide, inside the plastic film — so repair work relies on symptom geometry plus substitution testing, not on inspecting each trace by eye. That must be stated plainly, so readers are not taught to look at a trace and know which one is broken. In repair reality, a membrane layer cannot be repaired trace by trace; the general repair practice is to replace the whole keyboard module, and a manufacturer's guide likewise says that membrane, backlight, or internal circuit failure is most reliably fixed by replacing the whole keyboard.
3.4 Flex Cable Gold Finger Oxidation, Breakage, and Socket Latch Failure
Mechanism A is gold finger oxidation or contamination: gold fingers exposed for a long time to humid air plus hand sweat and dust lose their gold plating to wear, the base metal underneath oxidises, and contact resistance rises. The symptom is intermittent: it works sometimes when pressed hard, when the machine is moved, or when the lid is opened and closed. Mechanism B is flex cable breakage: a keyboard cable must not be folded into a permanent crease; a cable pinched by the top case causes intermittent or persistent failure; pulling a cable out without releasing the zero-insertion-force latch tears off the graphite coating. Breakage usually happens at the bend, where the cable turns from the bottom of the keyboard into the mainboard socket, and the conductor inside breaks while the plastic film on the surface looks intact: a normal-looking exterior does not mean a normal cable. Mechanism C is socket latch loosening or breakage: the zero-insertion-force latch is a small plastic part that breaks if forced during removal; once broken, the cable has no clamping force and the contacts make poor contact. A broken latch cannot be bought separately; the whole socket must be replaced. Mechanism D is crooked or incomplete insertion: a backlight cable must be inserted 100 percent and its white socket closed properly or it will not light, and a small misalignment is enough. The keyboard signal cable is the same: inserted short, a few pins make no contact and a column or region fails; inserted crooked, the pins are misaligned and the result is garbled characters or ghost keys.
The symptom fingerprint is a dead region or a fully dead keyboard, intermittent, with symptoms changing when the lid opens and closes. That change-when-moved pattern is characteristic of the cable and socket layer; the membrane layer does not change because the machine moves. The way to tell it apart is reseating the cable: if symptoms disappear after reseating, the problem was cable or socket contact; if reseating does nothing and a substitution test with another module still fails, the problem is on the mainboard or embedded-controller side. Reseating itself must be left to professional inspection: power off, release the latch, pull out, check the gold fingers for black, green, or white oxide, creases, scratches, or missing corners, push the cable fully and evenly back in, and close the latch. In repair reality, the cable is part of the module and usually cannot be replaced on its own; the socket is on the mainboard, and a broken latch means mainboard-level repair, priced after inspection.
3.5 Backlight LED Failure, Light Guide Plate Cracking, and Light-Bar Cable Fault
Mechanism A is individual LED failure: an LED ages, overheats, or is shorted by liquid, and a local area goes dim. Because the light guide plate spreads light, one dead LED usually means a dim region rather than one black key, and that geometry should be explained. Mechanism B is light guide plate cracking or deformation: the guide plate is a thin plastic sheet that cracks under pressure, a drop, or heat deformation; a crack blocks light conduction, so the area beyond the crack goes dark, and it can also leak light as a bright spot. Mechanism C is a broken light-bar flexible circuit or a loose backlight cable: the light bar is itself a flexible circuit that can break from bending or liquid, and a loose backlight cable leaves the whole backlight dark. Mechanism D is embedded-controller and brightness control: the backlight is controlled by the embedded controller, not by the Windows driver, and brightness steps cycle with the function key. So a dark backlight must first be checked against the model having a backlight at all — not every model has one — the function lock state, and whether the backlight setting in the BIOS is switched off.
The symptom fingerprint is a local dim area, a fully dark backlight with normal keys, or brightness that cannot be adjusted. The key distinction is that the backlight and the keys are two independent circuits. A manufacturer's guide separates faults into single-key problems — keycap, scissor switch, dome — and keyboard-unit problems — membrane, backlight layer, internal circuit failure. In repair, a faulty backlight layer usually means replacing the whole module, because the backlight layer and the membrane layer are laminated together and cannot be taken apart and replaced separately.
3.6 Liquid Corrosion: Water, Coffee, Milk Tea, Soup
This section matters most to Hong Kong readers and deserves the finest detail. How liquid gets in: first, liquid flows in through the gaps between keycaps, past the scissor switches and rubber domes, and drips onto the top membrane layer. Second, the top membrane is plastic film with some barrier effect, but liquid seeps between the upper and lower films through the spacer holes, the film edges, and the edge of the cable tail. Third, it passes through the membrane and base-plate holes, drips onto the backlight layer, then runs through the base-plate edges and cable holes into the machine and onto the mainboard near the keyboard socket. Fourth, if the model has a drainage design, liquid runs through a collection tray under the keyboard and out through drain holes in the bottom case; if it does not, it pools on the mainboard.
Which layer corrodes first, and how it spreads: in the first minutes, a short circuit. Liquid plus power means conduction along a path that was never designed, and impurities in the liquid cause corrosion and provide a path for current that should not be there, possibly damaging components; corrosion starts immediately and only stops when the machine is thoroughly cleaned. In the first day, hours to a day, residue deposits form. As water evaporates, dissolved substances are left behind: sugar from coffee, milk tea, and soft drinks, acid from coffee, juice, and soft drinks, salt from soup, sweat, and seawater, and milk protein and fat from milk tea and coffee with milk. Sugar forms a sticky film that absorbs moisture and keeps the surface slightly wet for a long time. In the first week, corrosion spreads day by day. Corrosion happens over days and weeks; after the water is gone, dissolved solids remain on traces and component legs and keep eating into them; a machine can survive a spill and work normally for two weeks, then fail for no apparent reason. The spread follows the silver traces, the flex cable gold fingers, the zero-insertion-force contacts, and the mainboard copper traces, especially between neighbouring traces with a voltage difference, where electrolytic and dendrite growth occur. Some models have a large rubber sealing gasket between the keyboard and the mainboard whose job is to protect the mainboard during a spill; that gasket tears easily, and a torn gasket lowers the waterproofing. In other words, the manufacturer anticipated this path and added a line of defence, and once that defence is torn, the spread accelerates.
Not all liquids are equal, as the table below shows.
| Liquid | Main residue | Corrosion and stickiness risk | Effect on the keyboard layers |
|---|---|---|---|
| Plain water | Very few minerals, depending on water quality | Lowest, but not zero — power plus water still shorts and corrodes | Membrane and flex cable, mild |
| Coffee with sugar and milk | Sugar, acid, milk protein, fat | High: sugar film absorbs moisture, acid attacks metal, milk residue smells and sticks scissor switches | Scissor switches stick, membrane sticks, silver traces corrode |
| Hong Kong-style milk tea | Sugar, milk, tea tannin, condensed milk | High: sugar plus milk protein, double stickiness, tea pigment stains | Similar to coffee, plus staining and more stickiness |
| Soup, salty drinks, seawater | Salt, mainly sodium chloride | Extremely high: salt is both conductive and destructive to metal; seawater is worst | Rapid short circuit and rapid corrosion |
| Soft drinks, juice, beer | Sugar, acid, pigment | High: acid keeps attacking metal | Membrane and flex cable corrosion, plus sticky keycaps |
Why "let it dry and it will be fine" is a misunderstanding: rice and similar desiccants do not help, because they do not remove the contaminants left by the spill; even if the machine appears to work normally, solder joints have already oxidised and become brittle, and corrosion keeps spreading inside. Dry rice was among the worst water absorbers in testing. The correct approach for general electronic water damage is to power off immediately, remove the battery if possible, open the machine, immerse affected parts in 90 percent or stronger isopropyl alcohol to displace water, loosen corrosion, scrub, dry, and reassemble carefully. Note that this is general electronic water-damage handling, not advice to soak a whole keyboard membrane in isopropyl alcohol — soaking a membrane can damage the silver paste and the adhesive layers, and this article does not teach readers to soak a keyboard. The reason a spilled keyboard is often simply replaced is that trying to clean or repair a liquid-damaged keyboard often causes more problems, and replacing the keyboard may be simpler.
3.7 Keycap Clip Breakage
The mechanism is a small plastic post or hook under the keycap breaking from sideways prying when a keycap is removed, from impact in a drop, or from fatigue after years of pressing the edge of a key. Once broken, the keycap does not grip and falls off at a light touch. The symptom fingerprint is a loose, tilted, or fallen-off keycap, while pressing directly on the scissor switch or dome — with a finger — still produces the character: electrical function is normal and mechanical fixing has failed. That is the biggest difference from a broken scissor switch: a broken scissor gives a tilted cap plus abnormal feel when pressed, while a broken clip gives a cap that falls off with normal feel. The way to tell it apart is to remove the keycap and check whether its bottom posts are complete and whether the scissor is intact, a job for professional inspection. If one post is broken, the cap grips on one side and is loose on the other. In repair reality, the fix is to replace the keycap, with the same model, language layout, and backlit or non-backlit version, because a replacement cap must match the correct layout and backlight type. Never use glue: glue seeps into the contact point and kills the key permanently, and if the silicone dome has already torn off, glue will not save it.
3.8 Base Plate Deformation
The mechanism is a drop, heavy pressure, pressure in a backpack, a foreign object trapped when the lid is closed, or long-term one-sided force, bending the metal base plate slightly. A bent base plate shifts the scissor clips, so keycaps tilt or unclip; in severe cases the membrane is pressed unevenly and a whole row of keys has inconsistent travel. The symptom fingerprint is several keys in one region with inconsistent feel — for example, the left keys feel normal while the right keys need a hard press, or a whole row sits at uneven heights. That regional pattern plus inconsistent feel is what separates base plate deformation from membrane failure: a membrane failure is dead, producing no character at all, while a base plate deformation is hard to press, producing a character only with force and the right angle. In repair reality, the base plate is part of the module; a slight deformation can sometimes be corrected, a severe one means replacing the module. If the deformation comes with a deformed casing or palm rest, the hinges and casing should be checked too.
3.9 Foreign Objects Jamming a Key
The mechanism is crumbs, food fragments, hair, sand, or grains of rice falling under a keycap and jamming the scissor switch or propping up the rubber dome, so the keycap cannot go down or cannot spring back. Butterfly machines are especially vulnerable: with travel of about 0.55 mm and the mechanism close to the top case, a single crumb can jam a key permanently. Scissor machines have more travel and are relatively less vulnerable, but they jam too. The symptom fingerprint is one key, sudden, previously normal, feeling blocked when pressed, sometimes not springing back, and sometimes producing characters continuously because the cap is held down as if by a long press. The way to tell it apart is to remove the keycap and look for a foreign object — a job for professional inspection — and to blow with compressed air held upright, so no propellant residue is sprayed. If it works immediately after blowing, it was a foreign object; if it is still the same, it is a mechanical or electrical problem. The trap is prying the keycap off forcefully to clean out an object: prying in the wrong direction breaks the clip and turns a cleaning problem into a parts problem. The correct removal method varies by brand and model and cannot be generalised.
3.10 Chatter, Ghost Keys, and Intermittency: Three Mechanisms That Are Not a Dead Key
Chatter is worn or contaminated contacts whose bounce time grows from under 1 ms to 8 to 25 ms, crossing the firmware's roughly 5 ms debounce window, so one press produces two letters. A membrane keyboard cannot have one switch replaced on its own, so persistent chatter usually means replacing the module. Ghost keys are matrix short circuits — a conductive liquid residue path or corrosion products spreading to short neighbouring traces — making an unpressed key type by itself. That differs from normal gaming ghosting, or blocking: blocking is pressing and getting nothing, while a ghost key is getting something with nobody pressing. Intermittency can come from poor flex cable contact, a silver trace micro-crack, or gold finger oxidation. Its diagnostic value is in what makes it change: moving the machine or opening and closing the lid points to the cable or socket; pressing hard points to a silver micro-crack or contact oxidation; temperature or humidity changes point to corrosion or condensation.
4. Symptom-to-Mechanism Reference Table
Need a laptop repair expert?
Free diagnosis · Transparent pricing · No fix, no fee · 180-day warranty
This table is the core tool of the article. One symptom can have several mechanisms, and the "most likely" order in the table is ranked by mechanism-layer logic, not by statistics: this research found no reliable first-hand failure-rate statistics, so this article gives no percentages, rankings, or failure-rate figures.
| Symptom | Most likely mechanisms, highest first | How to confirm or rule out |
|---|---|---|
| One key completely dead, no character however hard it is pressed, other keys normal | That key's membrane contact oxidised or silver trace broken; rubber dome torn or severely fatigued; scissor switch broken so the dome is never pressed; keycap clip broken and the cap shifted so it never reaches the dome | Visual check of the scissor and dome after removing the keycap, by professional inspection; press the dome directly with a finger to test; do an external keyboard and BIOS test first to confirm it is not software |
| One key feels wrong but still types, soft, hard, or without return | Rubber dome fatigue or hardening; scissor switch slightly deformed; foreign object jammed | Compare feel and travel with the neighbouring key; remove the keycap to check for a foreign object, by professional inspection |
| One key works at the centre but not at the edge | One side of the scissor switch broken or unclipped; one side of the keycap clip broken | Look at whether both sides of the scissor are clipped symmetrically |
| One key loose, tilted, or fallen off, but still types when pressed | Keycap clip broken; scissor clip worn | Check the posts under the keycap |
| One key stuck down, not springing back, or typing continuously | Foreign object jamming the key; rubber dome fatigued and not returning; scissor switch broken and jammed; sugar or milk residue sticking it, after a spill | Remove the keycap to check for a foreign object or sticky residue, by professional inspection |
| One key chattering, one press producing two letters | Contact bounce crossing the debounce window, from wear or contamination; rubber dome returning abnormally and closing the contact twice | Press slowly in a keyboard test tool and see whether it doubles every time; compare with an external keyboard |
| A whole row dead, for example a horizontal row not typing | That row's silver trace broken; one pin of the flex cable making poor contact, the pin for that row; the embedded controller's input for that row damaged, outside the module | Reseat the flex cable, by professional inspection; test with a replacement module; if the same row still dies with a new module, the embedded controller or mainboard is the layer |
| A whole column dead, for example a vertical column not typing | That column's silver trace broken; one pin of the flex cable making poor contact; the embedded controller's input for that column damaged | As above |
| A whole region dead, for example the left half or the number pad not typing | Flex cable partly broken or a few pins oxidised; several membrane traces in that region corroded, after a spill; backlight layer or membrane layer locally liquid-damaged | Check the spill history; reseat the flex cable, by professional inspection; check the gold fingers for local discolouration or creases |
| The whole keyboard dead, no key typing | Flex cable fully loose, broken, or with severely oxidised gold fingers; zero-insertion-force socket latch broken or socket damaged; embedded-controller keyboard input damaged; mainboard keyboard power or embedded-controller failure | A working external keyboard plus no response in the BIOS means the hardware layer; reseat the flex cable, by professional inspection; test with a replacement module |
| Intermittent, working sometimes and not others | Flex cable contact poor; silver trace micro-crack; gold finger oxidation; liquid corrosion in progress | Record what makes it change: moving the machine, opening and closing, temperature, humidity, pressing hard |
| Backlight partly off or partly dim | Individual LED failed; light guide plate cracked; light-bar flexible circuit partly broken | Look at the shape of the dim area; check the backlight cable, by professional inspection |
| Backlight fully off, but keys normal | Backlight cable loose or broken; light-bar flexible circuit broken; embedded-controller backlight output faulty; function key or BIOS setting switched off | Rule out settings first, function key and BIOS; then check the backlight cable, by professional inspection |
| Backlight on, but keys not typing | Keyboard signal cable loose or broken, with the independent backlight cable normal; membrane layer failed | This combination is itself evidence: a normal backlight proves the embedded controller has power and the backlight layer is normal, so the problem is in the signal layer |
| Pressing A gives B, or keys typing by themselves | Matrix short circuit, from liquid residue or corrosion products spreading; flex cable inserted crooked, pins misaligned | Check the spill history; reseat the cable and confirm the pin alignment, by professional inspection |
5. Layered Elimination: From Outside In, One Factor at a Time
The principle is from no disassembly to disassembly, from free to parts replacement, from outside the module to inside the module. Every step must be recorded, because the next step's judgement depends on the previous one. Disassembly steps are written only as far as handing the machine to a repair shop; readers must not be taught to open a zero-insertion-force socket or replace a module themselves, because a wrong removal breaks the latch or the cable.
5.1 Layer 0: History Taking — The Most Important Step and the Easiest to Skip
The questions to ask, which readers can use directly as a pre-inspection checklist: which keys fail, listed one by one, not just "some keys fail" — the row, column, or region geometry is diagnostic evidence; when did it start, suddenly or gradually; any liquid, what liquid, how much, and was power cut immediately; any drop or pressure; any keycap or machine disassembly before; intermittent or persistent, and what makes it change — moving, opening, temperature, pressing hard; whether the backlight is on; whether an external keyboard works. Good history taking lets the inspector start verifying from the suspected layer instead of starting from zero. Poor history taking sends the inspector down the no-liquid path, wasting time and risking a wrong diagnosis.
5.2 Layer 1: External Keyboard Comparison
Plug in a USB external keyboard — wired is best, to remove Bluetooth pairing as a variable — and type the same characters in the same text field. The logic is stated explicitly in a manufacturer's guide: if the external keyboard works, the problem is confined to the laptop's own keyboard. Conversely, if the external keyboard also fails, the problem may be in the operating system, driver, embedded controller, or mainboard, not the keyboard module. Three traps matter: a working external keyboard does not mean the keyboard module is definitely broken — it only proves the operating system input path is normal, and it cannot separate membrane failure, a loose cable, oxidised socket, or embedded-controller fault, which all need disassembly to separate; a failing external keyboard does not mean the problem is definitely software — an embedded-controller fault, a mainboard keyboard interface problem, or even a USB controller problem can make both keyboards fail together, and a BIOS test is needed to separate them; and a Bluetooth keyboard has pairing, battery, and interference variables of its own, so a "the external one fails too" result from Bluetooth may only be a Bluetooth problem — the comparison must use a wired USB keyboard.
5.3 Layer 2: Single-Key Physical Check, Without Disassembly
Look at whether the keycap is tilted, loose, fallen off, or sitting at an uneven height, and whether there is a foreign object between keycaps. Compare feel by pressing the suspect key and the neighbouring normal key one by one, comparing travel, return, and sound, and record which keys feel different. Centre versus edge: if the key registers at the centre but not at the edge, the scissor switch on one side is broken or unclipped. Compressed air means blowing under the keycap with the can held upright, so no propellant residue is sprayed. If it works immediately after blowing, it was a foreign object; if it is still the same, it is not a foreign object. Never spray liquid cleaner into a keyboard — liquid is the enemy. Things not to do: do not prise a keycap off with force, because the clip will break; do not glue a keycap back on, because glue seeps into the contact point.
5.4 Layer 3: BIOS, UEFI, and Pre-Boot Testing, Bypassing the Operating System
The principle is that the BIOS and UEFI run before the operating system loads and do not depend on Windows drivers. If the keyboard does not move in the BIOS either, the problem is in the hardware layer; if it moves in the BIOS but fails once Windows has loaded, the problem is in the operating system or driver layer, which belongs to the basic guide. One brand's method is to press F2 during startup to enter the BIOS and navigate with the arrow keys and Enter; if those keys move, that proves the keyboard circuit and firmware connection are normal. A more formal method is the manufacturer's pre-boot diagnostics: shut down, press F12 repeatedly during startup, choose Diagnostics, and run the tests; some service manuals state that pre-boot diagnostics can run interactive tests for the display and the keyboard. Every brand has similar pre-boot diagnostics, so one brand's F12 must not be written as universal for all brands — the article should say each brand has different diagnostic keys and tools at startup.
The backlight can also be checked at the BIOS layer: the backlight setting can be enabled or disabled in the BIOS, and if the backlight is off in the BIOS too, it is not a Windows setting problem. Two traps must be remembered: the BIOS only uses a few keys — arrow keys, Enter, Escape, and function keys — so a broken membrane column may happen not to affect those keys; for example, if the broken column is in the letter area, the arrow keys work perfectly and the BIOS test passes, yet the keyboard is already broken. A BIOS test passing does not mean the keyboard has no hardware problem; it only proves the embedded controller and the basic scanning path still work, and a full conclusion needs the manufacturer's keyboard diagnostics that scan every key. Also, some models need the embedded controller to initialise at startup, so pressing keys frantically in the first second after power-on can miss the key window and produce a false "nothing responds" result. The correct method is to wait until the brand logo appears and the keyboard light flashes once, then press about once per second.
5.5 Layer 4: Disassembly Check — Reseating the Flex Cable, by a Repair Shop
This layer involves removing the bottom case, disconnecting the battery, and opening the zero-insertion-force latch. This article says this step must be done by a repair shop and must not be written as a do-it-yourself tutorial. The reasons: a broken zero-insertion-force latch means replacing the whole socket; pulling a cable wrong tears off the graphite coating or the gold fingers; touching a cable without disconnecting the battery risks a short circuit. The correct procedure, as written in service manuals, is: power off and remove the battery if it can be removed — an internal battery needs its cable disconnected first; remove the bottom case and find the keyboard cable and the backlight cable, if there is one; release the zero-insertion-force latch, turning it to 90 degrees or gently lifting the black or white locking tab with a plastic pry tool; pull the cable straight out, never at an angle and never with force; check the gold fingers for black, green, or white oxide, creases, scratches, or missing corners, and check whether the socket latch is broken or the contacts are bent; clean if needed by wiping the gold fingers gently with 90 percent or stronger isopropyl alcohol, but never soak the membrane in it; reinsert by pushing the cable fully and evenly in to the bottom, confirming the gold finger direction is correct, then close the latch; reassemble and test on power-up.
Reading the result: if it works after reseating, the fault was poor contact — oxidation, looseness, or incomplete insertion; if the symptoms are unchanged, the cable and socket are not the main cause, and the next layer begins; if the symptoms change — for example, from fully dead to regionally dead — the cable or socket has a local problem, with a few pins making poor contact.
5.6 Layer 5: Module Layer Versus Mainboard Embedded-Controller Layer, by Substitution
Substitution means fitting a known-good keyboard module of the same model, cable included, and testing again. If it works, the old module was faulty — membrane, scissor switch, rubber dome, backlight layer, or cable, one of those layers. If it still fails, the problem is on the mainboard side: the zero-insertion-force socket, the embedded-controller input, or mainboard keyboard power. Substitution is used instead of measuring layer by layer because a broken membrane silver trace is hard to see with the naked eye, and an embedded-controller input fault needs an oscilloscope and a circuit diagram to measure, so a repair shop usually reaches an answer fastest by substitution. A manufacturer's hardware manual uses similar logic: if replacing a field-replaceable unit does not solve the problem, put the original unit back and do not replace a unit that is not broken.
The symptom pattern of the embedded-controller layer is a module replacement that still does not fix it, a group of keys failing that is not a single geometric row or column, an external keyboard also failing intermittently, and the keyboard failing together with the touchpad or the power button. Depending on the model, the embedded controller may manage the keyboard, the fan, and power together, so related symptoms should be looked at together rather than used to make a claim from one symptom alone. Mainboard-layer repair is zero-insertion-force socket replacement and embedded-controller-related circuit repair, which is mainboard chip-level repair. Keyboard replacement starts at HK$480, and mainboard chip-level repair starts at HK$880; everything else is priced after inspection in a written quotation.
6. Software Elimination Checklist: Only After This Can You Call It Physical
Use the checklist in order, from E1 to E16. Each item has four parts: what to do, what you would see if it were software, what you would see if it were not software, and the trap that misleads people. The judgement rule is that passing one item does not exclude software; several items, across layers, must agree before a conclusion is drawn. Steps involving disassembly, BIOS writing, or system reinstallation should be left to inspection; the reader's version stops at the safe boundary. General driver and settings problems already have a basic guide; this section's point is how, after software elimination, you prove it is physical — not how to reinstall a driver all over again.
| No. | Check | If it is software | If it is not software |
|---|---|---|---|
| E1 | Full shutdown, then cold start — not a restart | Intermittent failure disappears and stays away | The same key or row is dead on every startup, with no difference before and after a cold start |
| E2 | External wired keyboard comparison | External and internal keyboards show the same problem together, pointing to the operating system layer | External keyboard fully normal, the same internal key or row persistently fails |
| E3 | On-screen keyboard comparison | On-screen keyboard also cannot type, pointing to the operating system or input method | On-screen keyboard fully normal, physical keyboard persistently fails, supporting a hardware direction |
| E4 | Uninstall the keyboard driver in Device Manager, then reinstall | Recovery after uninstall and restart, and it stays recovered | Same symptom unchanged after reinstalling, or recovery for minutes or hours before reverting |
| E5 | Manufacturer driver, BIOS, and embedded-controller firmware updates | Problem disappears after updating, especially if it appeared after a Windows update | All drivers and BIOS already latest, problem continues |
| E6 | Language, input method, and keyboard layout check | Keys respond but produce the wrong characters or symbols; switching back to the correct layout fixes it immediately | The same key produces nothing at all, whatever layout is selected |
| E7 | Sticky Keys, Filter Keys, Toggle Keys, Mouse Keys, Slow Keys | The whole keyboard is affected at once, needing a long press to respond, and switching the setting off restores everything immediately | Settings all off and the problem continues; or the problem is limited to individual keys or rows |
| E8 | Fn Lock, Num Lock, Caps Lock state | Function keys all become media keys, or the letter area becomes numbers; switching back fixes it immediately | Individual function keys produce nothing at all, whatever Fn combination is tried |
| E9 | Test inside the BIOS or UEFI, pressing Esc, F2, or F10 at startup, without entering Windows | Arrow keys, Enter, and Esc all work in the BIOS, and the problem only appears in Windows | Arrow keys do not move in the BIOS, and Esc will not enter the startup menu at all |
| E10 | Manufacturer UEFI or in-system keyboard diagnostics, scanning key by key | Every key registers in diagnostics, but fails in Windows | A specified key produces no response in diagnostics, and diagnostics report a failure |
| E11 | Safe Mode | Keyboard fully normal in Safe Mode, failing only in normal mode | The same key or row is equally dead in Safe Mode |
| E12 | Clean Boot and a new user account comparison | Normal after a Clean Boot, with the problem returning as services are re-enabled group by group; or normal in a new account and failing in the old one | Clean Boot plus a new account, problem unchanged |
| E13 | Live USB, Windows PE, or another operating system comparison | Keyboard fully normal in the live environment | The same key or row still dead after changing the whole operating system |
| E14 | Restore BIOS defaults plus hard reset, or embedded-controller reset | Keyboard recovers after reset, especially if the problem followed a wrongly changed BIOS setting | Same symptom returns immediately after reset |
| E15 | Application-layer comparison, Notepad, Command Prompt, different software | Typing works in Notepad but not in one particular program | Notepad, Command Prompt, browser, and login screen all fail consistently |
| E16 | macOS-only checks: SMC, NVRAM, Safe Mode, input method monitoring | Normal in Safe Mode, normal after reset, or normal once input method switching stops | Safe Mode, login screen, and Keyboard Viewer all fail consistently |
Fifth, third-party driver updater tools are a trap, not an elimination step; only the brand's official tools and official website should be used. A BIOS update is risky: a power cut during the update can brick the mainboard, and a liquid-damaged machine or a machine with a faulty battery should never have its BIOS updated before inspection. Sixth, a keyboard working in Safe Mode does not mean a third-party program is definitely the cause, and a keyboard still dead in Safe Mode does not mean it is definitely hardware; a Live USB check is needed to separate Windows itself from hardware, and entering advanced startup may require a BitLocker recovery key. Seventh, a Clean Boot is a diagnostic tool, not a long-term solution, and normal startup must be restored after testing. Eighth, a manufacturer diagnostic passing does not mean the hardware is 100 percent healthy; a diagnostic failure is hard evidence of hardware, while a diagnostic pass only excludes a complete open circuit, and web keyboard tests are not a substitute. Ninth, Mac computers must be handled separately: an Intel Mac can reset the SMC by model, while an Apple silicon Mac has no SMC reset and should simply be restarted normally.
7. Tests That Mislead
The tests below all look useful on the surface and actually lead to wrong conclusions. Each must be taken apart, and none of them may be written as a confirmation method.
| No. | Misleading test or claim | Why it misleads | Correct understanding |
|---|---|---|---|
| T1 | It worked after reinstalling the driver, so it was a driver problem | Restart plus embedded-controller reset plus a temperature change can all make poor contact temporarily better | Observe continuity; recurrence within 24 hours means the driver is not the root cause |
| T2 | The external keyboard works, so the internal keyboard must be broken | It only proves the operating system input path is normal; it cannot separate membrane, cable, socket, and embedded controller | It only says the problem is confined to the internal keyboard path; disassembly is needed to separate the layers |
| T3 | It works in the BIOS, so it must be software | The BIOS only uses the arrow keys, Enter, Esc, and function keys; a broken column may happen not to affect them | A BIOS pass only excludes the one fault of a fully dead embedded controller |
| T4 | The manufacturer diagnostics passed, so the hardware is fine | Diagnostics mostly do press once and check for a signal; they do not test chatter, intermittent contact, or temperature-related faults | A diagnostic failure is hard evidence of hardware; a diagnostic pass is not proof of healthy hardware |
| T5 | It works in Safe Mode, so it must be third-party software | Safe Mode also disables manufacturer hotkey and embedded-controller-related drivers, so a firmware-layer conflict would also recover | A Live USB check is needed to separate the Windows layer from the firmware layer |
| T6 | Device Manager says it is working properly, so it is not a driver problem | The generic PS/2 driver status only reflects whether the driver is loaded, not the membrane, cable, or embedded controller | Device status has almost no value for keyboard hardware diagnosis |
| T7 | Pressing harder works, so it is just dirty or poor contact, and can be ignored | A hard press can temporarily punch through an oxide layer or force a collapsed dome to conduct, but a broken membrane trace keeps getting worse | Needing a hard press is itself a fault symptom, not a solution |
| T8 | It is intermittent, so it must be software or a virus | A loose cable, oxidised socket, and membrane micro-crack are all intermittent, and change with lid angle, temperature, and humidity | Intermittency points to no layer by itself; look at the conditions under which it recurs |
| T9 | It worked after reinstalling the system, so the system was the problem | Reinstallation involves many restarts, power-offs, cooling, and even the user moving the machine, any of which can temporarily change contact state | Observe continuity after reinstalling; a hardware problem returns with the same symptom within days or weeks |
| T10 | An online keyboard test shows a response, so the keyboard is fine | A browser test only sees operating system events; Fn and Globe keys do not trigger events; slight poor contact may register once and show as normal | An online test is only suitable for a quick key-by-key roll call, not a confirmation tool |
| T11 | The whole keyboard is dead and Device Manager cannot find the keyboard, so the mainboard is broken | A fully loose cable, oxidised socket, or broken keyboard power supply all make the system fail to recognise the keyboard, with exactly the same symptoms as a mainboard fault | Not recognising a keyboard does not mean a broken mainboard; the cable and socket must be checked by disassembly first |
| T12 | The backlight is off, so the whole keyboard is broken | The backlight and the keys are two independent systems | A dark backlight must be investigated on its own: Fn and BIOS settings, then the backlight cable, the backlight layer, then mainboard power |
8. Common Misdiagnoses and Traps
8.1 Mistaking a Membrane Break for a Driver Problem
A few keys do not respond, an online search is done, the first page all teaches driver reinstallation, reinstalling does nothing, so the driver is reinstalled again, the BIOS is updated again, the system is reinstalled again, in a loop lasting days. The characteristic of a membrane break is a fixed position and a fixed pattern — the same key dead every time, or a whole row or column dead together — and it has nothing to do with the driver version or the number of restarts. The correct approach is to do the BIOS and manufacturer diagnostics first: if the key is dead in the BIOS and in diagnostics too, stop trying software immediately and send the machine for inspection. A membrane break has no software solution; the longer it is dragged out, the more working time the user loses, and repeated system reinstallation puts unbacked-up data at risk.
8.2 Mistaking a Loose or Oxidised Cable for a Broken Mainboard
The whole keyboard suddenly dies, the mainboard or embedded controller is assumed broken, and the user decides it is better to replace the machine or accepts an expensive mainboard quotation. A keyboard cable connected through a zero-insertion-force socket can make the whole keyboard unresponsive when loose, oxidised, or creased and broken, with symptoms identical to a mainboard fault. A loose cable can come from a drop, vibration when opening and closing, pressure in a backpack, or a previous disassembly that was not clipped back properly. The correct approach is a disassembly check, by professional inspection: reseat the cable, check the zero-insertion-force latch, and check the end of the cable for oxidation or creases. A fully dead keyboard alone must never be used to jump to a mainboard conclusion. The cost of the mistake is at best paying for unnecessary repair, and at worst having a machine that could have been repaired written off as scrap.
8.3 Mistaking Liquid Damage for a Single Dead Key or a Driver Problem
A little water or coffee is spilled, the surface is wiped dry, it works at the time, and a few days later one or two keys fail, so it is assumed to be single-key ageing or a driver problem, and drivers keep being reinstalled. Once liquid seeps into the membrane layer, the residue — sugar, salt, acid — gradually corrodes the conductive traces over days to weeks, and the symptoms appear late and spread gradually: one key dies today, a row dies next week, a region dies next month. The correct approach is to follow the spill procedure in Section 9 as soon as liquid is suspected, without waiting for the symptoms to spread before inspection, and to tell the inspector what was spilled, when, and how much. The cost is a repair that grows from a keyboard module replacement into keyboard plus mainboard repair, and possibly data loss. The time cost of a liquid case is counted in days, not months.
8.4 Mistaking Backlight Failure for Whole-Keyboard Failure
At night the backlight is not seen, the whole keyboard is assumed broken, and the quotation and the decision to replace the machine are both built on a wrong premise. The backlight and the keys are two independent systems. The checking order is: the Fn plus backlight key and the keyboard lighting setting in the BIOS; whether the backlight cable is loose; whether the backlight layer itself — LEDs or light guide plate — is damaged; and mainboard backlight power. Keys working perfectly while the backlight is off means the keyboard module itself may be completely fine. The cost is replacing a whole keyboard without solving the problem, if the root cause was a loose backlight cable, or deciding to replace the machine on the wrong premise of a fully broken keyboard.
8.5 Thinking Only the Keycap or Scissor Switch Needs Replacing, When the Scissor Seat or Membrane Is Damaged Too
A keycap comes off or tilts, a replacement cap is bought online and clipped back on, it will not grip or will not press down, so more caps are bought and tried one by one. When a keycap comes off, it often tears the scissor hinge off with it, or lifts the membrane surface. A scissor switch is a miniature plastic hinge; once one side breaks, replacing the cap alone is not enough, and parts are not interchangeable across models and rows — Space, Shift, and Enter use scissor switches and balance bars of different structures. The correct approach is to check both scissor hinge positions, the balance bar, and the membrane surface for damage first, by professional inspection, and decide which part to buy only after knowing which layer is damaged; if the scissor seat — the fixing point on the keyboard base plate — is broken, even a scissor switch cannot be fitted, and the whole keyboard module must be replaced. The cost is wrong parts, repeated disassembly that widens the damage, and a whole keyboard replacement in the end, with all the time and parts money in between wasted.
8.6 Breaking Keycap Clips or Scissor Switches by Removing Keycaps Yourself, Especially on Apple Butterfly Keyboards and Large Keys
"The keycap just clips on, so I can prise it off and clean the dust" — a flat screwdriver or a fingernail levers from one side, there is a snap, and the clip is broken. Apple's official cleaning method is compressed air at a 75-degree angle, and users are not advised to remove keycaps themselves; several repair sources note that the keycap clips on modern MacBooks, especially butterfly keyboards, are extremely fragile, that the space bar carries a particularly high removal damage risk, and that the butterfly keyboard itself cannot be replaced separately — the whole top case assembly must be handled together. On Windows laptops, the scissor switch is likewise a small plastic clip, and the wrong angle or the wrong tool breaks it just the same. The correct approach is for general users to do external cleaning only — power off, compressed air, and a microfibre cloth — and to leave any keycap or scissor removal to inspection. The cost is turning one dirty key into one key that can never be fitted again, and finally a whole keyboard module replacement.
8.7 Trying to Save a Spilled Machine With a Hair Dryer, a Rice Container, Sunlight, or a Heater
"It is wet, so dry it" — hot air from a hair dryer, a container of rice, a sunny windowsill, or a heater. A manufacturer's spill guidance states explicitly not to use artificial methods such as a hair dryer or a fan to speed up drying. A repair guide is more direct: rice does not work at all, it only gives water more time to corrode the machine, and grains can get inside the machine and under keys. Apple's guidance also says not to put the device in a bag of rice — grains may damage the device — and not to use an external heat source or compressed air. Hot air pushes liquid deeper, deforms plastic and adhesives, and speeds up corrosion; a rice container does not absorb liquid inside the machine, it only absorbs the user's valuable time, and corrosion proceeds during exactly that time. The correct approach is in Section 9: cut power, drain, and send for inspection, without heating it yourself. The cost is damage that might have stayed at the keyboard layer expanding into mainboard corrosion; a battery heated after a spill also carries a safety risk, and a battery that becomes abnormally hot, swells, or smokes after liquid must be left alone and sent for inspection immediately, without any further attempt to power on or charge.
8.8 Reinstalling the System and Hiding a Hardware Fault
The keyboard fails, Windows or macOS is reinstalled, it works for a few days, it is assumed fixed, the same symptom returns weeks later, and it is reinstalled again. Reinstalling the system makes the user think the problem is solved, but a broken membrane trace, a loose cable, and liquid corrosion are all unaffected by reinstallation; the apparent recovery is mostly the restarts, power-offs, and temperature changes of the reinstallation process temporarily improving poor contact, or the user typing less after reinstalling and not yet triggering the fault condition. More seriously, reinstallation itself carries a data risk: if the user reinstalls while the keyboard is already failing, even a backup may not be done properly; and if the machine is actually a liquid case, the repeated power-ons during reinstallation are exactly the operations that widen corrosion. The correct approach is to do the BIOS, manufacturer diagnostics, and Live USB cross-operating-system comparison first, and only consider reinstallation after hardware has been ruled out; a machine suspected of liquid damage must never be reinstalled or powered on, and must go straight for inspection. The cost is data loss risk, hours of reinstallation and reconfiguration, and a second round of diagnosis when the problem returns. Reinstalling the system is a last resort, not a first step.
8.9 Treating "Press Harder and It Works" as Normal
A key needs a harder press to respond, the user gets used to it, and treats it as what happens with age. Needing a hard press is a typical early symptom of rubber dome fatigue or collapse, membrane contact oxidation, or scissor switch deformation. A hard press can temporarily punch through an oxide layer or force a collapsed dome to conduct, but every hard press accelerates wear: the oxide layer gets thicker, the dome collapses further, and the membrane contact corrodes further. The correct approach is to treat needing a hard press as a fault symptom and send the machine for inspection early; a normal keyboard should not need a hard press to respond. The cost is an early single-key fault dragged into a multi-key or whole-row fault, and long-term hard pressing also makes the scissor switch fatigue and break early.
8.10 Treating a Dead Row or Column as Several Keys Failing at Random
Five or six keys are seen failing at different times, assumed to be the keyboard ageing key by key, and keycaps are replaced and cleaned one by one. The membrane uses a row-and-column matrix: one broken row or column trace makes the whole row or column fail together, and the failed keys form a straight horizontal or vertical line on the keyboard. That pattern is itself diagnostic evidence, pointing to a broken membrane trace, not a driver problem — a driver problem does not follow hardware wiring. The correct approach is to draw or note the positions of the failed keys and see whether they form a row or column; if they do, send the machine for a whole keyboard module replacement and do not fiddle with keys one by one. The cost is time wasted cleaning or replacing caps one by one, which can never repair a broken trace, and the break may widen through oxidation during the delay and affect neighbouring traces.
8.11 Treating Fn Lock, Num Lock, or Input Method as Hardware Failure — the Reverse Misdiagnosis
Function keys all become volume keys, letters become numbers, or Chinese cannot be typed, and the keyboard is assumed broken and sent for repair or replaced. This is the reverse misdiagnosis: a software or settings problem mistaken for hardware. Fn Lock switching with Fn plus Esc, Num Lock, and input method switching with Ctrl plus Space or an accidental Globe key press are all one-second settings fixes. A manufacturer's guide explicitly lists function keys becoming media keys as a BIOS or Fn setting problem, and Apple's guidance also requires checking the input source first. This kind of false hardware failure should be placed first in software elimination, so users exclude the cheapest possibility first. The cost is unnecessary repair, inspection time, and even an unnecessary keyboard replacement. The cost of a reverse misdiagnosis is not a broken machine, but wasted money and time.
8.12 Treating Intermittent Failure as Software or a Virus, Ignoring Cable, Temperature, and Lid Angle
The keyboard works sometimes and not others, so it is assumed to be a software conflict or a virus, and antivirus is run, the system is reinstalled, and the antivirus is changed. Intermittency is the typical presentation of a loose cable, an oxidised socket, or a membrane micro-crack, and it leaves a trail: it recurs when the screen angle changes, because the cable near the hinge is pulled; it recurs after the machine heats up, because metal expansion changes contact; it recurs in humid weather, because the oxide layer's conductivity changes; it works only when a part of the machine body is pressed, because contact pressure changes. The correct approach is to record the conditions under which it recurs — angle, temperature, humidity, press position — because that information is extremely valuable to inspection. The cost is that virus scanning and reinstallation do nothing at all for poor contact, and while it is delayed, a cable crease grows from a micro-crack into a break, turning a reseat into a whole keyboard replacement.
8.13 Treating Repeated Typing, Chatter, or Ghost Keys as a Software Repeat-Rate Setting
One letter comes out as two, assumed to be a Windows repeat rate set too fast, the repeat rate is slowed, nothing changes, and the input method is blamed. Chatter on one or a few keys, with other keys normal, points to a membrane short circuit — liquid residue making the upper and lower layers stick or semi-conduct — a collapsed dome returning too slowly, or a foreign object jamming a butterfly key. A software repeat-rate setting affects all keys, never just one or two. The symptoms listed in Apple's butterfly keyboard service program include letters or characters appearing repeatedly, letters or characters not appearing, and keys feeling sticky or responding inconsistently. That service programme covered four years from the first retail sale and has ended; it should not be read as a current free repair. The correct approach is to rule out Filter Keys first, then check for a spill or foreign-object history; if chatter appeared after a spill, follow Section 9 immediately and stop using the machine. The cost is that continuing to use a shorted keyboard lets the shorted point keep heating and corroding, with a chance of spreading from the keyboard layer to the mainboard layer.
8.14 Treating a Fully Dead Keyboard as a Broken Mainboard or Embedded Controller
The whole keyboard is unresponsive, the mainboard is declared broken, and a mainboard quotation is accepted or the machine is replaced. A fully dead keyboard has at least four possible layers: the keyboard cable fully loose or broken; the zero-insertion-force socket oxidised or its latch broken; a keyboard power or fuse problem on the mainboard, which is a mainboard layer but not necessarily the embedded controller or the mainboard chip itself; and an embedded-controller or mainboard fault. Symptoms alone cannot separate them; disassembly and layer-by-layer checking are required. This article never writes that a fully dead keyboard equals a broken mainboard; the correct wording is that a fully dead keyboard has several possible layers and needs disassembly inspection to determine, priced after inspection in a written quotation. The cost of mistaking it for a mainboard fault is the same as in the cable case: paying too much or replacing a machine by mistake. This is one of the claims this article most wants to correct.
8.15 Treating a Half-Lit, Half-Dark, or Uneven Backlight as a Setting or Driver
The backlight is bright on the left and dark on the right, assumed to be a brightness setting or a driver problem, so brightness is adjusted and drivers are reinstalled. The backlight layer is lit by several LEDs shining into one light guide plate; an individual dead LED, a guide plate fogged by liquid, or a locally corroded backlight cable all produce local uneven brightness. A repair answer notes that uneven brightness is strictly a problem of the backlight light source itself, with several LEDs on the guide plate each responsible for one region, while overall dimness may be liquid shading, a brightness setting, or a mainboard step-up circuit problem. A settings problem makes the whole backlight bright or dark together; it does not make half bright and half dark. The correct approach is to rule out settings first — Fn and BIOS — then send the machine for inspection of the backlight layer and cable.
8.16 Treating "It Worked Immediately After the Spill" as "Nothing Happened"
Water is spilled, wiped dry, the machine powers on normally, and it is assumed to be fine and kept in use. This is the most dangerous misdiagnosis. After liquid gets inside, a dry surface does not mean a dry interior; residue corrodes the traces gradually over the following days to weeks. A manufacturer's spill FAQ states explicitly that it depends on the amount, the type of liquid, and how fast it is handled: plain water may dry out with no long-term residue, but other liquids can cause permanent damage, and even if it works at the time, contacting technical support for assessment is recommended. The correct approach is that after a spill, whether or not it works at the time, the machine should go for internal inspection and cleaning as soon as possible, rather than waiting for symptoms. The cost is delayed corrosion erupting all at once weeks later, with the keyboard, mainboard, and battery affected together and data risk rising sharply.
8.17 Thinking "The Model Matches, So It Fits", Ignoring Backlight, Language Version, Cable Direction, and Fixing Method
A keyboard is bought online because the model matches, and on arrival it has no backlight, the cable direction is different, or the language version is different — for example, a US layout versus a UK layout, with a different Enter key shape. The same series with different configurations can have many variants, and manufacturer service manuals list replacement by palm-rest and keyboard assembly, stressing matching parts by service tag or product number, not by series name. The correct approach is to check with the full model plus service tag or product number before quoting and ordering parts, never by appearance or series name. The cost is a wrong part, a part that cannot be fitted, or a fitted part with no backlight.
8.18 Thinking "A Soldered Keyboard Cannot Be Replaced" or "Every Machine Uses Screws"
One direction hears that modern keyboards are soldered in and the whole machine must be replaced when the keyboard breaks; the other assumes a keyboard is always a few screws and can be swapped casually. Both are wrong. Reality is a spectrum: older and business machines mostly use screw fixing and a keyboard that can be replaced on its own; thin machines and some consumer machines use plastic rivets melted into place, needing the rivets melted away and remade, or a whole palm rest or top case replaced together; Apple butterfly keyboard models have the keyboard riveted into the top case, and the official repair is a whole top case replacement. Which one applies must be checked in the service manual for the model and confirmed by disassembly. The cost of the first mistake is replacing a machine by error, and of the second is underestimating the complexity and the quotation.
9. Spill First Aid: The Correct Procedure and the Wrong Methods
9.1 The Correct Procedure, in Time Order
| Step | What to do | Why |
|---|---|---|
| 1. Cut power immediately | Hold the power button until it shuts down completely; do not wait for the normal shutdown procedure; unplug the charger at the same time, wall side first, with dry hands | Power plus liquid equals a short circuit; every extra second of power is another chance for shorting and corrosion. The normal shutdown procedure is too slow to wait for |
| 2. Do not power on again, do not charge | After shutdown, do not press the power button to see if it works, and do not plug in the charger to see if it charges | That one test power-on is exactly the operation that turns a salvageable machine into an unsalvageable one. Powering on to test is not diagnosis, it is a second injury |
| 3. Unplug all external devices | USB devices, external hard drives, mouse, display cable, and dock, all unplugged | Removes other powered paths and protects external devices and data |
| 4. Wipe surface liquid away | Use a dry towel or microfibre cloth to absorb surface liquid gently; do not rub hard, which pushes liquid deeper into the key gaps | Reduces the amount of liquid that keeps seeping in |
| 5. Drain upside down, with limits | Put the machine keyboard down, opened to about 90 degrees in an inverted V shape on a dry towel, and let gravity draw liquid back out through the keyboard; do not shake violently or tilt sharply side to side | Gravity is the only method that does not push liquid deeper; shaking and sharp tilting carry liquid to the mainboard, battery, and display |
| 6. Battery: only if safe and feasible | If the battery is external and removable, with a latch and no tools needed, it can be removed; if it is an internal sealed battery, do not open the machine yourself — leave it to inspection | Removing an internal battery involves prising the bottom case open and disconnecting a cable, with short-circuit and battery puncture risks |
| 7. Send for inspection promptly; do not wait several days to dry | After cutting power and draining, send the machine for inspection promptly. Inspection opens the machine, checks how far the liquid spread, cleans residue, and assesses the mainboard and battery | Drying is not cleaning. After water evaporates, sugar, salt, and acid residue stay on the traces and keep corroding. Only disassembly cleaning removes residue |
| 8. Write down the spill details | What was spilled — water, coffee, milk tea, soup, soft drink — roughly how much, where it spilled, whether the machine was on or off, and whether power was cut immediately | These details directly affect the inspection judgement: liquid type decides corrosiveness, and location decides the spread. Tell the inspector clearly and do not hide a spill history — hiding it only sends inspection down the wrong path |
9.2 Wrong Methods Compared
| Wrong method | Why it is wrong | Correct method |
|---|---|---|
| Put it in a rice container or bag | Rice does not absorb liquid inside the machine; grains get under keys and into ports and cause secondary damage; most importantly, rice delays inspection while corrosion proceeds during that time | Cut power, drain, send for inspection |
| Hair dryer, heat gun, heater, sunlight | Heat pushes liquid deeper, deforms plastic and adhesives, and speeds up corrosion; manufacturer guidance explicitly says not to use a hair dryer or fan to speed up drying | Room-temperature ventilation plus prompt inspection |
| Compressed air on the keyboard | Blows liquid from the keyboard surface deeper into the machine; official guidance also says not to use compressed air on liquid-affected ports. Compressed air is only for dry dust cleaning, not for a spilled machine | Absorb and wipe, do not blow |
| Powering on repeatedly to see if it works | Every power-on is another short-circuit opportunity; working does not mean unharmed — corrosion may simply not have reached a critical trace yet | Do not power on again after shutdown, until inspection is complete |
| Charging to see if it charges | Charging powers a wet circuit, as dangerous as a test power-on; the battery itself may be damaged after a spill, and charging carries a safety risk | Do not charge until inspection confirms the battery is safe |
| Shaking the machine, or turning it over and over | Carries liquid to areas that were not yet affected — mainboard, battery, display cable | Drain in a fixed inverted position; do not flip it repeatedly |
| Pushing tissue or cotton buds into ports | Leaves fibres inside the ports and causes poor contact; official guidance explicitly says not to push cotton buds or tissue into ports | Wipe the surface only; leave ports to inspection |
| "Dry it for 24, 48, or 72 hours and it will be safe" | No universal drying time guarantees safety. A manufacturer FAQ says at least 24 to 48 hours of drying for a keyboard surface spill, but a repair guide's position is that drying is not cleaning and residue does not disappear by drying. The two statements do not contradict: one says do not use it immediately, the other says it still needs disassembly cleaning after drying | Drying is necessary but not sufficient; inspection cleaning is the complete handling |
| Hiding the spill history | The inspector will investigate as if there were no spill, wasting time and possibly misdiagnosing; liquid contact indicator discolouration and corrosion marks will be found in the end, and hiding gains nothing | State the liquid type, amount, and time honestly |
10. The Hong Kong Context: Why It Happens More Easily Here
10.1 Humidity: An Accelerator of Corrosion
Hong Kong Observatory data for Cheung Chau station, monthly averages from 1993 to 2025, give an annual average relative humidity of 82 percent, with June at 91 percent, July at 90 percent, and August at 90 percent, April to May at 87 to 88 percent, and even the driest month, December, at 71 percent, with total annual rainfall of 1,656.0 mm. Another Observatory climate average, for 1991 to 2020, gives annual average relative humidity of 78 percent and annual rainfall of 2,431.2 mm. The two figures come from different stations and periods and must not be mixed directly, but the conclusion is the same: Hong Kong is a high-humidity environment over the long term, not in isolated years. Three practical effects for keyboard repair are that spilled liquid dries slowly, so the corrosion window is long; cable contact oxidation is faster than in a drier region, so intermittent faults are more common; and machines stored badly — for example, left in a damp corner or under an air-conditioner outlet where condensation forms — carry a higher risk of membrane contact and cable oxidation.
At high humidity, more water can condense on cold surfaces, and exposed conductors corrode, short, and grow dendrites. Silver forms silver sulphide and chloride films in humid air containing sulphur and chlorine, and resistance rises. A Hong Kong parts-storage discussion notes that in a Hong Kong warehouse without air conditioning, silver-plated radio parts turn black within weeks, and non-wiping contacts show poor contact after a year. That is a parts-storage observation and cannot be equated directly with a keyboard in use, but it proves the speed at which Hong Kong air attacks silver and metal contacts cannot be ignored. Moving from outdoors at 32 degrees and 90 percent relative humidity into a 22-degree air-conditioned room may make tiny water droplets condense on metal surfaces inside the machine, especially when the machine is carried indoors from outside. That condensation mechanism is supported by sources — water condenses on cold surfaces at high humidity — but the claim that Hong Kong air-conditioning transitions cause keyboard condensation is an inference with no direct measurement data, so this article says it may happen, not that it certainly does. Do not write that Hong Kong humidity makes keyboards fail more often as a causal claim with no source; the correct wording is to quote the Observatory humidity data and then say that in a high-humidity environment, spilled residue dries slowly and contact oxidation risk is higher, so inspection should be prompt. Prevention, as mechanism-level advice rather than a guarantee, is not to leave a machine for a long time in a high-humidity environment without air conditioning, to power it on regularly so internal heat drives moisture away — an inference — and not to delay after a spill, because the sooner it is handled, the less corrosion spreads.
10.2 Commuting: Shaking, Rain, and Pressure
Hong Kong users regularly carry a laptop in a backpack on the MTR or a bus: shaking and pressure can shift an already loose cable further, so an intermittent fault appears suddenly during a commute, and rain followed by an air-conditioned room creates a temperature difference that condenses water on the machine body, which can seep in through the key gaps. Backpack pressure is a laptop in a bag with books, a water bottle, and other objects on top, the pressure travelling through the top cover to the base plate, bending it slightly and shifting scissor clips and pressing the membrane. That mechanism can explain why some machines seem to break overnight — not while sleeping, but from backpack pressure the day before. Closing the lid on a foreign object means trapping a pen, earphones, a USB stick, or paper when the lid is closed, concentrating pressure on one or two keys and breaking a scissor switch or keycap clip locally. That is a common physical cause of a single key suddenly failing, inferred from scissor force mechanics, with no statistical source. Opening and closing fatigue is the flex cable near the hinge bending slightly on every opening; long-term bending fatigue can break the cable at the bend. A water bottle and an umbrella in the same backpack compartment are the most common unnoticed spill scenario: the user thinks nothing was spilled, but a leaking bottle or umbrella water seeping into the bottom of the bag enters through gaps in the bottom case. History taking should ask about these scenarios, not only whether a drink was knocked over. Prevention advice is to use a waterproof inner sleeve, keep a water bottle in a separate compartment from the laptop, and use a waterproof backpack cover in the rain — prevention advice that involves no price or effectiveness promise.
10.3 Cha Chaan Teng and Takeaway Spills
A cha chaan teng table is small, with drinks placed next to the laptop; takeaway soup and drinks travel in a bag with the laptop; an office coffee cup sits on the keyboard. The liquids are Hong Kong-style milk tea with sugar and milk, coffee with sugar and milk, soup with salt, and soft drinks with sugar and acid — all high-risk categories in Section 3.6, none of them safe. A takeaway cup lid that does not sit properly, a paper cup going soft, or a plastic bag tipping over are common office spill mechanisms. The advice is not to place drinks directly above or beside the keyboard, but on the far side of the desk away from the laptop, and to use a lidded water bottle instead of an open paper cup. The combined effect of humidity and takeaway spills is that sugar residue stays slightly wet for a long time in a high-humidity environment, so corrosion keeps going — one reason Hong Kong spill cases especially need prompt inspection. Milk tea and soup residue are harder to clean than plain water, because sugar plus milk protein sticks to the scissor switches and the membrane, and drying alone will not remove it.
10.4 Local Parts Reality: Genuine, Third-Party, Backlit, Non-Backlit, Riveted, Screwed
Genuine keyboard modules are made by manufacturers such as Chicony, Sunrex, Darfon, and Primax, certified by the brand, with layout, cable pin positions, and backlight specification matching the original machine. Third-party modules may differ in layout — for example, Enter key shape or Fn key position — backlight presence or brightness, and cable pin count or direction. A manufacturer's guide stresses using the serial number to match the correct layout, backlight type, and model-specific connector, so it fits first time. This article does not say third-party is always worse or genuine is always better; the difference is in matching accuracy, not abstract quality. A repair shop must match by model plus serial number, not by appearance.
11. Repair, Replace, Use External, or Replace the Machine: A Decision Framework
11.1 Four Options, Defined First So They Are Not Confused
| Option | Definition | When it applies |
|---|---|---|
| A. Single-key repair | Replace only the keycap, scissor switch, or balance bar, without touching the whole keyboard module | Keycap or scissor switch physically damaged, but membrane, cable, and backlight all normal, and an individual part is available |
| B. Whole keyboard module replacement | Replace the whole keyboard module, including membrane, cable, and backlight layer, depending on the model | Membrane open or short circuit, several keys or a whole row or column failing, backlight layer damaged, rubber domes ageing over a wide area |
| C. Use an external keyboard for now | Do not repair the internal keyboard; keep using a USB or Bluetooth external keyboard | A transitional option: waiting for parts, waiting for budget, waiting for a decision on replacing the machine; or the machine is near retirement |
| D. Replace the machine | Do not repair; replace with a new machine or a second-hand office machine | Repair cost too high relative to remaining value, parts unavailable, high mainboard risk from a spill, or an old machine with ageing in several places |
11.2 Decision Factor Matrix
| Factor | How it affects the decision | How to check it |
|---|---|---|
| Machine age and overall condition | Old machine plus battery, display, and cooling ageing together points to replacing the machine; young machine with other parts healthy points to replacing the module | Assess battery health, display, cooling, and SSD health during inspection; do not look at the keyboard alone |
| Keyboard fixing method | Screw fixing means module replacement is low cost and quick; rivet or melted fixing may mean a whole palm-rest replacement, with much higher cost and labour, so reconsider the external keyboard or machine replacement options | Check the service manual plus disassembly confirmation |
| Backlight presence | A backlit keyboard has more expensive parts and more variants; a non-backlit one is relatively simple | Check the part number against the service tag |
| Parts availability | Genuine or compatible parts available means module replacement is feasible; a model discontinued for years or an unpopular model may need a wait for parts, may have only compatible parts, or may have no parts, pointing to the external keyboard or machine replacement options | Check availability by full model; do not guess from the series name |
| Spill history | A spill history means internal inspection first to assess mainboard risk; even after the keyboard is replaced, mainboard corrosion may erupt later | Disassembly check of the corrosion range and liquid contact indicator state; mainboard repair priced after inspection |
| Data risk | Not backed up plus spill or mainboard risk means the first priority is backup and data protection, not the keyboard itself | Tell the inspector the data matters; do not run any powered test before backup |
| Use, typing volume | Heavy daily typing — office work, programming, accounting — makes the internal keyboard's feel and reliability important, pointing to module replacement; mainly used docked to an external display and keyboard means the external keyboard option can last a long time | Ask about the user's actual use; do not assume |
| Portability need | Carried out every day, to the library or a coffee shop, makes the external keyboard option impractical, pointing to module or machine replacement; mainly used on a desk means the external keyboard option is feasible | As above |
11.3 Price Framework, Using Only Confirmed Prices
Keyboard replacement starts at HK$480 — a confirmed price, and the only keyboard-related price this article can give. Mainboard chip-level repair starts at HK$880 — a confirmed price, quoted only in the context of a spill possibly affecting the mainboard, and not a quotation for any individual case. Everything else is priced after inspection in a written quotation, including but not limited to a palm-rest or top-case assembly with keyboard, separate backlight layer replacement, spill cleaning and inspection, cable or zero-insertion-force socket repair, single keycap or scissor switch parts, and anything that can only be determined after disassembly. This article gives no unconfirmed prices.
11.4 Six Typical Scenarios
Scenario one: a new machine, one to two years old, with one letter key's scissor switch broken and the membrane normal. The tendency is single-key repair, provided an individual part is available; if no loose part exists, the user must be told clearly that the whole keyboard must be replaced, and the user decides. Scenario two: a mid-age machine, three to five years old, with a whole row of keys dead, screw-fixed, with a backlight. The tendency is module replacement. A broken membrane trace cannot be repaired point by point; replacing the whole module is the only thorough solution. The quotation uses keyboard replacement from HK$480 as a starting point, with the rest priced after inspection. Scenario three: a mid-age machine with a whole row of keys dead, but the keyboard riveted into the palm rest. The fixing method must be confirmed by disassembly before a quotation can be given; a whole palm-rest replacement may be needed, with higher cost and labour, and the user must weigh module replacement against machine replacement. No firm price can be given before disassembly. Scenario four: a spilled machine, coffee, with several keys failing immediately. The first priority is not the keyboard, but cutting power and sending the machine for inspection to assess mainboard risk. Whether the keyboard is replaced must wait for the internal inspection result; even after the keyboard is replaced, the user must be told about the risk of delayed mainboard corrosion. Scenario five: an old machine, six years or more, with the keyboard and battery ageing together and parts supply tight. The tendency is to consider machine replacement seriously, or to use an external keyboard as a transitional option. Do not keep investing in one keyboard on a machine that is ageing in several places. Scenario six: a student or office user whose machine mainly sits on a desk connected to a display, with a tight budget. Using an external keyboard is a reasonable transitional option, but its limits must be stated: it is inconvenient to carry out, the power-on password needs the external keyboard, and special functions such as Fn and power keys may be limited. Using an external keyboard is not a repair, it is holding on, and the article must say the difference plainly.
11.5 Decision Flowchart, in Text
Keyboard fails. First do the software elimination, without disassembly. A software problem is solved by following the elimination items, with no disassembly needed; software fully eliminated means sending the machine for disassembly diagnosis. Disassembly diagnosis asks which layer is broken: a single keycap or scissor switch means single-key repair, if a part is available; membrane, cable, or backlight layer means whole module replacement; a loose cable or oxidised socket means reseating or cleaning, priced after inspection; a spill means assessing mainboard risk first, then deciding between module replacement and machine replacement; a riveted or palm-rest-integrated fixing method means re-evaluating the cost of module replacement and considering machine replacement. Before deciding, ask three questions: is the data backed up — if not, back it up first; is there a spill history — if so, assess the mainboard first; what else on the machine is ageing — battery, display, cooling.
12. Worked Examples — All Are Teaching Scenarios, Not Real Cases
The examples below are all teaching scenarios, not real cases, and represent no customer and no repair record. Example one, a teaching scenario, not a real case: a laptop with one letter key working at the centre but not at the edge, other keys feeling normal, the external keyboard normal, and the arrow keys normal in the BIOS. That combination points more to one side of the scissor switch being broken or unclipped, and the correct handling is to check the scissor switch, by professional inspection, not to reinstall the driver. Example two, a teaching scenario, not a real case: a laptop with a whole row of keys dying together, five keys on the row starting to fail on the same day, the external keyboard normal, and the same row of keys producing no response in the manufacturer's diagnostics. That combination points more to that row's silver trace being broken, and the correct handling is to send the machine for a whole keyboard module replacement, not to replace keycaps one by one. Example three, a teaching scenario, not a real case: a laptop with the backlight completely off but the keys working perfectly, the function key plus brightness key cycling having no effect, and the backlight setting already enabled in the BIOS. That combination points more to the backlight cable being loose or the backlight layer having failed, and the correct handling is to have the backlight cable checked by disassembly, by professional inspection, not to replace the whole keyboard first. Example four, a teaching scenario, not a real case: a laptop spilled with milk tea, wiped dry and powered on normally at once, then three keys chattering two weeks later, followed by a whole region failing. That combination points more to spill residue corrosion spreading, and the correct handling is to cut power immediately, stop powering on, and send the machine for inspection promptly — not to wait for it to dry and not to put it in rice. Example five, a teaching scenario, not a real case: a laptop working sometimes and not others, failing again when the screen angle changes, and only working when a particular spot on the body is pressed. That combination points more to poor cable contact, and the correct handling is to have the cable and the zero-insertion-force socket checked by disassembly, by professional inspection.
13. What to Prepare Before Sending for Inspection, and Related Links
Before sending a machine for inspection, prepare the following, so the inspector can narrow the range fastest: the full model number, including the model on the bottom of the machine; how the symptoms appear, including which keys fail, whether they form a row or column, and which type of symptom — no response at all, needing a hard press, chatter, garbled characters, or intermittent failure; when the symptoms started, suddenly or gradually; the conditions under which they recur or improve — lid angle, after heating up, humid weather, pressing a particular spot; the steps already tried, written honestly without hiding anything, including driver reinstallation, BIOS updates, and system reinstallation, on which day, and whether there was a brief recovery; the Safe Mode and external keyboard test results; whether a keycap or the machine was disassembled by the user, and if so, where; the spill and physical damage history, most important of all, written truthfully, including whether any liquid was spilled, what liquid, when, roughly how much, and where; whether it was dropped, knocked, or pressed by a heavy object; whether it was used in rain or a humid environment, and whether a water bottle leaked; after a spill, whether it was powered on to test, charged to test, dried with a hair dryer, or put in rice — written truthfully, because the inspector needs to know what the machine has been through; data and use, including whether the data is backed up — if not, say so first when sending it in — whether there is disk encryption and where the recovery key is, and how the machine is normally used — carried out every day, docked on a desk, heavy typing, or light office work.
For related links, readers can first look at https://www.laptops-king.com/pricing to understand the service framework, with all prices subject to a written quotation after inspection; readers who need to arrange an inspection can go to https://www.laptops-king.com/diagnostic to learn about inspection arrangements. Disassembly, measurement, swapping flex cables, and soldering are always for professional inspection; readers only do visual inspection and layered testing, and that is the safety line running through this whole article. If inspection finds other parts faulty at the same time, the published reference starting prices are battery from HK$580, display from HK$1,280, keyboard from HK$480, and mainboard chip-level repair from HK$880, with everything else priced after inspection in a written quotation. Keyboard module repair is always priced after inspection in a written quotation.
The shop details are: Room 1209, Dalton Plaza, Shek Mun, Shatin; telephone +852 2186 8010; WhatsApp +852 6558 6806; opening hours 12:00 to 19:00. Before asking for help, please finish the non-disassembly parts of the layered elimination above, and record the model number, the pattern of failed keys, the external keyboard comparison, the BIOS test result, and the spill history, so inspection can start directly from the suspected layer. The most feared thing about physical keyboard failure is not that it fails completely, but that it fails ambiguously: working sometimes, needing a hard press, occasionally chattering, and making people mistake it for a driver problem.
Items That Could Not Be Verified — An Honest Record
The following items could not be verified in the course of the research, and this article draws no conclusions about them: reliable first-hand statistics on the failure rate of each laptop keyboard mechanism, spill proportion, or average life in Hong Kong — this article gives no percentages or rankings; the debounce parameters of each brand's embedded controller — the open firmware figure of 5 ms is an open firmware default, not a specification for any one brand's embedded controller; dedicated chemical research on milk tea against silver paste and plastic film — the effect of milk tea can only be inferred from the general mechanisms of sugar, milk, and acid; a list of cable pin counts and zero-insertion-force socket models by model — pin counts vary by model and no universal table can be given; published measured figures for membrane silver trace width and thickness; the plastic materials of scissor switches, with no first-hand source for which plastic each maker uses; the life specification of backlight LEDs; the availability, price, and delivery time of each model's keyboard, which vary by brand, model, and supplier, with keyboard module prices always priced after inspection; the specific disassembly screw specifications, cable lengths, and connector models of each model, which must follow that model's service manual; the actual parts supply situation for each brand's Hong Kong official stock, which must be checked by model with the supplier; and the specific procedure and inspection standard for spill cleaning, which belongs to repair practice and is outside the literature research of this article.
Frequently Asked Questions
Q1: Only one key does not type. Does that mean replacing the keycap will fix it?
A: Not necessarily. One dead key can be a broken keycap clip, a broken scissor switch, a torn rubber dome, or an oxidised membrane contact, and the repair is completely different for each. The correct approach is to do an external keyboard comparison and a BIOS test first to confirm it is not software, then let inspection remove the keycap and check which layer is broken. Only a broken keycap clip can be fixed by replacing the keycap; a broken scissor switch needs a scissor switch, and a failed membrane contact needs a whole module. Never use glue on a keycap: glue seeps into the contact point and kills the key permanently.
Q2: A whole row of keys died together. Does that mean the whole row of keys broke at the same time?
A: No. A whole row dying together is usually one shared row trace breaking, not several keys breaking independently. The membrane uses a row-and-column matrix: one broken row trace makes the whole row fail at the same time, and the failed keys form a horizontal line on the keyboard. The correct approach is to draw or note the positions of the failed keys and see whether they form a row or a column; if they do, send the machine for a whole keyboard module replacement and do not clean or replace caps one by one. A driver problem does not follow hardware wiring.
Q3: The backlight is on but I cannot type. Does that mean the keyboard is fine?
A: No — quite the opposite. The backlight and the keys are two independent systems with independent cables. A backlight that is on proves the backlight layer and the embedded controller have power and are normal, so the problem is in the signal layer: a loose or broken keyboard signal cable, or a failed membrane layer. The correct approach is an external keyboard comparison and a BIOS test first, then inspection of the signal cable and the membrane layer. Do not assume the keyboard is healthy because the light is on.
Q4: It still worked immediately after I spilled water on it. Does that mean nothing happened?
A: No, and this is the most dangerous misunderstanding. After liquid gets inside, a dry surface does not mean a dry interior; sugar, salt, and acid residue gradually corrode the traces over the following days to weeks, and symptoms appear late and spread gradually. The correct approach after a spill is to cut power immediately, stop powering on, stop charging, drain it upside down, and send it for inspection promptly — not to put it in rice, not to use a hair dryer, and not to keep powering it on to see if it works. Drying is not cleaning.
Q5: The external keyboard works. Does that mean replacing the internal keyboard will definitely fix it?
A: Not necessarily. A working external keyboard only proves the operating system input path is normal and the problem is confined to the internal keyboard path; it cannot separate membrane failure, a loose cable, an oxidised socket, and an embedded-controller fault. The correct approach is disassembly inspection, with cable reseating and module substitution testing, to eliminate layer by layer before concluding. A fully dead keyboard does not mean a broken mainboard either: a fully loose cable or an oxidised socket can make the whole keyboard unresponsive, with symptoms identical to a mainboard fault.
Need Professional Laptop Repair?
Laptop King has 15+ years of repair experience in Shek Mun, Sha Tin. Free diagnosis, transparent pricing, no fix no fee. 180-day warranty for your peace of mind.