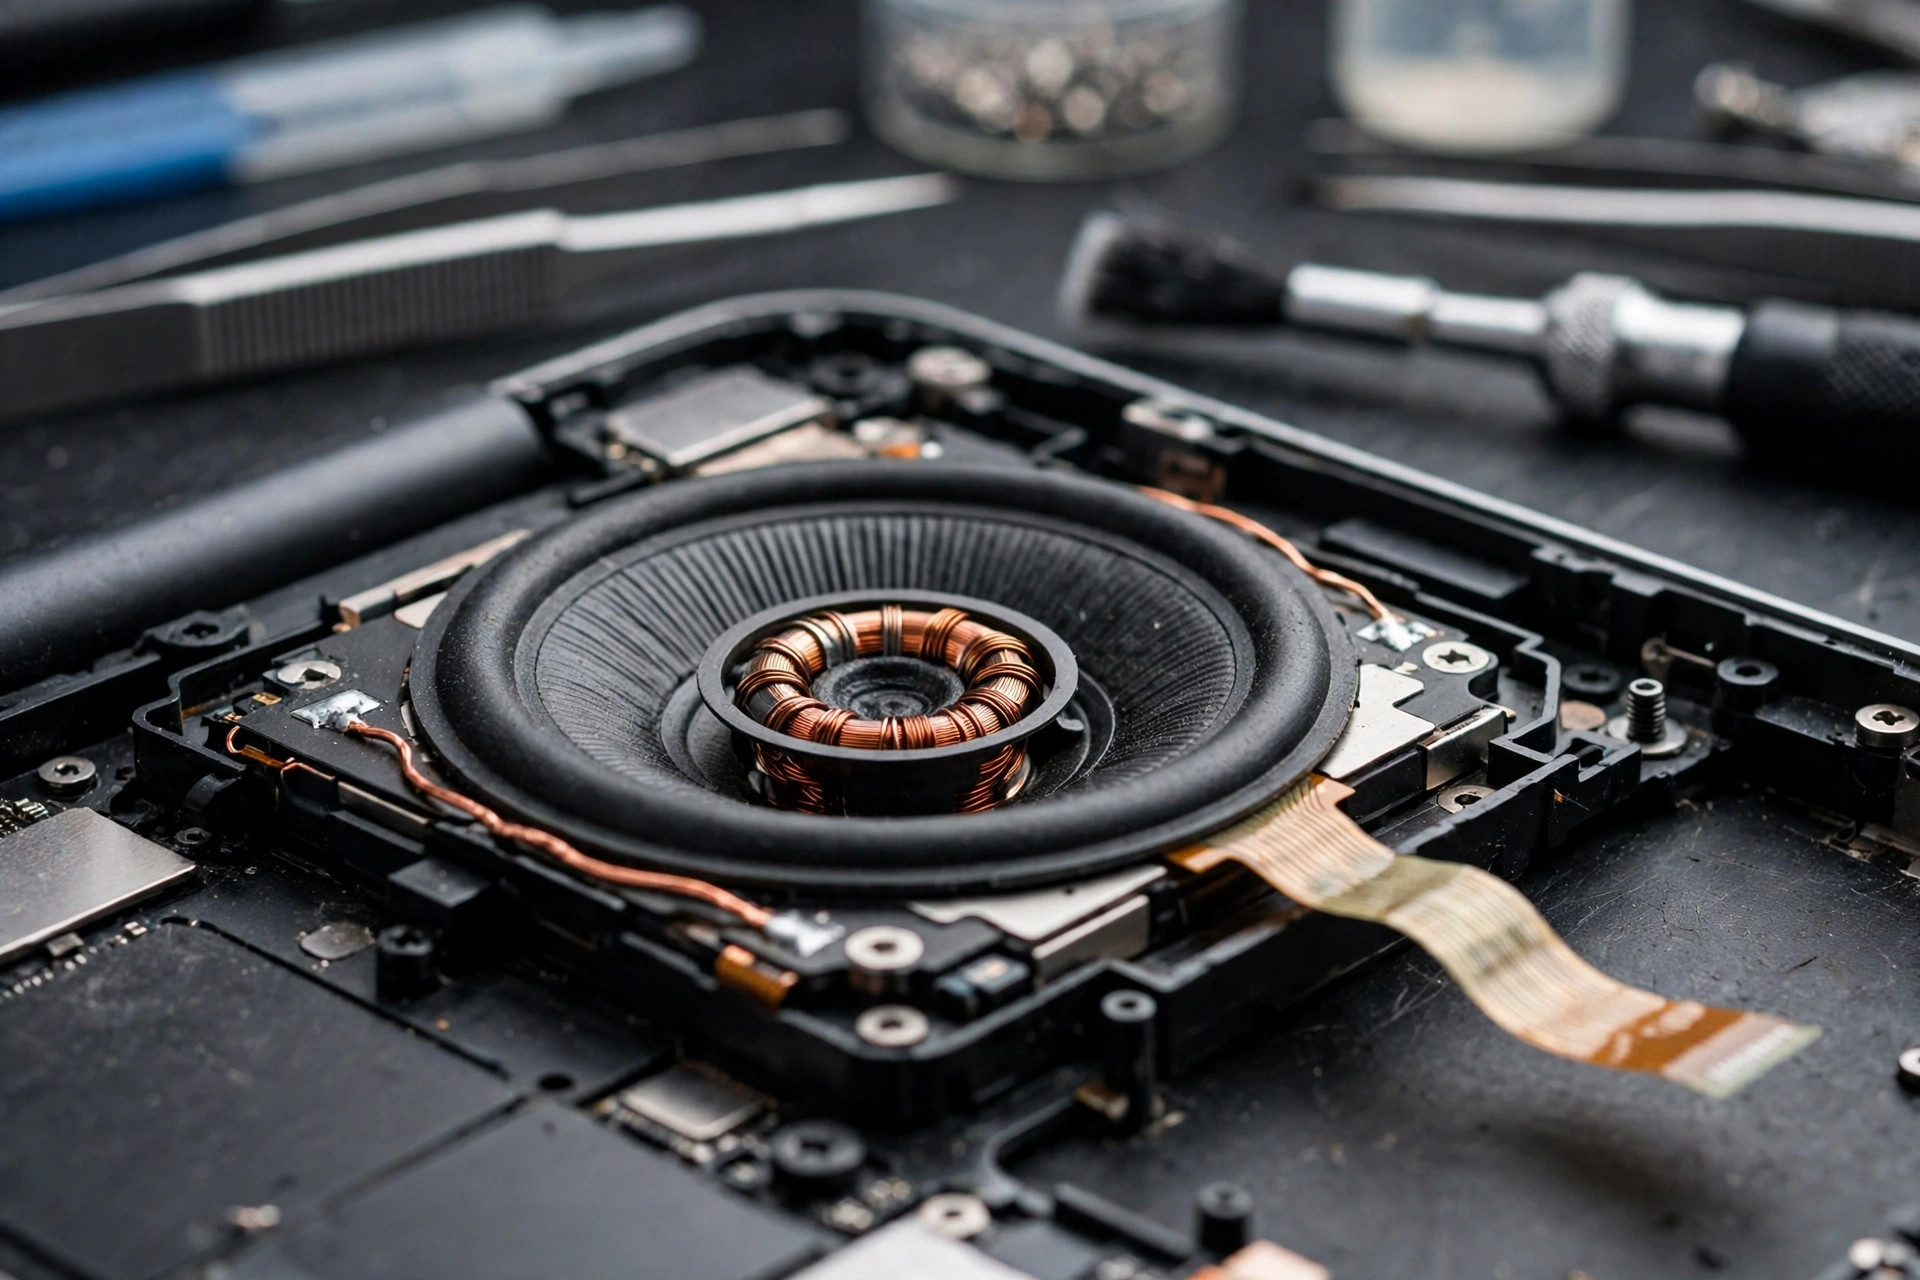
A laptop's built-in speakers suddenly distort, go silent on one side, cut in and out, lose their bass, become quiet, or produce background noise even when nothing is playing. The reader's first reaction is often to reinstall the driver, reset the system, or conclude that the speaker has burned out. This article focuses on one layer only: the physical layer of the laptop's built-in speaker module itself. The physical layer means the speaker driver, diaphragm, surround, spider, voice coil, magnet, tinsel lead, enclosure and resonance chamber, flex cable and connector, headphone jack detection switch, and the codec and amplifier on the mainboard — whether any of them is damaged, loose, deformed, oxidised, worn, liquid-damaged, or jammed by a foreign object. When the physical layer fails, no amount of software work will genuinely fix it. Conversely, when the output setting, driver, or audio enhancement is at fault, replacing the speaker module will not help either.
This article has a clear division of labour with the basic guide. The basic guide handles what most readers meet first: the wrong output device, muting, volume too low, a driver not updated, or a problem that appeared after a Windows update. This is the advanced guide. It assumes the basic elimination has already been done, and focuses on whether the speaker itself is broken, which part is broken, how to prove which part it is, and whether to repair, replace, or switch to external speakers. Every operation in this article that involves disassembly, measurement, swapping flex cables, soldering, replacing modules, replacing flex cables, or inspecting the mainboard is for professional inspection only; readers must not attempt them. Things a reader can safely do are limited to visual inspection after shutting down and disconnecting power, checking the device status shown by the system, the headphone comparison, the external speaker comparison, mono and balance tests, and pre-boot diagnostics. If you see burn marks, smell burning, see smoke, or feel abnormal heat at the speaker location, stop using the device immediately. If liquid ingress is suspected, disconnect power first and do not repeatedly power on to test. Never poke or press a speaker diaphragm with a sharp object.
1. Start With the Right Mental Model: A Speaker Is an Electromechanical Transducer, Not a Purely Electronic Part
A speaker driver is an electromechanical transducer: current flows through the voice coil, producing force in the magnetic gap of the permanent magnet, pushing the diaphragm back and forth and compressing air to make sound. This definition determines the entire failure classification. When the electrical-to-magnetic conversion fails — voice coil, magnet, or magnetic gap — there is no force, or the force is asymmetric or unstable. When the mechanical movement fails — diaphragm, surround, spider, or voice coil former — there is force, but movement is obstructed, off-centre, leaking, or non-linear. When the acoustic load fails — enclosure, resonance chamber, passive radiator, sealing, or rubber gasket — the driver itself is fine, but the front and rear sound waves cancel each other or leak away, and bass and volume suffer first. When the signal never reaches the driver — flex cable, connector, codec, amplifier, or headphone jack detection — the driver is innocent; the fault is an upstream break or misjudgement.
Laptop speakers are especially fragile, not because the principle differs, but because of size and environment: small driver diameter, thin diaphragm, fine voice coil wire, tight magnetic gap tolerance, tiny enclosure volume, thin and short flex cables, and a chassis that is frequently heated, damp, and shaken. The same mechanism that might take years to appear in a large speaker can appear faster in a laptop, and its symptoms are more easily confused with driver problems. The voice coil is the core component that converts electrical energy into mechanical energy in a speaker. Overheating and burnout is the most common cause of damage: excessive power causes heat to build up inside the voice coil, melting the insulation between windings and causing a short circuit. Mechanically, design or assembly defects can cause the voice coil to rub against the magnetic assembly, and a severe impact can deform or misalign the voice coil former. Magnetic particles such as dust or iron filings entering the magnetic gap can also jam or wear the voice coil. Repeated thermal expansion and contraction from long periods of high-power operation can cause material fatigue or solder joints to loosen.
Diagnosis of a burned voice coil further distinguishes different forms of thermal failure. Resin heated by the coil releases gas, forming bubbles on the voice coil former; when a bubble grows large enough to rub the pole piece, it produces a rattle. Another form is scrub: mechanical failure and non-linearity where the spider fails to keep the voice coil moving vertically in the magnetic gap, leaving large friction marks. In a fast burn, the bottom of the voice coil turns black while the top remains copper-coloured, and the windings rub and strike each other. In a slow burn, the resin is almost entirely burned away, the windings detach from the former, and loose wires can obstruct the remaining coils or bend and cause mechanical failure. Another discussion identifies two common failure modes: thermal failure and mechanical failure. In thermal failure, overloaded mid- and high-frequency content drives voice coil current that heats the magnetic core beyond the adhesive limit holding the coil; the glue melts, the coil loosens, and buzzing begins; a loosened winding can catch the centre pole and tear or wear through, creating an open circuit and total silence. In mechanical failure, overloaded low-frequency content exceeds the mechanical limit, the voice coil tube can strike the back plate, or the surround can tear. Less common failure modes include fusing, contact damage, and environmental exposure; fusing is usually caused by a large current spike from an amplifier fault or incorrect connection melting the voice coil.
A speaker failure analysis document lists initial causes that include voice coil former buckling, a split magnet ring jamming the voice coil in the gap, buzz, tinsel lead cut by mechanical fatigue, voice coil rubbing, voice coil open circuit, half the coil carbonised, exceeding the displacement limit, surround damage, spider breakage, voice coil-to-cone joint breakage, front or back plate shift jamming the voice coil in the gap, and spider softening causing friction or buzz. The value of this list is to remind the repairer that one "distortion" symptom can hide more than a dozen different mechanisms, and they must be separated by inspection and swapping, not guessed from the sound alone.
2. Speaker Module Structure: The Complete Chain From Driver to Mainboard
2.1 Components of the Speaker Driver
A typical moving-coil laptop speaker driver includes the diaphragm, dust cap, surround, voice coil and former, spider, magnetic circuit, frame, tinsel lead and terminals, and the wiring and flex cable interface.
| Structure | Function | Physical consequence when it fails |
|---|---|---|
| Diaphragm | The sound-radiating surface, usually a thin film or composite; laptops use light, thin diaphragms for sensitivity | Cracks, holes, or deformation destroy rigidity and symmetry, making movement non-linear and producing distortion and air leakage |
| Dust cap | The central dome, protecting the voice coil and magnetic gap from dust | A slight dent may not affect sound, but a dent reaching the cone neck or misaligning the voice coil will affect performance |
| Surround | The flexible ring joining the diaphragm edge to the frame, controlling cone movement and keeping the voice coil centred | Ageing makes it hard, cracked, powdery, or detached, losing elasticity and sealing and producing distortion or rattling |
| Voice coil and former | Enamelled wire wound on the former, sitting in the magnetic gap; current makes it move back and forth in the magnetic field | Overheating burnout, friction, or deformation makes sound coarse, quiet, or completely silent |
| Spider | The corrugated suspension under the cone, working with the surround to keep the voice coil moving vertically | Loss of elasticity with age lets the voice coil go off-centre and rub, and bass control weakens |
| Magnetic circuit | Permanent magnet, top plate, back plate, and magnetic gap, providing the static magnetic field; the gap is measured in very tight tolerance | Magnet shift, cracking, or demagnetisation makes the field uneven or weaker, so volume drops and distortion and friction appear |
| Frame | The structure holding the parts above; in laptops it is often moulded with the enclosure or fixed with glue or screws | Deformation makes the voice coil off-centre and produces rubbing |
| Tinsel lead | The fine wire carrying the signal from the terminal to the voice coil, bending every time the cone moves | Mechanical fatigue breakage causes intermittent or permanent open circuit, so sound comes and goes |
| Wiring and flex interface | A short wire from the driver to a connector on the mainboard; some models share one flex cable for both sides, others have separate cables | Loosening, oxidation, or internal breakage causes one-sided silence or intermittent silence |
2.2 Enclosure, Resonance Chamber, and Passive Radiator
A laptop has no separate speaker box. The "enclosure" is a small sealed or semi-sealed cavity between the bottom case and the palm rest, sometimes in the form of a plastic speaker box module. Its job is to isolate the front and rear sound waves from the diaphragm so they do not cancel each other, and to use the air elasticity inside the cavity to control low-frequency response. A sealed enclosure gives a smoother frequency response and tighter sound, but limited efficiency and bass extension. A ported design uses a tube to boost bass, but needs enough space for the tube and can produce port noise. A passive radiator is a third approach: a diaphragm with no voice coil and no magnetic circuit, driven only by air pressure inside the cavity. It has no port resonance problem and can give better bass from a smaller volume, but still needs a suitable cavity volume and enough displacement capability. Its key parameters include resonance frequency, compliance, effective radiating area, and displacement. As a preliminary screening principle, a passive radiator's total displacement capability should be at least twice that of the active driver — not a guarantee at all frequencies and input levels.
Three points matter for laptop repair. First, not every laptop has a passive radiator. Some models have only two active drivers plus a resonance chamber; only some higher-end models have a passive radiator. Whether one is fitted must be checked against that model's service manual or the physical unit; for models that cannot be verified, do not assume one way or the other. Second, enclosure leakage has different symptoms from driver damage. If the enclosure sealant, gasket, or rubber gasket ages, loosens, or breaks, bass disappears first or becomes loose, and volume is more likely to produce a puffing leakage sound at high volume, while the driver itself may still sound clear at low volume. A service manual specifically reminds the technician to use alignment posts and rubber grommets to seat the speaker in the chassis slot, and to push a grommet back into place before refitting the speaker if it was pushed out during removal. Another manual notes that the speaker includes four rubber isolators fitted in the screw holes, which are critical to speaker performance. These details show that rubber grommets are not optional accessories; they are part of the acoustic design. Third, a foreign object or loose plastic part inside the enclosure can resonate at a specific frequency and produce a vibration noise similar to driver distortion; elimination should check for loose screws, fragments, or detached damping foam inside the enclosure.
2.3 Flex Cable, Connector, and Mainboard Interface
The path from the speaker driver to the mainboard is usually: driver lead, short flex cable or wire harness, and the speaker connector on the mainboard. Service manuals from different manufacturers describe this consistently: when installing a speaker, use alignment posts and rubber grommets to seat it in the chassis slot, route the wire along the routing channel, secure the speaker wire to the mainboard with tape, and connect it to the connector on the mainboard. When removing it, disconnect the battery first, remove the screws holding the speaker, and pull the pull tab to disconnect the speaker connector. Some models list the speaker assembly as a field-replaceable unit and stress that the speaker connector must be firmly engaged and the wire routed as shown. Some models require switching off, disconnecting power, removing the bottom cover, and disconnecting the battery cable before removing the speaker assembly, then disconnecting the speaker wire from the mainboard and removing it from the clips before removing the screws. Some models list the speaker and antenna as a single module: disconnect the speaker wire and the wireless antenna, peel off the gasket, and remove the speaker and antenna; during reassembly, place the speaker wire properly in the hook slot. Another manual warns that incorrectly routed wire can cause damage. Most models install speakers in pairs, each with its own wire, connected to a power connector on the mainboard, with the speaker held by rubber support blocks.
Taken together, the physical weaknesses of the flex cable and interface layer are connector loosening, wire breakage or internal breakage, solder joint or terminal oxidation, and incorrect routing. A drop, a connector not fully seated after repair, or a wire pulled by force can leave a connector half-detached, causing intermittent silence or one-sided silence. A flex cable repeatedly bent near a hinge or routing bend can break internally while the insulation looks intact; it looks normal but measures open-circuit or intermittently conductive. In a humid environment, an oxide layer on the terminal surface increases contact resistance, making volume quieter or adding noise; in severe cases it causes intermittent contact. A wire not returned to its routing channel after repair can be pinched by a screw, worn by a fan blade, or squeezed by the battery, and fail again soon after.
2.4 Mainboard Audio Chain: Codec, Amplifier, Intel SST, and HDA
The signal chain from software to speaker is: application, Windows audio engine, audio driver, Intel High Definition Audio controller or Intel Smart Sound Technology audio DSP, HDA link, Realtek codec, speaker connector, flex cable, speaker driver, air. Intel High Definition Audio is a PC audio subsystem specification released by Intel in 2004 as the successor to the older audio specification, but it is not backward compatible. The specification includes up to 15 input and 15 output streams, up to 16 PCM audio channels per stream, 8 to 32-bit sample resolution, 6 to 192 kHz sample rate, support for audio codecs, a discoverable codec architecture, fine codec power control, audio jack detection, sensing, and retasking. The specification defines the host controller architecture, link frame format, and programming interface, and links the host controller to the codecs used by computer software. The codec side contains multiple widgets, including DAC, ADC, mixer, selector, pin complex, and power widgets. Configuring the codec side is complex: each widget's type and function must be queried one by one before building the path between the speaker and the microphone. It also mentions setting EAPD (External Amplifier Power Down) to enable the external speaker amplifier. This matters for diagnosis: if EAPD or the related GPIO fails to enable the amplifier correctly, the speaker can be completely silent while the headphone, which takes another path, still works.
Realtek codecs are the most common HDA codecs in laptops. Realtek's own public product information is mainly press releases and product pages; the full datasheet is generally provided only to manufacturer customers and is not publicly downloadable. A public search could not obtain the full official datasheet for common models, and this must be recorded honestly as not verified. What can be verified is that a Realtek press release describes the ALC5642 as the first single chip integrating a Hi-Fi audio codec, a high-efficiency low-power amplifier, and a voice and sound DSP, with SounzReal audio technology including virtual bass and virtual surround sound. This shows that a Realtek codec is not a simple DAC but a system chip integrating an amplifier and DSP; the degree of integration and amplifier output capability differ by model and must be checked against that model's manufacturer documentation. Linux ALSA documentation records that Realtek codecs have manufacturer-defined widgets providing a set of registers controlling codec functions; Realtek has not published the full documentation for those registers, instead providing specific values to fix problems. Open-source driver developers recorded the behaviour of one hidden register by black-box reverse engineering, noting the finding may also apply to several closely related models. This shows that even the open-source driver community has not obtained Realtek's full internal register documentation, and repair diagnosis should not assume that reading a register value can confirm a codec failure.
Intel Smart Sound Technology is the audio DSP solution on Intel platforms. Intel's official datasheet states that the audio DSP offload engine is an optional feature providing low-power DSP functions, offloading audio processing from the main processor, and enumerated as an optional function under the Intel HD Audio controller through Intel HD Audio driver software. For one processor series, audio DSP capability includes up to three DSP cores, up to 2,816 KB of L2 SRAM per DSP core, and DSP-offloaded low-power audio rendering and recording. Another chipset datasheet states that the audio DSP runs on a DSP core and supports Intel Wake on Voice, low-power audio playback and post-processing, and low-power VoIP and circuit-switched voice call preprocessing. In Windows Device Manager, SST usually appears as a related controller or audio controller. Third-party summaries note that when the SST driver is incompatible with the Windows version or the manufacturer's audio package, a yellow triangle and Code 10 error can appear, causing audio or microphone function loss. Microsoft once paused Windows 11 upgrades for some 11th-generation Intel processor computers because of an SST driver problem until a compatible version was installed; the fix is to use the correct OEM package, installation order, and restart.
The diagnostic implication is that SST and HDA driver problems and codec chip physical failure can have very similar symptoms — for example total silence, a device disappearing, or Code 10 — but they are eliminated differently. A driver problem usually affects the speaker and headphone together, or makes the device disappear or show a warning in Device Manager, and the speaker may still work in pre-boot diagnostics. A codec or amplifier physical failure usually also fails to sound in pre-boot diagnostics, or only one channel or one output path fails.
For the amplifier and DC offset, the amplifier built into or outside the codec amplifies the DAC's line-level signal to a level that can drive the speaker. Amplifier failure can appear as one-channel silence, very low volume, distortion, loud background noise, or output with DC offset. The physical harm of DC offset is well documented: the ideal amplifier's DC offset should be 0V. DC current does not move the voice coil, so it loses the cooling benefit of movement; resistive heating accumulates in the voice coil copper wire, and temperature can rise enough to break down insulation, melt glue, and finally burn the coil. DC voltage also pushes the voice coil to one end limit and holds it there, overstretching the surround; if DC is applied continuously, the surround material can tear, the cone can crease, and the coil can strike the magnetic structure. Another article on clipping clarifies a common misunderstanding: a clipped signal itself has no DC component. The danger of clipping is that the amplifier exceeds its supply rails and produces a flat-topped waveform, making the voice coil absorb too much energy in a short time and overheat. The varnish on the voice coil winding can generally tolerate high temperatures, but if power is excessive, the varnish boils and can no longer hold the coil; the winding can short itself, loosen, and strike the top plate and be torn from the former. In severe clipping, the voice coil accumulates heat while cone movement is insufficient to cool the coil and former, so the voice coil overheats and either jams in the magnetic gap or burns through the winding, creating an open circuit. Note that a laptop's built-in amplifier output power is far lower than a home or car amplifier, so in a laptop these mechanisms appear as gradual damage under long periods of high volume, poor heat dissipation, and a fine voice coil — not a single high-power burnout. Repairers should not apply car audio power figures directly to laptops. A laptop speaker's rated power and impedance differ by model and must be checked against the original part number and service manual; no generic figures could be verified in this research, so none are listed.
3. Failure Mechanisms, Item by Item
The mechanism list below is the core of this article. Each item includes the mechanism, the microscopic process, the typical sound or symptom, accelerating factors, inspection methods, and repair direction. Repair direction is only an inference at the mechanism level; the actual unit must be priced by a written quotation after inspection. Speaker module prices are always subject to a written quotation after inspection, and this article gives no speaker price figures.
Thermal Failure: F1 Voice Coil Overheating and Burnout
The enamel insulation of the voice coil wire and the resin or glue holding the windings melt, carbonise, and fail under prolonged overheating. Windings loosen, short, or burn through, creating an open circuit or an inter-turn short circuit. Current through the voice coil inevitably generates resistive heat; in normal operation, the voice coil's back-and-forth movement drives airflow that helps cooling. If input power stays above the voice coil's heat dissipation capacity for a long time, or if DC offset holds the voice coil fixed in one position so it loses movement cooling, heat accumulates. Early symptoms are distortion at high volume and a coarser sound. In the middle stage there is noise at any volume and clearly lower volume. In the late stage there is total silence, or a burning smell as soon as the unit is switched on — stop using it immediately and send it for inspection. Measuring voice coil DC resistance with a multimeter shows an open circuit when burned through, and a resistance clearly below normal when there is an inter-turn short circuit. Normal resistance differs by model, no generic figure could be verified, and comparison must be made with a known-good unit of the same model or between the left and right channels. Accelerating factors include long periods at maximum volume, bass boost and audio enhancement left on, poor chassis heat dissipation, amplifier DC offset, and clipping. Inspection methods are the headphone comparison and left-right swap, plus a visual check after disassembly for a blackened, deformed, or burnt-smelling voice coil, and pressing the cone gently to listen for scraping. Repair direction: laptop speaker drivers are generally not rewound; the whole speaker module must be replaced. If the amplifier is also confirmed to have DC offset, the mainboard layer must be handled as well, or the new module will burn out again.
Mechanical Failure: F2 Voice Coil Rubbing, F3 Diaphragm Damage, F4 Surround Ageing, F5 Spider Ageing, F6 Magnet Shift, F13 Magnetic Gap Debris
The voice coil should stay concentric and move vertically in the magnetic gap. Once it goes off-centre, the former deforms, the gap is narrowed by debris, or the magnetic circuit shifts, the voice coil rubs the gap surface as it moves, producing scraping and distortion. The magnetic gap tolerance is extremely tight; the clearance between the voice coil and the gap wall is measured in fractions of a millimetre. Any factor that pushes the voice coil off-centre — an aged surround sagging, a relaxed spider, a former deformed by impact, a shifted magnet, or a shifted front or back plate — makes the voice coil touch the gap wall at some point in its travel. Typical symptoms are a slight rustling or scraping sound even at low volume, worse with bass or large dynamics, and a scraping sound when the cone is pressed gently and evenly with a finger. Press lightly and evenly; never poke the diaphragm with a fingertip. If friction has already worn the voice coil surface or deformed the former, the module generally must be replaced. If the cause is only debris in the gap, cleaning may restore it, but no metal filings must remain, or friction will return. The diaphragm is the sound-radiating surface; any crack, hole, crease, or deformation destroys its rigidity and symmetry, making movement non-linear and producing distortion and air leakage. A paper diaphragm softens and weakens when damp; a plastic diaphragm can deform under prolonged high temperature. Any crack lets air leak through, breaking the isolation between front and rear sound waves and creating extra vibration at the crack edge. Diaphragm tearing is one of the most common speaker damage causes; if pressing the speaker produces a crackling sound or loose dust cap or rubber surround fragments, that indicates damage. Laptop diaphragms are generally not repaired locally: a glue patch changes mass and rigidity, affects sound, and does not last, so the whole module must be replaced. The surround is the flexible ring joining the diaphragm to the frame, controlling cone movement and keeping the voice coil centred. With age it hardens, becomes brittle, cracks, turns to powder, or detaches, losing elasticity and sealing. Foam surrounds gradually harden, become brittle, and break under UV, humidity, and temperature cycling; rubber surrounds last longer but also dry and harden with long use. The surround is usually the first speaker part to wear because it is more exposed to the environment than other parts. Foam surrounds become hard after years of use, then brittle and start to crack; butyl rubber surrounds last much longer because they are softer, work over a wider temperature range, and resist sunlight, water, and many chemicals — but even rubber surrounds eventually dry and harden. When the surround wears, speaker sound distorts and frequency response changes. Typical symptoms are bass deteriorating first, a loose sound, flapping, and distortion, more obvious at high volume; visually the surround shows cracks, fragments, detachment, or powder. Laptop surrounds are generally not replaced separately; the whole module must be replaced. The spider is the corrugated suspension under the cone; together with the surround it keeps the voice coil moving vertically and provides restoring force. With age its elasticity falls, it relaxes, softens, or breaks, and the voice coil easily goes off-centre. Typical symptoms are friction similar to voice coil rubbing, but the friction may appear only at a certain point in the cone's travel, with low volume, weak bass control, and a loose sound. A damaged spider generally means replacing the whole module; replacing the spider alone is not recommended. The magnet provides the static magnetic field; its strength and symmetry determine the size and linearity of the force on the voice coil. A shifted, cracked, or demagnetised magnet makes the gap field uneven or weaker, causing volume loss, distortion, and friction. Laptop speakers mostly use neodymium magnets for high magnetic force in a small volume, or ferrite for cost and thermal stability. Neodymium magnets are strong and small but brittle, vulnerable to impact, and sensitive to high temperature. Heat, physical shock, external magnetic fields, and environmental exposure can all reduce a neodymium magnet's strength. Every magnet has a Curie temperature; above it, magnetic domains misalign and magnetism is permanently lost. Physical shock or mechanical stress can change the magnet's structure and reduce its strength, and neodymium magnets are brittle and easily cracked or chipped by dropping or impact. Standard neodymium magnets are generally stable below 80 degrees Celsius, gradually weaken above 80 degrees, and demagnetise significantly above 150 degrees. The honest limitation is that a laptop speaker's magnet temperature in normal use is far below these demagnetisation temperatures, so demagnetisation is a less common mechanism in laptop speakers and should not be the first suspect. More common is magnet shift or cracking: an impact loosens the bond between the magnet and the front or back plate, the magnet shifts by a fraction of a millimetre, the gap narrows or becomes asymmetric, and the voice coil rubs immediately. Typical symptoms are a sudden drop in volume, distortion, and rubbing; if the magnet cracks, fragments can fall into the gap and jam the voice coil completely so there is no sound. Inspection is by checking for magnet shift, cracks, or fragments after disassembly, and swapping with another known-good speaker of the same model; never test by attracting with a magnet directly, as it can crack the magnet or draw in iron filings. The magnetic gap is extremely narrow; any dust, metal filings, iron powder, or fragments of a cracked magnet entering the gap will jam the voice coil or rub it, producing noise or jamming it completely. A magnet's force actively attracts iron particles; using a laptop for a long time in an iron-dust environment such as a renovation site, workshop, or metalworking environment, or metal filings falling in during disassembly, can let debris into the gap. Typical symptoms are a sudden scraping sound, the speaker jamming at a certain point in its travel, low volume, and distortion; pressing the cone gently may show clear resistance or a scraping sound. Inspection is by pressing the cone to listen for scraping, checking the gap with a magnifier after disassembly, and removing debris with compressed air and adhesive tape — by a technician only, to avoid pushing debris deeper or damaging the voice coil. If debris can be fully removed and the voice coil is undamaged, it may recover; if the voice coil is already worn or jammed, the whole module must be replaced.
Connection and Acoustic Load: F7 Tinsel Lead Fatigue, F8 Enclosure Leakage, F9 Passive Radiator Ageing
The tinsel lead carries the signal from the terminal to the voice coil and bends every time the cone moves. Long-term bending fatigue can break it at a solder joint or bend, causing intermittent or permanent open circuit. Tinsel leads are usually braided from many fine copper strands and are designed to tolerate a certain amount of bending, but the number of bends has a limit. Long periods of high volume increase cone displacement, increase the lead's bending range, and accelerate fatigue. The failure analysis list explicitly includes tinsel lead cut by mechanical fatigue. Typical symptoms are intermittent silence, sound coming and going, and sound returning or disappearing when the chassis is tapped lightly or the volume is changed; one channel may be intermittent while the headphone output is normal. Inspection is by left-right swap, and after disassembly, checking the lead for breakage and solder joints for cracks with a magnifier. A broken tinsel lead generally means replacing the whole module; flying-lead solder repair is not recommended because the solder joint's weight and rigidity change cone movement and do not last. The enclosure must stay sealed, or maintain a controlled amount of leakage as designed, to isolate the front and rear sound waves and provide the correct acoustic load. Seal failure lets the front and rear waves cancel each other, and bass suffers first, with volume and sound quality falling together. Long-term heat, damp, and vibration age the sealant, harden gaskets, and deform or detach rubber gaskets; if rubber gaskets or sealant are not correctly refitted after disassembly, the enclosure leaks. Typical symptoms are bass disappearing or becoming loose, low volume, and a puffing leakage sound at high volume; at low volume the sound may be close to normal, misleading the user into thinking it is a driver problem. Inspection is by checking the enclosure shell for cracks, sealant for detachment, rubber gaskets for deformation or loss, and screws for looseness after disassembly, and by swapping with a known-good module of the same model. If only a rubber gasket is loose or sealant has detached, refitting or replacing the sealing parts may work; if the enclosure shell is cracked or deformed, the whole module generally must be replaced, and in some models the enclosure and driver are moulded as one piece and cannot be separated. A passive radiator is a diaphragm with no voice coil and no magnetic circuit, driven by air pressure in the cavity to boost bass. Its surround ageing, mass change, loose fitting, or imbalance with the active driver all cause low-frequency distortion or loss. An aged, hardened surround raises its resonance frequency and reduces bass output; a cracked surround lets cavity air leak away and bass drops sharply. Typical symptoms are bass disappearing or becoming muddy, extra vibration at high volume, and distortion at a particular low frequency, while the active driver itself may still sound clear at low volume. Inspection starts by confirming whether the model has a passive radiator, using the service manual or the physical unit; if it cannot be verified, do not assume. Then check the passive radiator surround visually for cracks or detachment, and test with a low-frequency pure tone to see whether its movement is symmetrical. A damaged passive radiator generally means replacing the whole module.
Interface and Chip Layer: F10 Flex Cable Fault, F11 Headphone Jack Detection Error, F12 Codec and Amplifier Fault
Need a laptop repair expert?
Free diagnosis · Transparent pricing · No fix, no fee · 180-day warranty
The flex cable and connector are the last wired path from the mainboard to the speaker. Loosening, oxidation, breakage, or crushing can cause open circuit, intermittent contact, or rising contact resistance. A connector relies on the spring pressure of metal contacts to maintain contact; long-term vibration, thermal expansion and contraction, and damp oxidation can reduce contact pressure or raise contact resistance. Contacts are particularly vulnerable to humidity, temperature, and vibration. When ambient humidity is too high, water reacts with metal parts and causes corrosion, the insulation of electronic sockets falls, and conductivity rises; the higher the humidity, the greater the effect on connector contact life. Moisture ingress affects the insulation performance of electronic connectors and corrodes metal parts; the constant damp-heat test condition is 90% to 95% relative humidity at 40 degrees Celsius for at least 96 hours. When a connector works in an environment containing moisture and salt, the metal structural parts, contacts, and surface treatment layers can suffer electrochemical corrosion. A laptop speaker guide also notes that the fine wire connecting the mainboard and speaker can loosen after impact, hinge repair, or a previous repair, causing intermittent crackling or one-sided silence. Typical symptoms are intermittent silence, one-sided silence, sound coming and going when the chassis is tapped lightly or the screen is opened and closed, and low volume with noise; headphone output is normal. Inspection is by left-right swap: if the fault follows the flex cable or channel rather than the driver, it points to the flex cable or interface layer. After disassembly, check the connector for loosening, oxidation, or burn marks, and the flex cable for creases, pressure marks, or breakage. If only the connector is loose, reseating it and securing the wire may solve it. If the flex cable is internally broken or the connector is severely oxidised, the flex cable or speaker module must be replaced; in some models the flex cable and speaker module are one piece and must be replaced as a set. If the mainboard-side connector is damaged, it is mainboard-layer repair, subject to a written quotation after inspection. The HDA specification includes audio jack detection, sensing, and retasking. A laptop's 3.5mm headphone jack contains a mechanical or electronic detection switch; inserting headphones tells the codec to switch output from the speaker to the headphones, and removing them switches back to the speaker. If the detection switch jams because of dust, oxidation, or deformation, the system wrongly believes headphones are still inserted and keeps the speaker muted. The detection switch is a tiny mechanical contact or Hall sensor; long-term insertion and removal, dust accumulation, and damp oxidation can make its contact poor or jam it. Diagnostic documentation notes that if a beep is heard in pre-boot diagnostics, the speaker is working and connected, and the problem may be in the headphone jack detection circuit. Typical symptoms are a completely silent speaker with normal headphones, the system showing the output device as headphones even though they have been removed, and the speaker briefly recovering after inserting and removing headphones several times, then going silent again. Inspection is by checking whether Windows still shows headphones as the output device, inserting and removing headphones several times and watching the output switch, cleaning the jack with compressed air (by a technician, to avoid pushing dust deeper), and testing the speaker in pre-boot diagnostics. If it is only dust or slight oxidation, cleaning may restore it. If the detection switch is physically damaged, the headphone jack assembly or the related mainboard circuit must be replaced, subject to a written quotation after inspection. This is not a speaker driver fault; do not replace the speaker module before eliminating it. A codec or external amplifier output-stage fault can make one or both channels silent, distorted, very quiet, noisy, or carry DC offset that burns the speaker. Inside the codec are the DAC, ADC, mixer, amplifier, and EAPD control; a fault in any stage's power supply, clock, link, solder joint, or a moisture-shorted chip can make output abnormal. The HDA specification notes that the codec architecture is discoverable and contains multiple widgets; configuration must query each widget's function and build the path one by one, and EAPD must be set to enable the external speaker amplifier. If that signal fails to enable the amplifier, the speaker can be completely silent while headphones on another path still work. The DC offset and clipping mechanisms are described above and under F1; the key point is that DC offset is an amplifier-layer fault, but the victim is the speaker layer. Replacing only the speaker without handling the amplifier means the new speaker will burn out again. Typical symptoms are both channels silent or distorted at the same time, pointing to a shared upstream stage; one channel silent but the fault staying on the original channel after swapping speakers, pointing to that channel's amplifier output or flex cable; headphones also silent or distorted, pointing to the shared codec or driver part; and silence in pre-boot diagnostics too, pointing to the hardware layer rather than the Windows driver. Inspection is by headphone comparison, pre-boot diagnostics, left-right swap, and measuring the amplifier output for DC offset with an oscilloscope or multimeter — by a technician only. The specific safe threshold for DC offset differs by model; no generic figure could be verified, so none is listed. A codec or amplifier chip fault is mainboard chip-level repair, subject to a written quotation after inspection. The confirmed price for mainboard chip-level repair is HK$880 and up, but the speaker module itself is still priced by a written quotation after inspection; the two must not be confused.
| No. | Mechanism | Core physical process | Most visible symptom | Priority test |
|---|---|---|---|---|
| F1 | Voice coil overheating burnout | Insulation melts, winding shorts or opens | Distortion at high volume, later total silence | Headphone comparison, left-right swap, resistance comparison |
| F2 | Voice coil and magnetic gap friction | Voice coil off-centre, former deformed, magnetic circuit shifted | Scraping sound even at low volume | Press the cone gently, left-right swap |
| F3 | Diaphragm cracking, ageing, deformation | Crack leaks air, rigidity and symmetry destroyed | Distortion, harsh treble, sound like torn paper | Visual inspection of diaphragm, pure tone test |
| F4 | Surround ageing | Hardening, cracking, powdering, detachment | Bass deteriorates first, flapping sound | Visual inspection of surround, low-frequency pure tone test |
| F5 | Spider ageing, loosening, breakage | Elasticity falls, voice coil goes off-centre | Friction at a certain travel position, weak bass control | Disassembly inspection of spider, press the cone |
| F6 | Magnet shift, cracking, demagnetisation | Magnetic field uneven or weaker | Sudden volume drop, distortion, friction | Disassembly inspection of magnet, swap with known-good unit |
| F7 | Tinsel lead and solder fatigue breakage | Bending fatigue, solder crack | Intermittent silence, sound comes and goes | Left-right swap, magnifier inspection of lead |
| F8 | Enclosure leakage, seal failure | Front and rear waves cancel each other | Bass disappears, low volume, leakage sound | Check sealing and rubber gaskets, swap with known-good module |
| F9 | Passive radiator ageing, imbalance | Surround ageing, displacement imbalance | Muddy bass, extra vibration at high volume | Confirm whether fitted, visual inspection of surround |
| F10 | Flex cable and connector fault | Loosening, oxidation, internal breakage, crushing | Intermittent silence, one-sided silence | Left-right swap, reseat, inspect flex cable |
| F11 | Headphone jack detection error | Detection switch jammed, system wrongly believes headphones are inserted | Speaker silent, headphones normal, system shows headphones | Insert and remove headphones, pre-boot diagnostics |
| F12 | Codec and amplifier fault | Output stage fault, DC offset, clipping | Both channels abnormal together, background noise, distortion | Headphone comparison, pre-boot diagnostics, measure output |
| F13 | Magnetic gap debris | Dust, metal filings, magnet fragments jam the voice coil | Sudden scraping, jamming at a certain travel point | Press the cone gently, magnifier inspection of gap |
4. Signal Chain Diagram and the Four Layers
The simplified signal chain from software to the user's ear is: application, Windows audio engine, audio driver, Intel HD Audio controller or Intel SST audio DSP, HDA link, Realtek codec DAC, amplifier output, mainboard speaker connector, flex cable or wire harness, speaker driver terminal, tinsel lead carrying current to the voice coil, voice coil moving in the magnetic gap, diaphragm moving back and forth, air vibration, and the sound the user hears. The headphone path is used for comparison: application, Windows audio engine, driver, Intel HDA or SST, Realtek codec DAC, headphone amplifier, headphone jack, headphones. The pre-boot diagnostics path is also used for comparison: the firmware diagnostic program drives the speaker directly to produce a beep, bypassing the Windows driver.
The value of pre-boot diagnostics is that it bypasses the Windows driver layer. If the speaker is also silent in pre-boot diagnostics, the problem is more likely in the hardware layer — speaker, flex cable, codec, or amplifier. If the speaker sounds normal in pre-boot diagnostics, the problem is more likely in the Windows driver or settings layer. Official diagnostic documentation states that the main audio function of pre-boot assessment is to tell the user whether the speaker works: if no beep is heard, the speaker is disconnected or faulty; if a beep is heard, the speaker is working and connected, and the problem may be in the headphone jack detection circuit. HP's hardware diagnostics (HP PC Hardware Diagnostics UEFI) also provides an audio test under Component Tests, testing each speaker one by one. The enclosure and resonance chamber are not in series in the electrical signal chain; they sit in parallel at the acoustic layer. Sound waves in front of the diaphragm travel directly to the user, while waves behind the diaphragm enter the enclosure cavity. The enclosure's sealing, volume, and passive radiator determine how the rear waves are absorbed or used, which affects bass and overall volume. When the enclosure leaks, the electrical signal chain is completely normal but the sound is still poor — a common cause of "electrical tests normal but sound poor".
| Layer | Includes | Typical faults | Elimination tools |
|---|---|---|---|
| L1 Speaker driver layer | Voice coil, diaphragm, surround, spider, magnet, tinsel lead, magnetic gap | Burnout, friction, cracking, ageing, shift, broken wire, debris | Left-right swap, press cone gently, visual inspection, resistance comparison |
| L2 Flex cable and interface layer | Flex cable, connector, routing, headphone jack detection | Loosening, oxidation, internal breakage, misjudgement | Left-right swap, reseat, insert and remove headphones, open-close test |
| L3 Codec chip layer | Realtek codec, amplifier, EAPD, HDA and SST controller | Silence, one-channel failure, DC offset, background noise | Headphone comparison, pre-boot diagnostics, oscilloscope, multimeter measurement |
| L4 Software and driver layer, comparison only | Windows audio engine, driver, audio enhancement, output device setting, volume mixer | Wrong output device, driver conflict, distortion from audio enhancement | Turn off audio enhancement, change default format, reinstall manufacturer driver, pre-boot diagnostics comparison |
5. Layered Elimination: From Outside In, One Factor at a Time
Step 0: Record the symptoms; do not skip this. Record when it started, whether it was sudden, whether it relates to a drop, liquid, update, or repair, which side, what kind of sound — distortion, silence, noise, vibration, low volume, intermittent, bass loss — and at what volume and frequency it appears. A sudden one-sided silence and a gradual distortion point to different mechanisms. Record what you observe; do not press the speaker area hard or shake the machine repeatedly to "test it properly", as this can further damage a loose connector.
Step 1: Software comparison — quick elimination, not the main focus. Confirm the output device is set to the built-in speaker, not a Bluetooth headset, HDMI display, or external speaker. Confirm that neither the system nor the application is muted, and that each application's volume in the volume mixer is normal. Turn off audio enhancements and test with the same audio clip; official troubleshooting guidance notes that audio enhancements can cause distortion or crackling on some devices, and turning them off is an officially recommended test step. Try a different default format and test again. Check Device Manager for yellow warnings, especially whether the Intel SST device shows a Code 10 error. If a driver problem is suspected, reinstall using the model-specific audio package from the manufacturer's support page, not only the generic driver from Windows Update.
Step 2: Headphone output comparison — the dividing line. Insert wired headphones and play the same audio clip. If the headphones are clear but the speaker distorts or is silent, the problem is in the speaker layer or the flex cable and interface layer, or headphone jack detection is misjudging; the shared driver and codec parts are basically normal. One guide states explicitly that if headphone sound is clear but the speaker is not, the fault is most likely in the speaker itself. If the headphones also distort or are silent, the problem is in the shared codec or driver part, or the amplifier output is abnormal; pre-boot diagnostics are needed to separate the chip layer from the driver layer. If the headphones are normal but the speaker stays silent after removing them, suspect a jammed headphone jack detection switch.
Step 3: External speaker comparison — complementary to the headphone comparison. Play the same audio clip through a Bluetooth or USB external speaker. If the external speaker is normal but the built-in speaker is abnormal, this further confirms the problem is in the built-in speaker path. If the external speaker is also abnormal, it points to the system audio engine or driver layer. Note that a Bluetooth external speaker takes another audio path — the Bluetooth codec — and cannot be treated as identical to the wired headphone comparison; record both comparisons together.
Step 4: Mono test and left-right balance test. In Windows audio settings, switch output to mono and test the left and right channels separately. Use the left-right balance slider to push sound fully to the left channel, then fully to the right, and record which side is abnormal. If only one side is abnormal, it points to that side's speaker driver, flex cable, or that channel's amplifier output; a left-right swap is needed to separate them. If both sides are abnormal at the same time, it points to a shared upstream stage — codec, amplifier, driver, or shared enclosure part — or both drivers ageing at once, which is less common and must be verified by swapping.
Step 5: Pre-boot diagnostics — the dividing line between the chip layer and the driver layer. Dell: press F12 at startup to enter the one-time boot menu, choose Diagnostics, and run the audio test in the pre-boot system assessment; official diagnostic documentation states that the pre-boot assessment audio test can tell whether the speaker works without relying on the Windows driver. HP: after shutting down, press Esc then F2 to enter hardware diagnostics, choose Audio under Component Tests, and test each speaker one by one. Lenovo tests audio through the Lenovo Vantage hardware scan, or by pressing F10 (Think series) or F11 (Idea series) at startup to enter UEFI Diagnostics; the audio playback test plays audio patterns and asks whether the user can hear them. If the speaker sounds normal in pre-boot diagnostics, the problem is more likely in the Windows driver or settings layer. If it is also abnormal, the problem is more likely in the hardware layer and disassembly inspection is needed.
Step 6: Left-right channel swap — disassembly required, by a technician only. After disassembly, swap the left and right speaker flex cables — the left driver to the right channel connector and the right driver to the left — and test again. If the fault follows the driver, so that distortion originally on the left now appears on the right, the fault is in the speaker driver itself and that side's module must be replaced. If the fault stays on the original channel, the fault is in the flex cable, connector, or that channel's amplifier output, and the speaker driver itself is innocent. Notes: in some models the left and right speakers share one flex cable or one connector and cannot be swapped separately; in some models the left and right drivers are a single integrated module that must be replaced as a set. Before swapping, confirm whether the model's service manual allows it. The swap test must be done after disconnecting power; incorrect operation can damage the mainboard or the speaker.
Step 7: Disassembly visual inspection and measurement — the confirmation layer. Check the diaphragm for cracks, holes, or deformation; the surround for cracks, powdering, or detachment; the dust cap for dents. Press the cone gently and listen for scraping. Check the flex cable for creases, pressure marks, or breakage; the connector for loosening, oxidation, or burn marks. Check the enclosure shell for cracks, sealant for detachment, and rubber gaskets for deformation or loss. Measure the DC resistance of the left and right speakers with a multimeter and compare them; an open circuit or a clearly low resistance points to voice coil burnout or a short circuit. Normal resistance differs by model and no generic figure could be verified, so comparison must be against a known-good unit of the same model. Check the magnetic gap for debris, and the magnet for shift or cracking.
Step 8: Decide the repair direction. If the speaker driver is confirmed faulty, replace the speaker module, priced by a written quotation after inspection. If the flex cable or interface is confirmed faulty, reseat, replace the flex cable, or replace the module, depending on whether the flex cable is integrated with the module, priced by a written quotation after inspection. If the codec or amplifier is confirmed faulty, it is mainboard chip-level repair, subject to a written quotation after inspection; the confirmed price for mainboard chip-level repair is HK$880 and up, but the speaker module itself is still priced by a written quotation after inspection. If the software or driver is confirmed faulty, reinstall the manufacturer audio package, turn off audio enhancements, and correct the output settings.
| Step | Test | What passing means | What failing means |
|---|---|---|---|
| Step 0 | Record symptoms | A complete timeline and trigger conditions for comparison with mechanisms | No record, so every later step lacks a baseline |
| Step 1 | Software comparison | A settings or driver problem, restored after correction | Move to Step 2 |
| Step 2 | Headphone comparison | Clear headphones point to the speaker or flex cable layer; abnormal headphones point to the shared upstream stage | Abnormal headphones: move to Step 5 to separate chip from driver |
| Step 3 | External speaker comparison | Normal external speaker points to the built-in speaker path | Abnormal external speaker points to the system audio engine or driver layer |
| Step 4 | Mono and balance test | One-sided abnormality points to that side's path; both sides point to a shared upstream stage | Move to Step 6 to swap |
| Step 5 | Pre-boot diagnostics | Normal points to the Windows layer; abnormal points to the hardware layer | Hardware layer: move to the disassembly layer |
| Step 6 | Left-right swap | Fault following the driver means driver failure; fault staying on the channel means flex cable or amplifier | Disassembly required, by a technician only |
| Step 7 | Disassembly visual inspection and measurement | Visible damage or abnormal resistance confirms the fault | No visible damage: a substitution test is needed |
| Step 8 | Decide repair direction | Quote by layer, decide by written quotation after inspection | Ordering parts before confirmation wastes time and cost |
6. Symptom-to-Mechanism Reference Table
The table below is the core reference tool of this article. Each symptom lists the most likely physical causes in order of likelihood, with the next elimination step. "Most likely" does not mean "certain"; the actual unit must be verified layer by layer using the previous section's procedure.
| Symptom | Most likely physical causes, in order of likelihood | Elimination step |
|---|---|---|
| Distortion, noise at any volume, coarse sound | Voice coil friction, diaphragm cracking, surround ageing, amplifier clipping or distortion, magnetic gap debris | Headphone comparison; press cone gently to listen for scraping; visual inspection of diaphragm and surround after disassembly; left-right swap |
| Distortion only at high volume | Early voice coil overheating, surround ageing, enclosure leakage, amplifier clipping | Test at medium volume; turn off audio enhancement and bass boost; check enclosure sealing and rubber gaskets; left-right swap |
| One-sided silence | Flex cable loosened or internally broken, voice coil burned open, tinsel lead broken, that channel's amplifier output fault, balance setting error | Check balance setting, headphone comparison, mono test, left-right swap |
| Both sides silent, headphones also silent | Driver or output setting, shared codec or amplifier fault | Pre-boot diagnostics: normal points to the driver layer; also silent points to the chip hardware layer |
| Both sides silent, headphones normal | Headphone jack detection jammed, speaker amplifier or EAPD not enabled, speaker connector loosened | Insert and remove headphones several times and watch the switch; pre-boot diagnostics; disassembly inspection of speaker connector |
| Noise or background hiss, continuous even with nothing playing | Codec or amplifier background noise, power supply interference, connector oxidation, rising contact resistance, noise introduced by driver or audio enhancement | Turn off audio enhancement; headphone comparison; check connector oxidation |
| Vibration noise, chassis vibration or resonance at a specific frequency | Enclosure loosened, sealant detached, rubber gasket missing, voice coil friction, loose screw or fragment resonating inside the chassis, passive radiator loosened | Pure tone test at different frequencies; press the chassis or speaker area lightly; disassembly inspection of enclosure, rubber gaskets, and foreign objects |
| Low volume, both sides at once | Magnet demagnetisation or shift, amplifier output drop, rising contact resistance, enclosure leakage, volume setting or audio enhancement | Headphone comparison; left-right swap; check connector oxidation; check enclosure sealing |
| Low volume, one side only | Voice coil inter-turn short circuit, that side's flex cable poor contact, that channel's amplifier output drop, balance setting offset | Check balance setting; left-right swap; measure and compare left and right speaker resistance |
| Intermittent silence, sound comes and goes | Flex cable loosened or internally broken, tinsel lead fatigue breakage, intermittent headphone jack detection error, codec solder joint cold joint | Tap the chassis lightly or open and close the screen; insert and remove headphones; left-right swap; disassembly inspection of flex cable and solder joints |
| Bass disappears, treble normal, sound becomes thin | Enclosure leakage, seal failure, passive radiator ageing or breakage, surround ageing, bass boost turned off or driver setting changed | Compare with bass boost on and off; check enclosure sealing and rubber gaskets; check passive radiator; low-frequency pure tone test |
| Harsh or sharp treble | Diaphragm cracking or deformation, surround hardening, audio enhancement setting wrong | Turn off audio enhancement; headphone comparison; visual inspection of diaphragm and surround after disassembly |
| A pop at startup, then silence | Amplifier DC surge at startup, voice coil already burned and the startup surge opens it completely, connector intermittent contact | Stop using it immediately and send it for inspection; do not repeatedly power on to test; pre-boot diagnostics; disassembly inspection of voice coil and amplifier output |
| Burning smell or abnormal chassis heat with silence | Voice coil burnout, amplifier or codec short circuit | Stop using it immediately and send it for inspection; do not continue powering on or testing at high volume |
7. Software Elimination Checklist
How to use it: work from top to bottom in the order shown, test once after each item, and stop as soon as there is sound. Do not change all the settings at once. Understand both what each item can eliminate and what it cannot; looking at only the first half creates new misdiagnoses. Official documentation explicitly requires working step by step, testing after each step, and stopping once the problem is solved. If the driver, settings, enhancement effects, and firmware are all changed at once, even if sound returns, nobody will know which step was the real cause, and the next failure will have to be guessed from scratch.
| No. | Item | Method (Windows 11 mainly; location varies by version) | What it can eliminate | What it cannot eliminate |
|---|---|---|---|---|
| E1 | Output device, default device | Settings, System, Sound, Output: select the built-in speaker; first remove HDMI, dock, and USB audio devices, and disconnect Bluetooth audio devices | Wrong output device; sound sent to a screen or Bluetooth device with no speaker | Speaker driver, flex cable, amplifier, or chip fault; jammed jack sensor |
| E2 | Volume, mute | Taskbar speaker icon, volume slider, keyboard mute key, physical mute switch if present | Muting, volume too low | Any hardware fault; an individual app muted |
| E3 | Volume mixer | Settings, System, Sound, Volume mixer: check the system and each app's volume and output device | An individual app muted or turned down; wrong app output device | Speaker hardware fault; driver problem |
| E4 | Left-right balance | Settings, System, Sound, select the output device, Output settings: set Left and Right to the same value, usually 100; confirm mono audio is off | One-sided silence caused by balance pushed to one side; mono masking a one-sided problem | One-sided driver or flex cable fault; driver channel mapping error |
| E5 | Audio enhancement switch | Settings, System, Sound, select the output device: set Audio enhancements to Off; also check the manufacturer's enhancement software profile | Distortion or popping from Windows or manufacturer enhancement | Diaphragm tearing or voice coil problems; distortion already present at low volume |
| E6 | Windows audio troubleshooter | Get Help app, search for the audio troubleshooter; or Settings, System, Troubleshoot, Other troubleshooters, Audio, Run | Common setting errors, disabled devices, and driver errors the troubleshooter can detect and fix | Hardware faults; driver incompatibility the troubleshooter cannot detect; firmware-layer problems |
| E7 | Driver version, manufacturer driver first | Download the matching audio driver package from the laptop manufacturer's support page; Device Manager, Sound: uninstall the old driver, restart, install the manufacturer driver, restart again; check the Intel SST device for Code 10 | Damaged driver, incompatible version, Windows Update replacing the manufacturer driver; known incompatibility of problem SST driver versions | Speaker driver, flex cable, amplifier, or chip hardware fault; audio disabled in firmware; amplifier unsupported in Linux |
| E8 | Driver rollback | Device Manager, audio device, Driver, Roll Back Driver, if available | A driver problem that appeared only after an update | A hardware fault already present before the update |
| E9 | Audio service restart | Services, Windows Audio and Windows Audio Endpoint Builder: confirm they are running, restart if needed | Silence caused by a stopped or stuck audio service | Driver, settings, or hardware faults |
| E10 | Default audio format | Output device properties, Advanced, Default Format: try the system-recommended format, for example 2-channel, 16-bit, 48000 Hz; actual options differ by device | Distortion or silence from an unsupported or incorrect audio format | Speaker driver, flex cable, or chip fault; driver incompatibility |
| E11 | Firmware audio switch | Restart into firmware and check that onboard audio or HD Audio Controller is Enabled; check audio options only | Audio disabled in firmware causing the device to disappear completely | One-sided distortion, intermittent problems that change with movement, speaker driver faults |
| E12 | Dell pre-boot diagnostics (ePSA / SupportAssist On-board Diagnostics) | Press F12 at startup and choose Diagnostics; or Fn plus the power button; on the main screen choose the quick audio check and listen for the beep | Tests the speaker before Windows and the driver load: a beep means the speaker is connected and can sound, pointing to the Windows layer; no beep means the speaker is disconnected or faulty | Intermittent contact that happens to be good at test time; headphone jack detection circuit fault |
| E13 | Lenovo UEFI Diagnostics / Vantage hardware scan | Press F10 (Think series) or F11 (Idea series) at startup to enter UEFI Diagnostics; or open Lenovo Vantage in Windows, Device, Hardware scan; the diagnostics include an audio playback test that plays audio patterns and asks whether the user can hear them | Can identify hardware problems even when the OS cannot sign in or connect; the audio playback test separates hardware from Windows problems | A passed test does not mean Windows is necessarily normal; some models' firmware diagnostics may not include an audio test — check that model's manual |
| E14 | HP UEFI audio test (HP PC Hardware Diagnostics UEFI) | After shutdown, press Esc repeatedly at startup, then F2; choose Component Tests, Audio, Run Once, select Speakers, listen to the musical notes and enter how many were heard; the test takes about one minute | Tests audio hardware outside the OS: passing points more to a software problem; failing gives a Failure ID for contacting support | A passed test does not mean Windows is necessarily normal; older diagnostics may not have an audio test; the test cannot cover intermittent problems |
| E15 | Linux Live USB comparison test | Boot from a mainstream distribution's Live USB without installing, confirm volume is not muted and the output device is the built-in speaker, test headphones for comparison, then test the built-in speaker | A Windows driver or settings problem, when sound works in the live environment but not in Windows | Some models' amplifiers have no driver support in Linux (for example, the Samsung Galaxy Book4 Pro's MAX98390 amplifier, completely silent in Linux while the hardware itself is fine); setting errors in the live environment itself |
| E16 | Windows Update and manufacturer driver update check | Settings, Windows Update: install pending updates and restart; then check the manufacturer's support page for audio, chipset, and firmware updates | Known driver fixes distributed through Windows Update | New incompatibility introduced by an update; hardware faults; a safeguard hold not yet lifted after updating |
8. Common Misdiagnoses and Traps
Each trap below is written with conditional language — "points more to", "still needs elimination", "cannot be concluded from this alone". Absolute language such as "that means the speaker is broken" or "reinstalling the driver will definitely fix it" is exactly what this section dismantles, and the writing team must not present a trap as a conclusion.
| No. | Misdiagnosis | Surface symptom | Real cause | How to tell them apart |
|---|---|---|---|---|
| M1 | Treating it as a driver problem | Built-in speaker silent or distorted; the first driver reinstall does not help, so the user reinstalls again, tries another version, or runs a third-party driver tool repeatedly | Drivers are genuinely a common cause, but reinstalling the same driver repeatedly will not restore a damaged speaker driver or flex cable | There is a stopping point: follow the official sequence once with the manufacturer driver, confirm in Device Manager that the device appears with no yellow warning, and if the symptom is completely unchanged, stop repeating the same action and move to pre-boot diagnostics and the Linux comparison test |
| M2 | Treating it as a system setting | Total silence, sound from one side only, or only one app silent | Wrong output device, muting, left-right balance pushed to one side, mono audio on | First remove HDMI, dock, and USB audio devices and disconnect Bluetooth audio devices, then retest; set left-right balance to the same value; confirm mono audio is off |
| M3 | Treating it as a Windows update problem | Sound stops after a Windows update, or does not recover after updating | An update can expose an existing driver incompatibility, replace the manufacturer driver with a generic one, or coincide with a hardware failure purely by chance | Understand safeguard holds correctly; rolling back an update is not a cure-all — rolling back the driver or reinstalling the manufacturer driver is more targeted than uninstalling the whole Windows update; the USB audio known issue affects USB audio devices, not the built-in codec chip |
| M4 | One-sided speaker silence versus codec chip failure | Only the left or only the right speaker is silent or distorted; the other side is completely normal | A one-sided problem narrows the range to that side's driver, flex cable, or grille blockage, but driver channel mapping errors or enhancement software channel processing errors can also cause one-sided symptoms in software | First eliminate the balance setting; use the same audio clip to test built-in left, built-in right, headphone left, and headphone right, and record all four results |
| M5 | Headphones work, so the speaker must be broken | Wired headphones have sound but the built-in speaker is silent, so the user concludes the speaker is broken and must be replaced | Headphones working proves the audio service, driver, and application layers are broadly normal and narrows the problem to the path from the driver to the built-in speaker — but at least four possibilities sit in between | The built-in speaker may be disabled in the system; the headphone jack sensor may be jammed; a driver or settings problem may affect only the built-in endpoint; or the fault may be in the flex cable, connector, or amplifier stage |
| M6 | Distortion misjudged as software audio enhancement | Distortion, harshness, crackling, or popping, especially with bass or at high volume | Audio enhancement can genuinely cause distortion, but a reasonable first step is not the only explanation | Compare after turning enhancement off: if distortion disappears completely, it points more to the enhancement setting; if distortion is completely unchanged, especially at low volume, suspect physical speaker driver damage more strongly; do not test with high volume to "check properly" |
| M7 | Firmware audio setting | The audio device does not appear in Windows at all, or sound suddenly stops after a firmware update | The built-in speaker must be enabled in firmware settings; updating firmware and chipset drivers is listed as the step after the audio driver | If the device does not appear in Device Manager or Sound settings at all, if the problem started after a firmware update, or if someone changed firmware settings, checking the audio options is reasonable; normal headphones, one-sided speaker distortion, or symptoms that change when pressed cannot be explained by a firmware setting |
| M8 | Dual-boot and Linux comparison test, meaning and limits | "Try a Linux Live USB: sound means a Windows problem, silence means broken hardware" | The logic of the Linux comparison is to swap in a completely different driver and audio server stack — but there is a verified example: the Samsung Galaxy Book4 Pro uses a Realtek ALC298 codec with a MAX98390 smart amplifier, the Linux kernel correctly detects the codec but never initialises the MAX98390 amplifier, so the built-in speaker is completely silent in every distribution and kernel version while the headphone jack works normally | Silence in Linux does not mean broken hardware; it can simply mean Linux lacks a driver for that model's amplifier; firmware diagnostics are more direct than the Linux comparison and should be done first |
| M9 | Sound missing in only one app means the speaker is broken | One video platform is silent but local videos have sound; or a meeting app is silent but the music player has sound | Windows volume mixer can set volume and output device independently for each app, and individual apps have their own speaker selection | Test with at least two different apps and the same audio clip; if only one app is silent, the problem points more to that app's settings or permissions than to speaker hardware |
| M10 | Confusing volume mixer, system volume, and app volume | System notification sounds work but videos are silent, or the reverse | Windows has two layers, system volume and per-app volume; the System entry and individual apps in the volume mixer are separate | Check each entry in the volume mixer one by one |
| M11 | Bluetooth, HDMI, or a dock stealing the output | The built-in speaker is silent although nothing is connected, or stays silent after removing a screen | Each time Windows connects a new audio device — Bluetooth headphones, HDMI screen, USB dock — it may automatically switch the default output, and may not switch back to the built-in speaker after the device is removed | Before testing the built-in speaker, disconnect all Bluetooth audio devices, remove the HDMI cable, USB audio devices, and dock, then manually set the built-in speaker as the default output in Sound settings and test again |
| M12 | Headphone jack sensor jammed | No headphones are inserted, yet Windows shows headphones as connected and the built-in speaker is silent; or the speaker intermittently recovers after inserting and removing headphones | The symptom is directly tied to inserting and removing headphones; in one reported case, slowly removing the headphone plug restored the built-in speaker because the sensor was jammed | Clean the jack gently with compressed air — do not poke a hard object into it — then insert and remove headphones once and test; if the jack is visibly physically damaged or loose, it is a jack hardware problem and should be sent for inspection rather than repeatedly inserted and removed |
| M13 | Reinstalling the system or restoring factory settings will definitely separate software from hardware | "If there is still no sound after reinstalling Windows, it must be broken hardware" | The official documentation's actual logic is the reverse: if hardware diagnostic tests pass and the problem remains after a reset, it points more to a deeper software conflict — not that silence after reinstalling means broken hardware | Reinstalling the system can only eliminate software problems inside the current Windows installation; it cannot eliminate a manufacturer driver incompatible with that Windows version, a firmware setting problem, or a conflict between brand enhancement software and antivirus software; pre-boot diagnostics must be done before reinstalling |
| M14 | Intermittent or movement-dependent symptoms misjudged as unstable drivers; liquid or drop damage still treated as a software problem | Sound comes and goes; moving, shaking, or lightly touching the speaker area, or opening and closing the screen, changes the sound; or the machine was exposed to liquid or dropped and speaker problems appeared afterwards | Symptoms that change with movement point more to a loose flex cable or intermittent solder joint or connector contact than to a driver problem, which is usually constant silence or silence immediately after an update; after liquid exposure, muffled or crackling sound, or residue, rust colour, or green-blue deposits near the grille or ports, should raise liquid corrosion as a suspect; corrosion can keep spreading even after the surface looks dry, and problems may appear days after the liquid exposure | Record what is observed; do not press the speaker area hard or shake the machine repeatedly to "test it properly"; send it for inspection promptly, and record the time and circumstances of the liquid or drop exposure and any accompanying symptoms |
Driver Stopping Point and Version Numbers, Stated Precisely
The driver direction has a stopping point: follow the official sequence once — download the matching driver from the manufacturer's website, uninstall the old driver, restart, install the manufacturer driver, restart again — and confirm in Device Manager that the device appears with no yellow warning. If the symptom is completely unchanged, stop repeating the same action and move to pre-boot diagnostics and the Linux comparison test. Reinstalling the same driver repeatedly will not restore a damaged speaker driver or flex cable. Distinguish "driver cannot be installed" from "driver installed but no sound": the former — Device Manager showing Code 10, the device not appearing, or "No audio output device is installed" — points more to the driver or system layer; the latter — the driver loads normally, the volume meter moves, but the speaker is completely silent or distorted on one side only — points more to the speaker path. Driver sources must be distinguished: official documentation requires installing the latest driver from the device manufacturer's website. A generic driver automatically distributed by Windows Update, or a version distributed by a third-party driver tool, may not include the enhancement software or settings the model needs; having a driver installed is not the same as having the right driver installed. Verified driver version examples include Intel SST driver versions 10.29.0.5152 and 10.30.0.5152, which could cause blue screens on 11th-generation Intel Core platforms; Microsoft therefore paused delivery of Windows 11 24H2 to affected computers, and the fixed driver versions are 10.29.00.5714 and 10.30.00.5714 or newer, after which the hold was lifted. Another example is Dirac Audio's cridspapo.dll component, which caused some computers to lose sound completely after upgrading; Microsoft applied safeguard hold ID 54283088 until the manufacturer distributed a fixed driver through Windows Update. These examples show two things: audio driver problems can genuinely make Microsoft block an update, and the fix often arrives as a driver distributed through Windows Update rather than simply waiting for the next major Windows update. The USB audio known issue after updating must be discussed separately: search results show that Microsoft's Windows 11 26H2 known issues list included some USB Audio Class 1.0 devices possibly showing Code 10 and no sound, with status mitigated and a full fix planned for a later Windows update. This problem affects USB audio devices, not the built-in Realtek chip; it must not be written as a built-in speaker problem, or vice versa. That source also noted that Microsoft's 26H2 known issues list at the time did not list a Realtek problem. "Not listed" does not mean "no problem"; write only that the list at the time listed only the USB audio problem, and do not infer that Realtek definitely has no problem.
9. The Hong Kong Context: Why It Happens More Easily Here
9.1 Humidity: Hong Kong's Long-Term Background Factor
Hong Kong Observatory climate data shows that Hong Kong's mean annual relative humidity for 1991–2020 was 78%, with mean annual rainfall of 2,431.2 mm; compared with 1981–2010, the change in mean annual relative humidity was not statistically significant. Another Observatory monthly dataset for 1971–2000 also shows mean annual relative humidity of 78%. In other words, Hong Kong is in a high-humidity environment over the long term; a laptop speaker module is exposed to damp air daily, not occasionally. Humidity affects the speaker module in several ways. A paper diaphragm absorbs moisture, softens, loses strength, and deforms and breaks more easily. Foam and rubber surrounds age faster under humidity and temperature cycling, hardening, becoming brittle, and cracking. Moisture in the air reacts with metal parts and causes corrosion, lowering insulation and raising conductivity; the higher the humidity, the greater the effect on connector contact life. Moisture ingress affects the insulation performance of electronic connectors and corrodes metal parts; the constant damp-heat test condition is 90% to 95% relative humidity at 40 degrees Celsius for at least 96 hours. For a laptop, the speaker connector, flex cable terminals, and headphone jack detection contacts are all such weak points; an oxide layer raises contact resistance, making volume quieter, adding noise, or causing intermittent silence. If a neodymium magnet's surface coating is damaged, a damp environment can corrode it and reduce its magnetism; the glue holding a magnet can also age in damp conditions, raising the risk of magnet shift. Damp can also make the mainboard audio circuit damp, causing intermittent codec or amplifier faults; such faults appear more easily during humid spring weather or the rainy season, may briefly recover when dry, but accumulate damage with repeated damp exposure. A practical reminder: humidity-caused faults are often gradual; a user may first notice quieter volume or intermittent noise, and only weeks later one-sided silence. When repairing, besides replacing the damaged module, check connectors for oxidation and the chassis interior for water marks or corrosion, and remind the user not to keep the laptop in a damp environment or by a window for long periods. In tropical climates, mean relative humidity often exceeds 70%, and moisture can seep into circuits, corrode components, and cause short circuits; another source notes that above 60% relative humidity, moisture starts to accumulate on surfaces, and indoor humidity should ideally be kept at 40% to 50%. These figures are the recommendation ranges of those sources and must be cited as such; they must not be presented as an official standard of the Hong Kong Observatory or a manufacturer. The specific recommendations below are collated suggestions, not source text: avoid storing the laptop for long periods in a damp, unventilated place; if indoor humidity stays high, consider using a dehumidifier and monitoring it with a hygrometer; avoid placing drinks near the laptop; if liquid has been spilled, send it for inspection promptly rather than treating it as a driver problem; clean speaker grille dust and debris regularly, gently with a soft brush or compressed air, and never poke a hard object into the grille or jack.
9.2 Commuting Vibration and Drops: Everyday Mechanical Stress in Hong Kong
Hong Kong users often carry their laptops with them, riding the MTR, buses, and minibuses and experiencing continuous slight vibration, plus moving between coffee shops, libraries, and offices, so drops, bumps, and squeezing are far more likely than for a computer that stays on a desk. Commuting vibration and drops affect the speaker module in several ways: magnet shift, where a drop loosens the bond between the magnet and the front or back plate, the magnet shifts by a fraction of a millimetre, the gap narrows, and the voice coil rubs immediately; flex cable loosening, where a drop or vibration leaves the speaker connector half-detached, causing intermittent or one-sided silence; voice coil former deformation, where a severe impact deforms or misaligns the former; diaphragm cracking, where a drop deforms the chassis, squeezing the diaphragm or letting a sharp object pierce it; enclosure seal failure, where a drop cracks the enclosure shell or dislodges a rubber gasket and bass disappears; and cold solder joints, where long-term vibration cracks codec or amplifier solder joints, causing intermittent faults that may briefly recover or disappear when the chassis is tapped lightly — an important diagnostic clue. A practical reminder: if the user says the fault appeared suddenly after a drop, suspect the mechanical layer first, not the driver layer; if it appeared gradually after long-term commuting use, consider both vibration fatigue and ageing. Commuting protection suggestions: use a cushioned laptop bag; avoid putting the laptop in the same compartment as heavy objects; do not open and close the screen forcefully; avoid playing audio at maximum volume for long periods on public transport; if distortion has already appeared, lower the volume and send the unit for inspection promptly rather than testing it at high volume; on rainy commutes, make sure the laptop bag is waterproof; if the laptop has been rained on, switch it off first, wipe the surface dry, and send it for inspection promptly to check for liquid ingress.
9.3 Local Parts Reality: Genuine Modules, Third-Party Parts, Used Parts, and Waiting Times
This research could not verify the stock, price, or waiting time of any specific model's speaker module; the following is general mechanism-level information, and the actual unit must be priced by a written quotation after inspection and the supplier's reply. Genuine modules have the advantage that size, impedance, and enclosure matching follow the original design, so sound is closest to factory condition; the disadvantage is that some older models may have been discontinued and require ordering, with waiting times differing by model — no specific waiting time could be verified. Third-party modules may differ slightly in size and wiring from the genuine part, and sound may differ; repair must confirm that size, screw hole positions, connector, and flex cable length match the original unit, or the module may fit unstably, leak, or make poor contact. Used parts are speaker modules removed from another laptop of the same model; their advantage is genuine matching, but their disadvantage is their own degree of ageing — the surround, voice coil, and magnet have already been used for some time — and their condition must be verified with the same inspection methods (pressing the cone gently, visual inspection of the surround, resistance comparison). Never assume a used part is necessarily good. Some models have left and right speakers as a single integrated module, so if one fails the whole set must be replaced; some models share one module between the speaker and the antenna; some models have the flex cable integrated with the speaker module so the flex cable cannot be replaced separately. Before repair, confirm the module structure against that model's service manual, or the repair scope may be misjudged. Module waiting times differ by brand, model, and supplier; this report gives no waiting-time promise. A practical reminder: confirm by left-right swap that the fault is in the speaker driver itself before ordering a speaker module; if the fault is in the flex cable or amplifier layer, ordering a speaker module will not solve the problem and will waste time and cost.
| Hong Kong factor | Affected layer | Mechanism | What the reader can do |
|---|---|---|---|
| Mean annual relative humidity 78% | Diaphragm, surround, interface, magnet, mainboard | Damp softening, faster ageing, oxidation, corrosion, rising contact resistance | Avoid long-term damp or window-side placement; clean grille dust regularly; send for inspection promptly after liquid spills |
| Air-conditioned rooms alternating with hot, humid outdoors | Diaphragm, interface, mainboard | Rapid temperature change causing condensation, water droplets forming a leakage path | Avoid high-volume testing immediately after a rapid temperature change; note whether it improves after drying |
| Commuting vibration | Magnet, flex cable, solder joints | Bond loosening, connector half-detached, solder joint cracking | Use a cushioned laptop bag; avoid the same compartment as heavy objects; avoid forceful opening and closing |
| Drops and squeezing | Diaphragm, voice coil former, magnet, enclosure | Former deformation, magnet shift, diaphragm cracking, enclosure shell cracking | If symptoms appear suddenly after a drop, suspect the mechanical layer first and send for inspection promptly |
| Parts coded by model number | Module, flex cable | Different brands and models are not interchangeable; some older models may be discontinued | Provide the full model number when sending for inspection; consider an external speaker while waiting for parts |
| Waiting time differs by model | Module, flex cable | Uncommon or older models may require ordering | Ask the inspector about parts availability and expected waiting time for that model, and record it on the quotation |
10. Repair, Replace, Go External, or Replace the Machine: A Decision Framework
On price reality: this report gives no figures for speaker-related repair prices; all are subject to a written quotation after inspection. The reason is that whether the speaker module needs a driver, flex cable, connector, or whole module replaced can only be known after disassembly inspection, and parts supply and structure differ greatly between brands and models, so advance estimates easily mislead. The confirmed prices that may be used as decision references for other items are limited to these four and must not be read as speaker prices: battery HK$580 and up, screen HK$1,280 and up, mainboard chip-level HK$880 and up, keyboard HK$480 and up. These four are listed so that when a machine has several problems at once, the user has a comparison baseline — for example, if the same machine needs a battery and speaker work, the two are on different price scales and should be considered separately, not by treating another item's price as a reference for speaker repair. A written quotation should list: the inspection result (which part is faulty), the repair plan (replace driver, flex cable, whole module, or mainboard-layer repair), the parts source where applicable, labour, and the quotation validity period. Repair should start only after the customer confirms the quotation.
| Option | Suitable situation | Risks and limits | Questions to ask when deciding |
|---|---|---|---|
| Repair: replace only the speaker driver, keeping the original module shell, flex cable, and connector | Inspection confirms only one or both drivers are damaged, for example diaphragm tearing or a voice coil problem, while the flex cable, connector, amplifier, and chip are normal; the machine's age is still acceptable and parts are available | If the flex cable or connector is also aged, replacing only the driver may fail again soon; in some models the driver is bonded to the module shell and is harder to replace, so the inspector must judge whether replacing the driver alone is suitable | Is the fault limited to the driver? Are the flex cable and connector also aged? Is there a driver part for the matching model? |
| Repair: replace the flex cable or re-solder the interface | Inspection confirms the fault is in a loose or broken flex cable or an intermittently contacting interface solder joint; symptoms change with movement, opening and closing, or pressing; a known-good speaker is still silent but the mainboard speaker contact has a signal | Re-soldering durability depends on the solder joint and mainboard condition; if the break is in a hard-to-replace section, the module may have to be replaced together; do not attempt disassembly and re-soldering yourself — the risk is high | Where exactly is the break or loosening? Are other solder joints also aged after re-soldering? Is replacing the flex cable more economical than replacing the whole module? |
| Replace the whole speaker module | Inspection confirms problems in both the driver and the flex cable or connector, or the driver and module structure are bonded and cannot be replaced separately; or the labour of replacing the driver alone is similar to replacing the whole module | The part model must match exactly; some older models have limited parts supply and may require waiting; after replacing the module, the left and right channels and audio enhancement settings must still be retested | Are module parts available? How long is the wait? Does module replacement include a left-right channel test? |
| External option: Bluetooth speaker, USB speaker, or USB audio device as a stopgap | Built-in speaker repair cannot proceed for now, for example waiting for parts, budget undecided, or the machine is about to be retired; the user mainly uses the laptop in a fixed location; or inspection confirms a mainboard audio-layer fault with high repair cost and the user wants to keep using the machine with an external option first | An external option cannot repair the built-in speaker; carrying an external speaker while commuting is inconvenient; Bluetooth audio may steal the output again and must be managed in settings; USB audio devices are also affected by the Windows Update USB audio known issue where applicable | Is the external option a short-term stopgap or a long-term replacement? Is the user's scenario a fixed location or frequent commuting? |
| Replace the machine | The machine is already old with several hardware items ageing at once; speaker module parts are no longer available; inspection confirms a mainboard audio-layer fault, and the mainboard repair cost plus other pending repairs is close to the replacement cost; or the user's work demands high audio quality and an external option is not acceptable | Replacing the machine involves data migration, software reinstallation, and settings transfer, so allow time; back up the old machine's data; do not decide to replace the machine immediately just because the speaker is silent — complete inspection and a written quotation first, then compare figures | Besides the speaker, does the machine have other pending repairs? What is the total of the written quotations for each item? What is the total replacement cost, including data migration time? |
Decision factors are machine age, parts supply, price reality, warranty status, usage scenario, and accompanying problems. A newer machine has higher remaining value from repair; an older machine with several ageing parts should have the speaker repair and other pending repairs totalled before comparing with replacement. Machine age alone is not the single deciding factor; it must be considered together with parts supply and overall condition. Some models have limited speaker module or flex cable supply and may require waiting; while waiting, an external option can be used as a stopgap. Parts supply must be checked at inspection time; this report could not verify waiting times for individual models. On price reality, use the written quotation's figures; speaker repair prices are always subject to a written quotation after inspection. Compare total repair cost with total replacement cost, including data migration time, not a single part price. On warranty status, if the machine is still within the manufacturer's warranty period, ask the manufacturer about warranty coverage before deciding on third-party repair; disassembling the machine yourself or having it repaired by a third party may affect the manufacturer's warranty, so understand the terms before deciding. This report gives no warranty day counts; the specific terms follow the manufacturer's documentation. On usage scenario, users who mainly work in a fixed location and do not demand much from audio will accept an external option more readily; users who commute frequently, attend meetings, or need the built-in speaker available immediately should prioritise repairing the built-in speaker. On accompanying problems, if the machine also has battery ageing, a screen problem, a keyboard problem, or other faults besides the speaker, total the written quotations for each item before deciding, to avoid repairing one item at a time while another fails next.
The reasonable local repair flow is: inspection, written quotation, customer confirmation, repair. Inspection means the inspector confirms the fault point — driver, flex cable, connector, amplifier, chip, or setting — using the logic above, rather than quoting immediately from the user's description. When sending the unit for inspection, bring the record checklist from the next section so the inspector can narrow the range without asking everything again. The written quotation should list the fault point, repair plan, parts, and labour. Speaker-related items are always subject to a written quotation after inspection. Repair starts only after the customer confirms the quotation. If inspection finds that the actual fault differs from the initial judgement, a new quotation should be issued and confirmed again rather than proceeding with the original quotation. After repair, verify as described above and record the left and right channels, different volumes, and different audio sources.
11. Worked Examples — All Are Teaching Scenarios, Not Real Cases
The four examples below are purely teaching scenarios, not real cases, and do not represent any real user or repair record. Example one, a teaching scenario, not a real case: a laptop used daily for commuting has a distorting left speaker and a normal right speaker; both headphone channels are clear; pre-boot diagnostics also show distortion on the left; the balance setting is already centred. Following the layered flow, the software layer is eliminated, the headphone comparison points to the speaker or flex cable layer, the abnormal pre-boot diagnostics point to the hardware layer, and after a left-right swap the distortion follows the left driver to the right side, confirming a left driver fault. The repair direction is to replace that side's module, priced by a written quotation after inspection. Example two, a teaching scenario, not a real case: after a Windows update, a laptop's speaker suddenly goes silent, and Device Manager shows the Intel SST device with Code 10 and driver version 10.29.0.5152. This combination points to the driver layer; the correct handling is to download the matching manufacturer audio driver from the manufacturer's website and update to the fixed version or newer, not to replace the speaker module. Example three, a teaching scenario, not a real case: a laptop's speaker is completely silent but the headphones are normal; the system shows the output device as headphones even though they have been removed; after inserting and removing headphones several times, the speaker briefly recovers and then goes silent again. This combination points to a jammed headphone jack sensor; the correct handling is to inspect and clean the jack and sensor, not to replace the speaker module. Example four, a teaching scenario, not a real case: a laptop has lost its bass while treble is normal; at low volume the sound is close to normal, at high volume there is a leakage sound, and headphone bass is normal. This combination points more to enclosure seal failure than to voice coil burnout; the correct handling is to inspect the enclosure sealing, rubber gaskets, and enclosure shell after disassembly, not to replace the driver directly.
12. What to Prepare Before Sending for Inspection, and Related Links
Before sending the unit for inspection, prepare the following so the inspector can narrow the range as quickly as possible: the full model number, including the model on the bottom of the machine; how the symptom appears, including which side is affected, what kind of sound, at what volume, and with which audio sources; the output device, which output device is currently selected, whether the built-in speaker has been set as the default, and whether HDMI, dock, and USB audio devices were removed and Bluetooth disconnected before testing; volume and mute status, including system volume, the keyboard mute key, and the physical mute switch if present; the volume mixer, including the system and each app's volume, and whether any app is muted; left-right balance, the left and right values, and whether mono audio is on or off; audio enhancement, whether Windows enhancement is on or off, the manufacturer's enhancement software profile name, and whether symptoms changed after turning enhancement off; the headphone comparison, the result of testing the same audio clip with wired headphones — normal, also silent, or also distorted — and whether the built-in speaker recovered after inserting and removing headphones; the Bluetooth, USB, and HDMI comparison, where sound went when a Bluetooth headset or speaker, USB headset, or HDMI screen was connected; the left-right channel test, the four results for built-in left, built-in right, headphone left, and headphone right; the distortion trigger conditions, at what volume distortion appears, whether it appears at high volume only or at low volume too, whether it appears with all audio sources or only one clip or app, and whether it changed after turning enhancement off; the driver record, whether the driver was updated, reinstalled, or rolled back, whether the driver source was the manufacturer's support page or Windows Update, whether Device Manager shows a yellow warning or Code 10, and the Intel SST device status where applicable; the troubleshooter record, whether the Get Help audio troubleshooter was run, what the result was, and whether it showed anything as fixed; the pre-boot diagnostics result, including brand, test name, whether sound was heard during the test, whether it was heard through the speaker or headphones, and the full Failure ID if one was given; the Linux Live USB result, if tested, including the distribution name and the built-in speaker and headphone test results; the firmware and update record, whether firmware settings were changed or firmware, Windows, or drivers were updated before the problem appeared, the date the problem first appeared, and whether it appeared suddenly or gradually worsened; the liquid, drop, and pressure history, whether there was a spill, liquid ingress, drop, impact, or heavy pressure, how long after the incident the speaker problem appeared, and any accompanying symptoms such as random shutdowns, screen flickering, abnormal keys, battery problems, or other port failures; and the machine's basic information, including brand and model, system version, and whether the speaker, hinge, or mainboard was repaired before. This information is not meant to let the reader confirm the diagnosis themselves; it lets the inspector start from the suspected layer without redoing elimination already done. Before any disassembly repair, remind the reader to back up important data.
For related links, readers can first look at Pricing and service scope to understand the service framework; prices are always subject to a written quotation after inspection. Readers who need to arrange an inspection can go to Inspection booking to see the inspection arrangements. Disassembly, measurement, flex cable swapping, and soldering are for professional inspection only; readers should only do visual inspection and layered testing. That is the safety line running through this entire article.
If inspection finds other parts with problems at the same time, the published reference starting prices are battery HK$580 and up, screen HK$1,280 and up, keyboard HK$480 and up, and mainboard chip-level HK$880 and up; everything else is subject to a written quotation after inspection. Speaker module repair is always subject to a written quotation after inspection.
Shop details: Room 1209, Dali Plaza, Shek Mun, Shatin; phone +852 2186 8010; WhatsApp +852 6558 6806; opening hours 12:00–19:00. Before asking for help, complete the non-disassembly parts of the layered elimination above and record the output device, balance, enhancement settings, headphone comparison, pre-boot diagnostics result, and model number, so inspection can start directly from the suspected layer. The most difficult thing about physical speaker failure is not that it fails completely, but that it fails ambiguously: sound that distorts, comes and goes, or loses its bass, making people mistake it for a driver problem.
Items That Could Not Be Verified — An Honest Record
The following items could not be verified during this research, and this article draws no conclusions about them: rated power, impedance, sensitivity, and frequency response figures for each laptop speaker model, which differ by model and must be checked against the original part number and service manual; the full official datasheet text for common codec models, which is generally provided only to manufacturer customers and could not be obtained by public search; stock, price, and waiting time for each speaker module model, which differ by brand, model, and supplier, with speaker module prices always subject to a written quotation after inspection; specific disassembly screw specifications, flex cable lengths, and connector models for each model, which must be checked against that model's service manual; a generic safe threshold figure for DC offset, which differs by amplifier design and is not listed; whether each laptop model is fitted with a passive radiator, since not every laptop has one and this must be checked against that model's service manual or the physical unit; a generic lifespan figure for speaker drivers, since lifespan is greatly affected by usage habits, volume, environment, and model; parts supply and waiting times for individual speaker module models, which must be checked at inspection time; whether individual models' pre-boot diagnostics include an audio test, since test items may differ across models and versions and must be checked against that model's manual; and an official standard for Hong Kong indoor humidity, since the 40% to 50% indoor humidity recommendation range cited in this article comes from general electronics care sources, not the Hong Kong Observatory or a manufacturer's official standard, and must be cited as such.
Frequently Asked Questions
Q1: My speaker distorts. Does that mean the speaker has burned out?
A: Not necessarily. Distortion can come from voice coil friction, a cracked diaphragm, an aged surround, enclosure leakage, magnetic gap debris, or amplifier clipping — all of them can make sound coarse. The correct approach is to turn off audio enhancement first and compare with the same audio clip at the same volume; then do the headphone comparison — clear headphones with a distorting speaker points to the speaker layer; then test at low volume — distortion already present at low volume points more to physical driver damage; finally, confirm which side's driver is at fault with a left-right swap. Do not test with high volume to "check properly", or an already damaged driver may be damaged further.
Q2: Only one speaker is silent. Does that mean that side's speaker has burned out?
A: Not necessarily. One-sided silence can come from a loosened or internally broken flex cable, a burned-open voice coil, a broken tinsel lead, or that channel's amplifier output fault, and it can also come from the balance setting pushed to one side. The correct approach is to check the left-right balance first, set both sides to the same value, and confirm mono audio is off; then use the same audio clip to test built-in left, built-in right, headphone left, and headphone right; finally, separate the causes with a left-right swap — a fault following the driver points to the driver, while a fault staying on the original channel points to the flex cable or amplifier.
Q3: Headphones have sound but the speaker is silent. Does that mean the speaker is broken?
A: Not necessarily. Headphones working means the problem is not in the whole audio system but in the built-in speaker path, and that path includes settings, jack detection, driver endpoints, flex cable, connector, amplifier, and the speaker driver itself — each must be eliminated in turn before naming one. In particular, check whether the headphone jack sensor is jammed: the system shows the output device as headphones even though they have been removed, and the speaker may briefly recover after inserting and removing headphones several times. That combination points more to the detection switch than to the speaker driver.
Q4: Bass has disappeared but treble is normal. Has the speaker burned out?
A: Not necessarily. Bass disappearing while treble stays normal points more to enclosure leakage, seal failure, passive radiator ageing, or surround ageing than to voice coil burnout. The correct approach is to compare with bass boost on and off, check the enclosure sealing and rubber gaskets, check the passive radiator where fitted, and test with a low-frequency pure tone. Sound close to normal at low volume with a leakage sound only at high volume is a typical enclosure-layer characteristic.
Q5: Pre-boot diagnostics produce no sound. Does that mean the speaker hardware is broken?
A: No sound in pre-boot diagnostics means the problem is more likely in the hardware layer — speaker, flex cable, codec, or amplifier — rather than the Windows driver, but it still cannot say which layer is at fault; a left-right swap, disassembly visual inspection, and resistance comparison are still needed to separate them. Conversely, sound in pre-boot diagnostics with silence in Windows points more to the Windows driver or settings layer. Pre-boot diagnostics are the dividing line between software and hardware, not a confirmation tool; confirmation requires disassembly and substitution testing.
Need Professional Laptop Repair?
Laptop King has 15+ years of repair experience in Shek Mun, Sha Tin. Free diagnosis, transparent pricing, no fix no fee. 180-day warranty for your peace of mind.