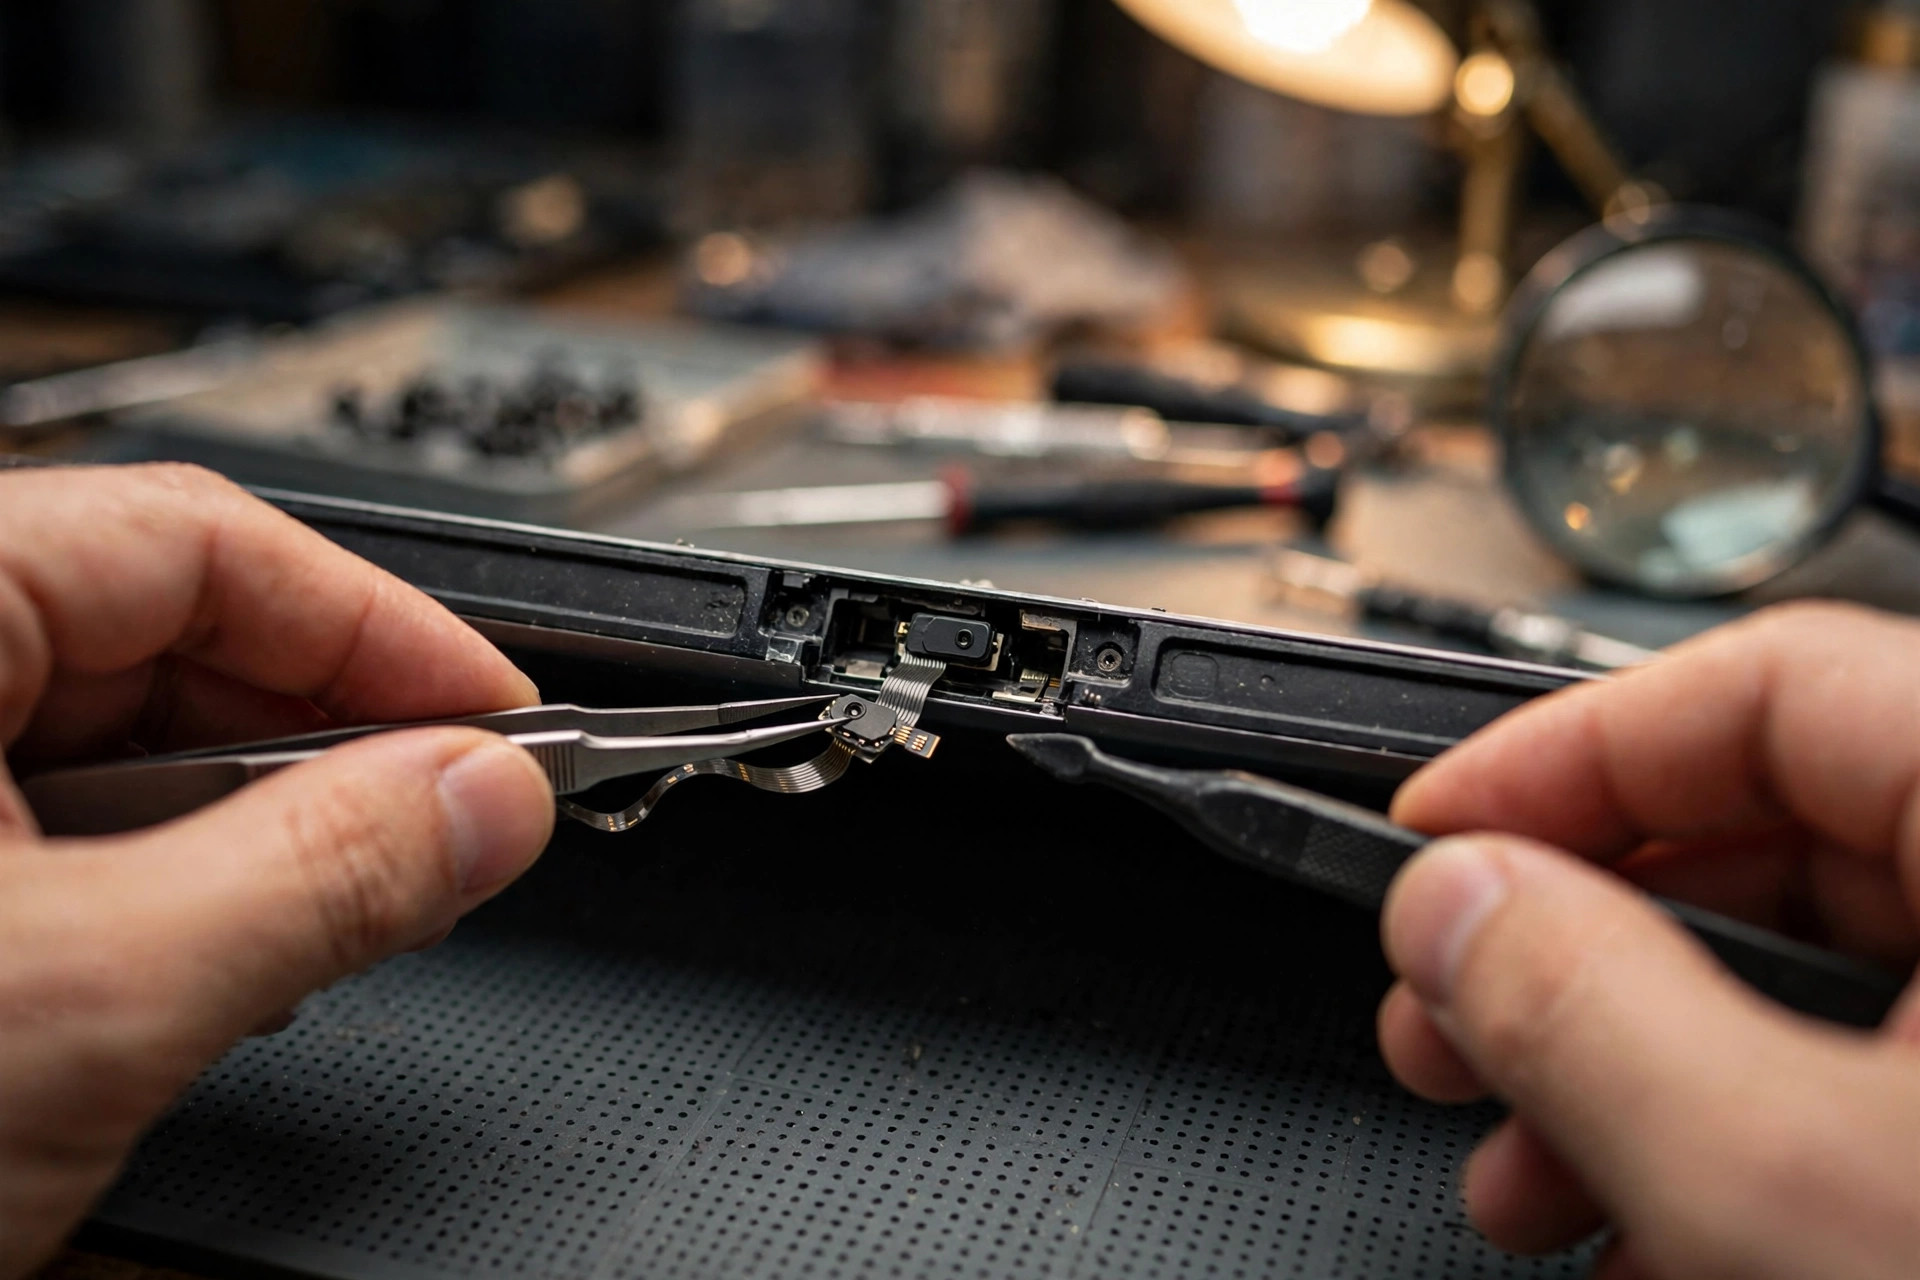
A built-in laptop microphone that suddenly goes silent, sounds very quiet to the other side, crackles, cuts in and out, or only works when you move the lid is usually blamed on a driver. The first reaction is often to reinstall the driver, reset the system, or conclude that the microphone has burned out. This guide focuses on one layer only: the physical layer of the built-in microphone module inside the top bezel of the laptop. That layer means the MEMS microphone element, the sound port and acoustic channel, the flex cable routed through the hinge, the connectors at both ends, and the audio codec and Intel Smart Sound Technology digital microphone path on the mainboard, and whether any of them is damaged, loose, deformed, oxidised, worn, liquid-damaged or blocked.
This guide is the advanced companion to a basic guide, and the division of labour is deliberate. The basic guide covers what most readers meet first: a muted microphone, the wrong input device selected, a Windows privacy switch left off, a driver not updated, or a fault that appeared only after a Windows update. This advanced guide assumes that basic elimination has already been done, and asks whether the microphone element itself has failed, which part of it has failed, how that can be proved, and whether to repair it, replace it or switch to an external microphone.
Every operation in this guide that involves disassembly, bezel removal, measurement, rework, module replacement, flex replacement or mainboard connector inspection is for professional inspection only, and readers must not attempt it themselves. The only things a reader can safely do are visual inspection after shutdown, checking mute switches, checking the device state shown by the system, cross-application testing and cross-system testing. If you see charring, smell burning, see smoke, find a blackened or melted bezel, or feel abnormal heat around the microphone, stop using the device at once. If liquid ingress is suspected, disconnect power first and do not test repeatedly with power applied. Never poke the microphone sound port with a metal pin, a toothpick or any hard object.
1. A map of the link: nine stages from the microphone to the other person's ear
Before separating the layers, you need a map. The path from a built-in microphone to the other person's ear can be divided into nine stages: first, the sound source and the case sound port; second, the MEMS microphone element itself; third, the microphone flex cable, which runs from the lid through the hinge to the mainboard; fourth, the mainboard connector, a ZIF socket or a board-to-board connector; fifth, the codec path or the Intel SST digital microphone path; sixth, the HDA bus or the DMIC interface; seventh, the Windows audio driver; eighth, Windows privacy settings; and ninth, the application layer, such as Teams, Zoom, Chrome and Sound Recorder.
One more concept has to be stated first: the built-in microphone is not one part, it is a chain. Sound waves pass through the sound port, reach the diaphragm, become a change in capacitance, are turned into an electrical signal by the ASIC, travel along the flex cable to the mainboard, are converted into digital audio by the codec or the DSP, and only then reach Windows. If any link in that chain breaks, the symptom can still be the same word, "silent".
2. How a MEMS microphone works: diaphragm, backplate, air gap and ASIC
Almost all modern laptop built-in microphones are capacitive MEMS microphones, not the older electret type. A MEMS microphone is made of a movable silicon diaphragm and a fixed backplate with holes, and the two form a tiny capacitor. Sound pressure makes the diaphragm vibrate, the distance between the diaphragm and the backplate changes, the capacitance changes with it, and the ASIC inside the same package turns that capacitance change into an electrical signal.
| Structure | Function | What happens when it fails |
|---|---|---|
| Diaphragm | A thin film, about one micrometre thick, that vibrates with sound pressure | A drop or overpressure deforms it or makes it stick, and sensitivity falls permanently |
| Backplate | A fixed electrode with acoustic holes | Blocked holes change the air damping and the sound turns muffled |
| Air gap | The gap of a few micrometres between the diaphragm and the backplate | A water drop or dust in the gap causes leakage and crackling |
| Back cavity | The cavity behind the diaphragm, which sets the low-frequency response | A leaking back cavity or aged glue makes the sound thin and sharp |
| Sound port | The opening in the package, top port or bottom port | A blocked port cuts the volume sharply and makes the sound stuffy |
| ASIC | The dedicated chip in the same package, for amplification and encoding | Electrostatic discharge or overvoltage damages it, giving no output or a locked digital output |
| Package and solder joints | The MEMS and ASIC surface-mounted on the microphone board | Cracked or cold solder joints cause intermittent silence |
There are three microphone output types, and the diagnosis has to know which one a given model uses, because the same words, "the microphone is silent", point to different failure modes for each type.
| Output | Signal form | Typical path in a laptop | Diagnostic meaning |
|---|---|---|---|
| Analog | The ASIC outputs a continuous voltage, sent along the flex cable to the codec microphone input | Microphone, flex cable, codec analog input, analog-to-digital conversion, HDA bus | Interference on the flex cable or rising contact resistance raises the noise and lowers the volume directly |
| PDM | The ASIC outputs a one-bit high-speed pulse stream, which needs a decimation filter to become PCM | Microphone, flex cable, Intel SST digital microphone interface or codec PDM input | An unstable clock or one broken wire silences the whole digital microphone or decodes to zero |
| I2S | Digital PCM, which can connect directly to a processor or a codec | More common in wearables; rare in laptops | The laptop mainstream is still PDM or analog, and I2S is a minority design, so do not confuse them |
3. A dual-microphone array: not two independent microphones, but one array system
Most modern laptops use two microphones, and some higher-end models use three or four. The purpose of two microphones is not that one can take over when the other fails. It is spatial processing. First, beamforming: the two microphones compare the arrival time difference of the same sound source, strengthen sound coming from the user's direction, and suppress sound from other directions. Second, noise suppression: one microphone takes the voice, the other takes the ambient noise as a reference, and the DSP subtracts it to output cleaner speech. Third, acoustic echo cancellation. Fourth, far-field pickup: the user can still be heard from one to two metres away.
A single microphone failure is the easiest kind to miss, because the symptom is not total silence.
| Situation | What the user hears | Mechanism |
|---|---|---|
| Both microphones normal | Normal pickup, low background noise | Beamforming and noise suppression work normally |
| One microphone silent or very quiet | Sound is received, but the other side says it is very quiet or very noisy | The array loses its spatial reference, and the DSP cannot separate voice from noise properly |
| One microphone crackling or popping | Intermittent crackling and popping, worse when the lid moves | The faulty microphone's noise is treated by the DSP as a valid signal |
| One microphone sound port blocked | Left and right channels unbalanced, direction sense wrong, noise suppression fails | The sensitivity difference between the two microphones exceeds the DSP tolerance |
| Both microphones silent | Total silence | The module power, shared flex cable, connector, codec or SST path has failed |
4. Failure mechanisms, layer by layer
The table below is the core of this guide. Each mechanism is given with its physical process, its typical symptom and its discriminating test.
| No. | Failure mechanism | Physical process | Typical symptom | Discriminating test |
|---|---|---|---|---|
| F1 | Sound port blocked | Dust, fibre, wax or glue blocks the port | Volume falls sharply, sound turns muffled, usually gradual | Inspect with strong light and magnifier; gentle suction may help; never use a metal pin |
| F2 | Moisture or condensation | Sudden temperature change condenses water, creating a leakage path | Crackling, hissing, intermittent silence; may improve after drying | Leave in a dry place and test again; note moves between air conditioning and outdoors |
| F3 | Drop or impact | Diaphragm deforms, solder joints crack, board breaks | Silence, crackling or distortion at once, or days later | Ask about history; tapping the lid edge changes the sound |
| F4 | Hinge flex cable fatigue | Daily lid movement bends the cable until copper fatigues and cracks | Sound comes and goes with the lid, crackling, angle-dependent | Angle test; camera may be affected too |
| F5 | ZIF or FFC connector loose | Lever opens, cable not fully inserted, vibration shifts it | Intermittent silence, tapping the case has an effect, reseating restores it | Reseat the ZIF connector; qualified personnel only |
| F6 | Connector or solder joint oxidised | Moisture and time oxidise contacts, raising resistance | Volume falls gradually, noise rises, intermittent breaks | Inspect contacts for discoloration; cleaning or reseating may help |
| F7 | Solder joint cracked or cold | Thermal expansion and vibration crack solder joints | Intermittent silence; normal cold, failing warm, or the reverse | Hot or cold testing; a microscope is needed |
| F8 | ESD or overvoltage damage to the ASIC | Static discharge through the port, cable or connector breaks the ASIC input | Sudden total silence, locked PDM output, or DC offset; mostly irreversible | Ask about history; no visible mark, replacement module needed to verify |
| F9 | PDM clock or data line fault | Clock or data line breaks, shorts or picks up interference | Total silence, or decoding to zero or noise; USB microphone still works | USB comparison plus angle test |
| F10 | Codec fault or power supply fault | Codec chip damaged, power pin dry-jointed, HDA bus fails | Built-in microphone, headset microphone and loudspeaker may all fail together | 3.5 mm comparison; BIOS diagnosis; mainboard-level inspection |
| F11 | Intel SST or DSP driver fault | SST driver version incompatible, especially after Windows 11 upgrade | Yellow triangle or Code 10 on SST; built-in microphone silent but USB microphone works | Check Device Manager and reinstall the vendor driver |
| F12 | Physical mute or privacy switch pressed by mistake | Fn mute key, keyboard mute key, or camera shutter linked to microphone mute | Total silence, but Device Manager and driver look normal | Check the LED and key state; the most common false fault |
| F13 | Case acoustic channel misaligned | Module shifts, gasket ages or shifts, port misaligned after bezel change | Appears after screen or case change, volume falls sharply | Ask about repair history; inspect port alignment on disassembly |
Moisture and condensation: write it accurately
High humidity is not the same as condensation. Hong Kong's annual average relative humidity is 78 percent, and the summer months are higher. A MEMS microphone can generally still work in stable high humidity. What is really harmful is condensation caused by a sudden temperature change, for example moving from an air-conditioned room to the outdoors, when the case or microphone module surface falls below the dew point and water drops condense. The mechanism is that a capacitive microphone has an extremely high input impedance, so water plus dust can form a leakage path, and the result is crackling, hissing and falling volume. Light condensation may recover after drying, but if the water has caused oxidation, it will not recover on its own.
Drops, flex fatigue and solder joints
Drop damage comes in three forms. First, mechanical damage to the diaphragm or backplate: the diaphragm deforms or sticks, sensitivity falls permanently, the sound distorts, there is no visible damage, and the module must be replaced. Second, cracked solder joints: a micro-crack appears in the MEMS package or microphone board solder, still conducts intermittently at first, and expands to a complete break over days or weeks. Third, a shifted flex cable or connector. When taking the history, ask three things: was it dropped, when did it happen, and did the fault appear at once or days later.
For hinge flex cable fatigue, the microphone cable runs from the lid through the hinge to the mainboard, and every opening and closing is one bending cycle. The conductors in a flexible circuit develop cracks under repeated bending. At first a crack may only partly cross the conductor, so it still conducts, but vibration or shock extends the crack until it breaks completely. The discriminating point is this: if the sound appears and disappears only at certain lid angles, the flex cable layer is far more likely than the microphone chip layer.
Loose and oxidised are two different failures and must not be confused. A loose connector means the ZIF lever is not latched, the cable is not fully inserted, or vibration has shifted it; the pattern is sudden, intermittent, and restored at once by reseating. Oxidation means long-term humidity has oxidised the gold fingers or contacts, contact resistance rises gradually, and the pattern is slow worsening, falling volume and rising noise. The ZIF lever breaks very easily, and reseating must only lift the lever, never force the socket itself.
Electrostatic discharge: damage you cannot see
Electrostatic discharge is a failure mode of MEMS devices, and experiments show that a stationary comb can stick to the ground layer because of ESD. The ESD path for a laptop microphone includes body static through the sound port, through the flex cable, and through hands touching internal parts during repair, breaking the ASIC input stage. The damage comes in three forms: immediate catastrophic failure, intermittent failure, and latent failure, where the test looks normal and the fault only appears weeks later. ESD damage leaves no visible mark, so a replacement module or an oscilloscope is needed to verify it.
5. Which layer has failed: an attribution table
The table below is a shared framework for the reader and the repair technician. Every cell is a probability, not a diagnosis. A confirmed diagnosis needs disassembly and a substitution test.
| Observation | Microphone module itself | Flex cable | Mainboard connector | Codec or SST | Software |
|---|---|---|---|---|---|
| USB microphone works, built-in microphone silent | Possible | Possible | Possible | Possible, digital path | Unlikely |
| Headset microphone works, built-in microphone silent | Possible | Possible | Possible | Low | Low |
| Headset microphone and loudspeaker also silent | Low | Low | Low | High | Possible |
| BIOS or UEFI test fails | High | High | High | High | Very low |
| BIOS or UEFI test passes, Windows silent | Very low | Very low | Very low | Possible | High |
| SST yellow triangle or Code 10 | Very low | Very low | Very low | Possible | High |
| No microphone device in Device Manager | Possible | Possible | Possible | Possible | Possible |
| Sound comes and goes when the lid moves | Low | High | Possible | Very low | Very low |
| One microphone of the array fails | High | Possible | Low | Low | Very low |
| Silence immediately after a drop | High | Possible | Possible | Low | Very low |
| Hissing after moisture, better after drying | High | Low | Possible | Very low | Very low |
| Physical mute LED is on | Unrelated, muted | Unrelated | Unrelated | Unrelated | Unrelated |
| Appears after a screen or case change | Possible | Possible | Low | Very low | Very low |
6. Physical mute switches and privacy shutters: by brand
A physical mute switch is the most common false fault. Hardware mute overrides software settings: when the Fn microphone mute key LED is on, the blue bar in the Windows recording test will not move, Device Manager will still look normal, and the BIOS diagnostic may also report the microphone as muted. Looking only at Windows settings will lead to a wrong diagnosis of a hardware fault. The first step of the diagnostic procedure must be to rule this out, or all later tests are wasted.
| Brand | Microphone mute key | LED logic | Privacy shutter |
|---|---|---|---|
| Lenovo ThinkPad | Fn plus F4, depending on FnLock | The LED on the key means the microphone is muted | ThinkShutter covers the lens only; it does not mute the microphone |
| HP | Depends on the model, commonly F9 or F8 | An amber LED means off; logic may be reversed on other models | Sliding camera shutter on the top bezel; covers the lens, not the microphone |
| Dell | Some business models have a mute key, often F4 or F8 | Check that model's manual | Sliding shutter or electronic switch (model-dependent); covers the lens, not the microphone |
| Other brands | Check that model's manual or keyboard icons | Whether the light means muted or enabled varies by brand and model | A shutter covers the lens; it is not the same as muting the microphone |
7. Layered elimination: from the outside in, and do not change the order
The procedure below runs from the outside in, from software to hardware, and from no-disassembly to disassembly. Each step has a clear definition of pass and fail, and a clear next step. The principle is to start with steps that need no disassembly, cost the least and can be reversed, record the result of each layer before moving on, and never change several variables at once, or the real cause will never be known.
| Layer | Check | Pass means | Fail means |
|---|---|---|---|
| Layer 0: physical mute | Check the mute key LED, the privacy shutter, and Windows mute and volume | Normal after unmuting; the procedure ends | Go to layer 1 |
| Layer 1: Windows recording test | Settings, System, Sound, Input, select the built-in microphone, watch the blue bar; or record ten seconds in Sound Recorder | Hardware probably healthy; the problem is in one application | The bar does not move at all; go to layer 2 |
| Layer 2: external USB microphone comparison | Connect a USB microphone, switch the input device, repeat the test | USB microphone works, so the fault is in the built-in chain | USB microphone also silent, so the fault is in Windows audio or the driver layer |
| Layer 3: 3.5 mm headset microphone comparison | Connect a 3.5 mm headset with a microphone, switch the input device, repeat the test | Headset microphone works, so the analog input path is probably still present | Headset microphone also silent, so codec or driver becomes more likely |
| Layer 4: Device Manager state | Record whether the microphone device exists, whether SST has a yellow triangle or Code 10, and the driver version | Completely normal, so the driver layer is probably healthy | Code 10 on SST means a driver problem first; a missing device means go to layer 5 |
| Layer 5: BIOS or UEFI diagnostic | Dell: F12 at startup; HP: Esc then F2; Lenovo: Vantage audio diagnostic | Passes, so hardware is probably healthy; fault is in the driver or privacy layer | Fails, so hardware is strongly suspected with Windows bypassed |
| Layer 6: angle test | On the recording test page, slowly open and close the lid, pausing three seconds to speak every 15 degrees | All angles normal, so an intermittent fault may relate to temperature, vibration or software | Sound at some angles, silence at others: strong evidence of flex fatigue or a loose connector |
| Layer 7: disassembly inspection | Qualified personnel only: inspect ZIF lever, contacts, solder joints, measure continuity, run substitution tests | A substitution test is the only way to confirm the module itself has failed | Without a spare part, a dead microphone is an inference, not a diagnosis |
Need a laptop repair expert?
Free diagnosis · Transparent pricing · No fix, no fee · 180-day warranty
Layer 5 is the line between software and hardware. A failed BIOS or UEFI diagnostic means the fault survives with Windows bypassed, so the hardware is strongly suspected, and the next step is disassembly inspection rather than another driver reinstall. A passed BIOS or UEFI diagnostic plus silence in Windows means the hardware is probably healthy, and the fault is in the Windows driver, privacy or application layer. Note that some models have no separate microphone test in the BIOS, only a display of whether the microphone device exists.
The angle test in layer 6 has two operating rules. First, never push the lid beyond its normal range; forcing it past the limit will itself accelerate flex cable wear, and the test becomes the cause of the damage. Second, do not shake, hit or press the machine hard during the test; vibration testing should be gentle, and its purpose is observation, not forcing a cracked conductor back into contact. The angle test is a diagnostic tool, not a repair: if the symptom disappears after the test, the crack is still there.
Layer 7 is not a user operation, and this guide must label it as qualified personnel only. The inspection list includes disconnecting power, removing the battery or disconnecting the internal battery cable, and anti-static measures; opening the base cover and checking whether the microphone flex cable ZIF lever has opened, whether the cable has shifted, and whether the contacts are oxidised or discoloured; removing the screen bezel and checking the camera and microphone module for sound port alignment, the acoustic gasket, cracks in the module and cracked solder joints; measuring the flex cable continuity with a multimeter; and substitution testing with a known-good microphone module or flex cable of the same model.
8. Error-code map: use the vendor's own table, do not invent codes
The error codes below all come from official support pages and vendor guidance. Do not invent other codes, and do not write one code as the only diagnosis. The operating point is to double-click the device, open Properties, open the General tab, and write down the full device status text and the error code, then open the Driver tab and write down the driver version and date.
| Error code | Vendor wording, in brief | What it means | Next step at the software layer | Hardware likelihood |
|---|---|---|---|---|
| Code 10 | This device cannot start | The driver cannot start the device | Update the driver; check the SST version; reinstall the vendor driver | Medium |
| Code 19 | Configuration information incomplete or damaged | Registry device settings are damaged | Uninstall, restart, let Windows rebuild it; or roll the driver back | Low |
| Code 39 | The driver may be corrupted or missing | Driver file corrupted, missing or mismatched | Reinstall manually from the vendor website for that model | Low |
| Code 45 | Device is not currently connected | Windows cannot see the hardware at all | First check whether the BIOS disabled the microphone; rescan for hardware changes | High |
| Code 43 | Windows stopped the device because it reported problems | The device reported an error | Update or reinstall the driver; check the SST version | Medium |
| Yellow triangle, no code | The driver has a problem but reports no specific code | Driver layer fault | Write down the device name and driver version, then follow the Code 10 procedure | Depends |
The Intel SST driver problem is the most instructive driver case in this batch. The problem versions are IntcAudioBus.sys 10.29.0.5152 and 10.30.0.5152, which could cause a blue screen or system instability when installing Windows 11 24H2 on 11th-generation Intel Core processors. Microsoft applied a safeguard hold, so Windows Update did not offer the 24H2 update to machines with the problem configuration until it was resolved; Microsoft lifted the hold on 11 September 2025, when the fixed driver had entered the Windows Update channel. The fixed versions are 10.29.00.5714 or 10.30.00.5714 or later. This matters for microphone faults in three ways: first, the same SST driver problem can show up as both a blue screen and a silent microphone; second, "the microphone went silent after a Windows update" has a known, verifiable driver-version explanation; third, Microsoft actively blocks problem updates.
On most Intel platform laptops the audio driver is not one driver but a set. The Realtek audio driver handles the codec: analog-to-digital conversion, microphone input, loudspeaker output and sound effects. The Intel SST OED driver handles the DSP: offloading noise suppression, voice wake-up and microphone array processing. The two drivers must be used as a matched pair: if the Realtek driver is updated while the SST driver stays old, or the other way round, a mismatch appears. Realtek states clearly that a generic driver downloaded from the Realtek website may not include the system or mainboard manufacturer's custom functions.
A driver being replaced by Windows Update is the mechanism most easily mistaken for "the update broke the hardware". Windows Update can deliver driver updates automatically, including SST and Realtek, and overwrite the vendor driver with a generic version. The generic version may lack the vendor's microphone array settings, such as beamforming parameters and noise suppression settings, so the microphone becomes "audible but poor quality" or "completely silent". The clues are that the fault began at the same time as a Windows Update, and that the driver provider changed from the vendor to Microsoft.
9. The three Windows privacy switches, exclusive mode and audio enhancements
Windows 11 microphone permission is three layers, not one, and this is the most common and most easily miswritten misdiagnosis in this batch.
| Switch | Path | What it does | What happens if it is left off |
|---|---|---|---|
| Microphone access, the master switch | Settings, Privacy and security, Microphone, at the top | A system-wide master switch; when off, no application receives the microphone | All applications are silent, including Sound Recorder |
| Let apps access your microphone | Same page, the second switch | Allows Microsoft Store apps to use the microphone, with a per-app list below | Store apps are silent; desktop apps are not affected by this switch |
| Let desktop apps access your microphone | Same page, at the bottom | Allows traditional desktop programs to use the microphone; they are not listed one by one | Teams, Zoom and Chrome desktop versions are silent, but Windows Sound Recorder may still work |
A company or school managed device can have microphone access forced off by the administrator, and the user sees the switch greyed out on the settings page. In that case no local troubleshooting will work, and the IT administrator must be contacted. This guide must mention that case, or readers will reinstall drivers forever. The microphone and camera permissions are also commonly confused: if the microphone is part of a webcam, Microsoft notes that camera permission may also be needed, but for a built-in microphone array the two permissions are separate, and turning camera permission off does not silence the built-in microphone.
Volume, gain and disabled state must also be checked. If the input volume slider is at zero or near zero, the microphone is "audible but cannot be heard", which is easily mistaken for total silence. In the classic Control Panel, open the Recording tab, right-click the microphone, open Properties, open the Levels tab, and confirm that it is not muted, that the volume is 100, and that the microphone boost has not been reset. For a disabled device, right-click an empty area on the Recording tab, tick "Show Disabled Devices", and if the built-in microphone appears greyed out or disabled, right-click and choose Enable.
Exclusive mode is a breeding ground for misdiagnosis. Exclusive mode lets one application take full control of the audio device, bypass the Windows mixer, and control the sample rate and bit depth directly. The disadvantage is that while that application uses the microphone, no other application can use the same microphone at all. After Zoom or Teams takes the microphone in exclusive mode, Sound Recorder, Chrome and another meeting application go silent, and the user thinks the microphone is broken, when in fact the microphone has been taken over by one program. Turning exclusive mode off lets several applications share the microphone. General meeting use should have exclusive mode off; only professional recording needs it. For testing, the default format can be set to 16-bit, 48,000 Hz.
The triple-processing conflict of audio enhancements deserves its own paragraph. Windows-level enhancement, vendor-level enhancement and application-level enhancement, all doing noise suppression, echo cancellation and automatic gain at the same time, fight each other: Windows noise suppression eats part of the voice, Teams treats that part as noise and eats more of it, and the result is broken, quiet, distorted speech. The troubleshooting rule is to set Windows audio enhancement to off first, then test the Teams or Zoom noise suppression settings one at a time, with only one layer of processing on.
10. The application layer: Teams, Zoom and Chrome
Passing the built-in Sound Recorder test does not mean Teams will pass. Passing a Teams test call does not mean Zoom will pass. Passing Zoom does not mean a Chrome web meeting will pass. Each layer has its own permission and input selection, so the correct test method is to tick each layer separately.
For Teams, the test call is in Settings, Devices, Audio settings. The test call bot records a short message, plays it back, and gives a test summary. The limitation is that the test call is currently only in English, and it is not available in the Teams web version. Teams has its own microphone drop-down list, which can differ from the Windows default input: selecting the built-in microphone in Windows does not mean Teams has selected it, so the microphone must be confirmed in Teams, Settings, Devices, Microphone. For noise suppression, Teams offers three levels: Auto, Low and High. Voice isolation uses AI to filter background noise and other voices, and needs a voice profile to be created first.
For Zoom, there are two test methods: when joining a meeting, press "Test Speaker and Microphone", listen to the ringtone first and then record and play back; or in Settings, Audio, Microphone, test the microphone, watch the input level bar move while recording, and listen to the playback. Zoom's official documentation says that if Zoom cannot detect a microphone, check whether the microphone is connected, muted, or blocked by Windows privacy. For noise suppression, Zoom uses noise suppression and echo cancellation by default, with background noise suppression in four levels: Auto, Low, Medium and High, where High is the most aggressive and will remove background voices. Original sound mode disables echo cancellation and post-processing, and is only for music or a professional microphone.
For Chrome, a browser meeting must pass three gates: Windows privacy, Chrome's own microphone permission, and the individual website's microphone permission. All three are needed. When entering a website that needs the microphone, Chrome asks "Allow", "Allow this time" or "Never allow"; choosing "Never allow" by mistake leaves that website permanently silent until it is changed manually. The change is made in Chrome, Settings, Privacy and security, Site settings, Microphone, or by clicking "View site information" on the left of the address bar, then Site settings, Microphone, Allow. A desktop Teams or Zoom that is silent while the Chrome web version works, or the reverse, is important evidence for locating the faulty layer.
Online microphone test tools are described here by principle only, and no specific website is recommended. The principle is that an online test tool generally uses the browser WebRTC interface to ask the browser for microphone permission, then shows a live volume meter or a recording playback inside the browser. In theory the sound does not have to be uploaded to a server, but whether it is uploaded or stored depends on that website's implementation, which the user cannot verify from the interface. There are three limitations: permission confusion, because passing an online test only proves that Chrome, the website permission and the Windows desktop application permission all passed; privacy risk, because authorising a microphone to an unfamiliar website means that website can listen while you stay on it; and unreliable quality assessment, because the volume meter and playback quality depend on the browser, the network and the website.
Echo is not the same as a broken microphone. Loudspeaker sound picked up by the microphone, then processed too late by the Teams or Zoom echo cancellation, forms an echo loop. Concluding that the microphone is broken just because the other side hears their own voice is a misdiagnosis. The correct split is: you wear earphones, and does the other side's echo disappear? If it does, it is loudspeaker feedback, the microphone is healthy, and the fix is to wear earphones during meetings, lower the loudspeaker volume, and check that echo cancellation is on. If it does not disappear, ask next whether the other side hears the echo only when you speak, or all the time. Only when you speak may mean the echo is on the other side's loudspeaker, not your machine. All the time means checking the Teams or Zoom echo cancellation settings, and turning Windows audio enhancement off to avoid double processing.
11. Common misdiagnoses and traps
The traps below should be named one by one, and the reader should check whether any of them has been stepped into.
| No. | Misdiagnosis | Surface symptom | Real cause | How to tell |
|---|---|---|---|---|
| 1 | Thinking the driver is broken, when it is the physical mute switch | Total silence; Device Manager normal | The microphone mute key was pressed; the LED is on | Press the mute key once and test again |
| 2 | Thinking the driver is broken, when it is a loose flex cable or module | Total silence; Code 45; Device Manager cannot see the microphone | The flex cable is loose or broken, or the microphone module has come off | Device Manager state and code; BIOS; pre-boot diagnostic |
| 3 | Thinking the microphone is broken, when the wrong input device is selected | Silence, or only another microphone's sound is heard | Windows default input switched to a Bluetooth headset or a USB microphone | Settings, Sound, Input, try each device in turn |
| 4 | Thinking the microphone is broken, when the third privacy switch is off | Sound Recorder works, Teams or Zoom is silent | "Let desktop apps access your microphone" is off | Sound Recorder passing plus Teams failing is the evidence |
| 5 | Thinking the microphone is broken, when it is muted inside the application or by the host | Only one meeting is silent | Meeting button muted, host muted you, or headset inline mute on | Check the meeting button, the host state, and try another application |
| 6 | Thinking the microphone is broken, when it is loudspeaker echo | The other side hears their own voice or an echo | Loudspeaker sound picked up by the microphone | Does the echo disappear when earphones are worn |
| 7 | Thinking the microphone is broken, when echo cancellation is processed twice | Broken, distorted speech, volume jumping up and down | Windows enhancement plus Teams or Zoom suppression plus vendor effects fight each other | Turn Windows enhancement off; keep one layer of suppression |
| 8 | Thinking the microphone is broken, when it is the privacy shutter or a covered lens | Black camera picture, and the microphone is assumed broken too | A shutter does not cover the microphone | Does Sound Recorder still pick up sound with the shutter closed |
| 9 | Thinking the microphone is broken, when the BIOS has disabled the microphone | Total silence; Device Manager cannot see the microphone | The BIOS has turned off the built-in microphone or onboard audio | Enter the BIOS and check whether the microphone is enabled |
| 10 | Thinking the microphone is broken, when a Windows update replaced the driver | Silence right after an update; it worked before | SST or Realtek overwritten by a generic version | Compare the driver version and date; check the update history |
| 11 | Thinking the microphone is broken, when one microphone of the array is broken | Sound is present but very noisy, noise suppression fails, the other side cannot hear clearly, volume is low | One microphone of the pair has failed, so beamforming fails | Record with suppression off, then turn one layer on at a time |
| 12 | Thinking the microphone is broken, when it is a sample rate or exclusive mode conflict | One application is silent while others work, or the sound breaks up | Exclusive mode is taken by one program; the sample rate does not match | Turn exclusive mode off; change the default format |
| 13 | Thinking the microphone is broken, when a company or school policy locks it | The settings page switch is greyed out and cannot be changed | A management policy forces the microphone off | Check whether the settings page is greyed out; ask the administrator |
| 14 | Thinking the microphone is broken, when the microphone port is covered or dusty | Quiet, stuffy, intermittent sound | The microphone port is covered by a sticker, a case or dust | Look at the microphone port; remove the obstruction and test again |
| 15 | Thinking a USB microphone has fixed the built-in microphone | The USB microphone works, the built-in microphone is still silent | The USB microphone bypasses the built-in path; it does not repair it | Unplug the USB microphone and test the built-in one again |
12. Hong Kong conditions: why failures are especially likely here
Hong Kong conditions must be written realistically, not as a generic article. First, humidity and oxidation. Hong Kong Observatory climate data says that Hong Kong's annual average relative humidity is 78 percent, from 81 to 85 percent in March to May, from 85 to 87 percent in June to August, and 72 to 74 percent even in the driest months. This is a persistently humid environment, and it is not friendly to small, unsealed connectors. The mechanism is that moisture plus oxygen oxidises copper and other contact metals, raising contact resistance, and micro-fretting corrosion at a connector shows up as intermittent disconnection.
Second, daily commuting and carrying. Most Hong Kong laptops are carried out and back every day, on trains, buses and on foot, and the lid is opened and closed many times a day. The lid is pushed past a comfortable angle in a small space, or the whole machine is picked up by a screen corner, and these are exactly the uses that accelerate hinge flex cable fatigue. Frequent switching between train air conditioning, bus air conditioning and hot, humid outdoor air is several sudden temperature changes in one day, and the heat and vibration inside a backpack press on the flex cable and the connectors at the same time.
Third, the difference in test environments. Commuting also means that users often join meetings in noisy places such as train carriages and streets, where they depend more on noise suppression and beamforming. A single microphone failure is more obvious in a commuting setting, where the background noise is loud, than in a quiet room, where it may not be noticed. This guide can remind readers to do a baseline microphone test in a quiet place first, then verify it in the normal daily environment, because only the comparison is meaningful. Moisture-related intermittent faults show up at the software layer as working one day and failing the next.
Fourth, the local parts reality. Microphone modules, flex cables and bezel assemblies are all ordered by model part number; they are not generic parts. On some models the flex cable is not sold separately, and the whole display cable or the whole lid assembly must be changed together. The HP 250 G7 example shows that the dual microphone array is built into the camera module in the top bezel, and the vendor does not supply a separate microphone part, so a faulty microphone means replacing the whole camera plus dual microphone module. That example applies only to the HP 250 G7 and must not be generalised to all HP models.
13. Repair, replacement and substitution decision framework
The decision table must not be written as a blanket recommendation to replace, or a blanket recommendation to use an external microphone. It must follow the inspection result. Prices are always by written quotation after inspection, and this guide writes no specific figure for microphone repair itself, because the fault could be a connector, a flex cable, a module, a bezel or a mainboard connector, and that is only known after opening the machine.
| Situation | More reasonable direction | Trade-off to state |
|---|---|---|
| The fault is confirmed in the mute switch, input selection, privacy settings, driver, BIOS | Fix the settings by layered elimination; no part needed | Lowest cost; repeat the test several times after the fix to confirm stability |
| The fault is confirmed in a loose connector, and the flex cable and module are intact | Disconnect power and static, then reseat both connectors | A disassembly repair; forcing the latch damages the connector |
| The fault is confirmed in the flex cable, the angle test is positive, and the cable shows a crease or a pinch | Replace the flex cable; if combined with the display cable, the scope grows | The new cable must follow the original hinge route; confirm the part number first |
| The fault is confirmed in the microphone module, all angles fail, the vendor diagnostic fails, and a known-good flex cable has already been tested | Replace the microphone module | Part number must match the model; camera and microphone on the same board must be tested together |
| The fault is confirmed in the bezel or the acoustic channel | Replace the bezel or the lid assembly | Gluing a cracked bezel is not a repair; it can keep pressing on the cable |
| The fault points to the codec | Mainboard chip-level repair assessment, including the codec and nearby circuits | An escalation path, not a first step; mainboard chip-level repair is from HK$880, microphone module replacement by written quotation after inspection |
| Internal hardware repair is not economical, parts cannot be ordered, the machine is already old, or the user needs to join meetings immediately | An external USB microphone as a substitute | Immediately usable, no disassembly; but it does not repair the built-in microphone or replace the dual array and noise suppression |
| Several layers are damaged at once, or other parts of the mainboard also have problems | Judge from the whole-machine inspection result | Use the written quotation after inspection; let the user decide |
| The machine itself has reached its replacement cycle, or other ageing problems remain after repair | Compare repair and replacement together | Compare on the inspection result and the written quotation; no replacement model recommendation here |
14. Teaching examples, none of which are real cases
The three examples below are purely teaching scenarios, not real cases, and they do not represent any real user or repair record. Example one, a teaching scenario and not a real case: a laptop used for daily commuting has a microphone that only works when the lid is at a certain angle, goes silent past another angle, and appears and disappears in Device Manager. Following the layered procedure, the mute switch, input selection, privacy settings, driver and BIOS have already been ruled out, and a positive angle test points to the flex cable or hinge path. Example two, a teaching scenario and not a real case: a laptop microphone goes silent right after a Windows update, the Intel SST device in Device Manager shows Code 10, and the driver version is 10.29.0.5152. That combination points to the driver layer, and the correct handling is to download the vendor audio driver for that model from the vendor website and update to the fixed version or later, not to replace the microphone module. Example three, a teaching scenario and not a real case: a laptop records sound in Sound Recorder, but Teams is completely silent and the other side hears nothing. That combination points to the application layer: "Let desktop apps access your microphone" is off, or Teams has selected the wrong input device.
15. Preparing for inspection, and related links
Before sending a machine for inspection, prepare the following information so the inspector can narrow the fault down quickly: the full model number, including the model on the base label; how the symptom appears, including which lid angles work, which do not, whether vibration affects it, and whether cold and warm states differ; the Device Manager state, including whether the microphone is listed, whether there is a yellow warning, which error code appears, and which driver version is installed; the results of the layered tests already done, including the mute switch, input selection, privacy settings, cross-application test and vendor diagnostic result; any history of drops, liquid ingress, screen replacement or hinge work; and whether Sound Recorder, Teams, Zoom and Chrome fail separately or together. This information is not meant to let the reader diagnose the machine alone; it lets the inspector start verification from the suspected layer instead of repeating elimination that has already been done. Before any disassembly repair, readers should back up important data.
For related links, readers can first look at pricing and service scope to understand the service framework; the price is always by written quotation after inspection. Readers who need to arrange an inspection can go to inspection booking for the inspection arrangements. Disassembly, bezel removal, measurement and soldering are for professional inspection; readers should only do visual inspection and layered testing, and that safety line holds from the first section to the last, however deep any section goes.
If inspection finds other components faulty at the same time, the published starting prices for those lines are battery from HK$580, screen from HK$1,280, keyboard from HK$480, and mainboard chip-level repair from HK$880; everything else is by written quotation after inspection.
The shop details are: Room 1209, Dalton Plaza, Shek Mun, Shatin; telephone +852 2186 8010; WhatsApp +852 6558 6806; opening hours 12:00–19:00. Before asking for help, please complete the non-disassembly parts of the layered elimination above, and record the Device Manager state, the error code, the driver version, the test results and the lid angle, so inspection can start directly from the suspected layer instead of repeating basic elimination. The most difficult thing about a physical microphone failure is not a fault that is total, but a fault that is ambiguous: the device is listed, the driver looks normal, and the recording comes and goes, which makes it look like a driver problem.
Frequently asked questions
Q1: The microphone cannot be found in Device Manager at all. Does that mean the microphone has burned out?
A: It cannot be said directly. Total non-enumeration can mean the BIOS has turned the microphone off, the physical mute switch is off, the flex cable is broken, the connector is loose, the microphone module is dead, or the mainboard connector has failed. The correct order is to check the mute switch and the physical switch first, then enter the BIOS to confirm the microphone is enabled, then run the vendor hardware diagnostic, and only then suspect the flex cable, the connector or the module.
Q2: The microphone works sometimes and not others, and moving the lid brings it back. Is the driver unstable?
A: That is not the typical pattern of a driver problem. A symptom that changes with the lid angle points to the mechanical layer of the flex cable or the hinge path: a crack has appeared in the copper inside the cable, and some angles make contact again while others break it. The correct method is the angle test in section 7, recording which angle fails and whether the symptom can be repeated, and then handing the machine to inspection to confirm whether it is the connector, the flex cable or the module.
Q3: Sound Recorder records sound, but Teams or Zoom is silent. Is the microphone broken?
A: Not necessarily. Sound Recorder passing means the Windows input layer is broadly healthy, and Teams or Zoom being silent points to the application layer. The correct method is to check the third privacy switch, whether "Let desktop apps access your microphone" is on, and then check whether the microphone selection inside Teams or Zoom is the built-in microphone. This combination is one of the most common misdiagnoses; do not replace the module or reinstall the driver for it.
Q4: An external USB microphone works. Does that mean the built-in microphone does not need repair?
A: No. A working external microphone only proves that the external microphone itself and the system are broadly healthy; it does not prove that the built-in microphone is healthy. An external microphone bypasses the built-in microphone; it does not repair it. A cracked flex cable, a loose connector and a faulty module are still there. It must also be stated that the built-in dual microphone array and its noise suppression are not replaced by an external microphone. If your work depends on the built-in microphone and its noise suppression, an external microphone is only a stopgap.
Q5: The microphone went silent right after a Windows update. Did the update damage the hardware?
A: That cannot be said directly. Sudden silence after an update has a known, verifiable driver-version explanation: the Intel SST driver problem versions 10.29.0.5152 and 10.30.0.5152 once caused Microsoft to apply a safeguard hold on Windows 11 24H2, and the fixed versions are 10.29.00.5714 or 10.30.00.5714 or later. The correct method is to open Device Manager, write down the driver version and compare it, and update the vendor audio driver for that model from the vendor website. An update can also reset the privacy settings, so the three privacy switches should be checked at the same time.
Need Professional Laptop Repair?
Laptop King has 15+ years of repair experience in Shek Mun, Sha Tin. Free diagnosis, transparent pricing, no fix no fee. 180-day warranty for your peace of mind.