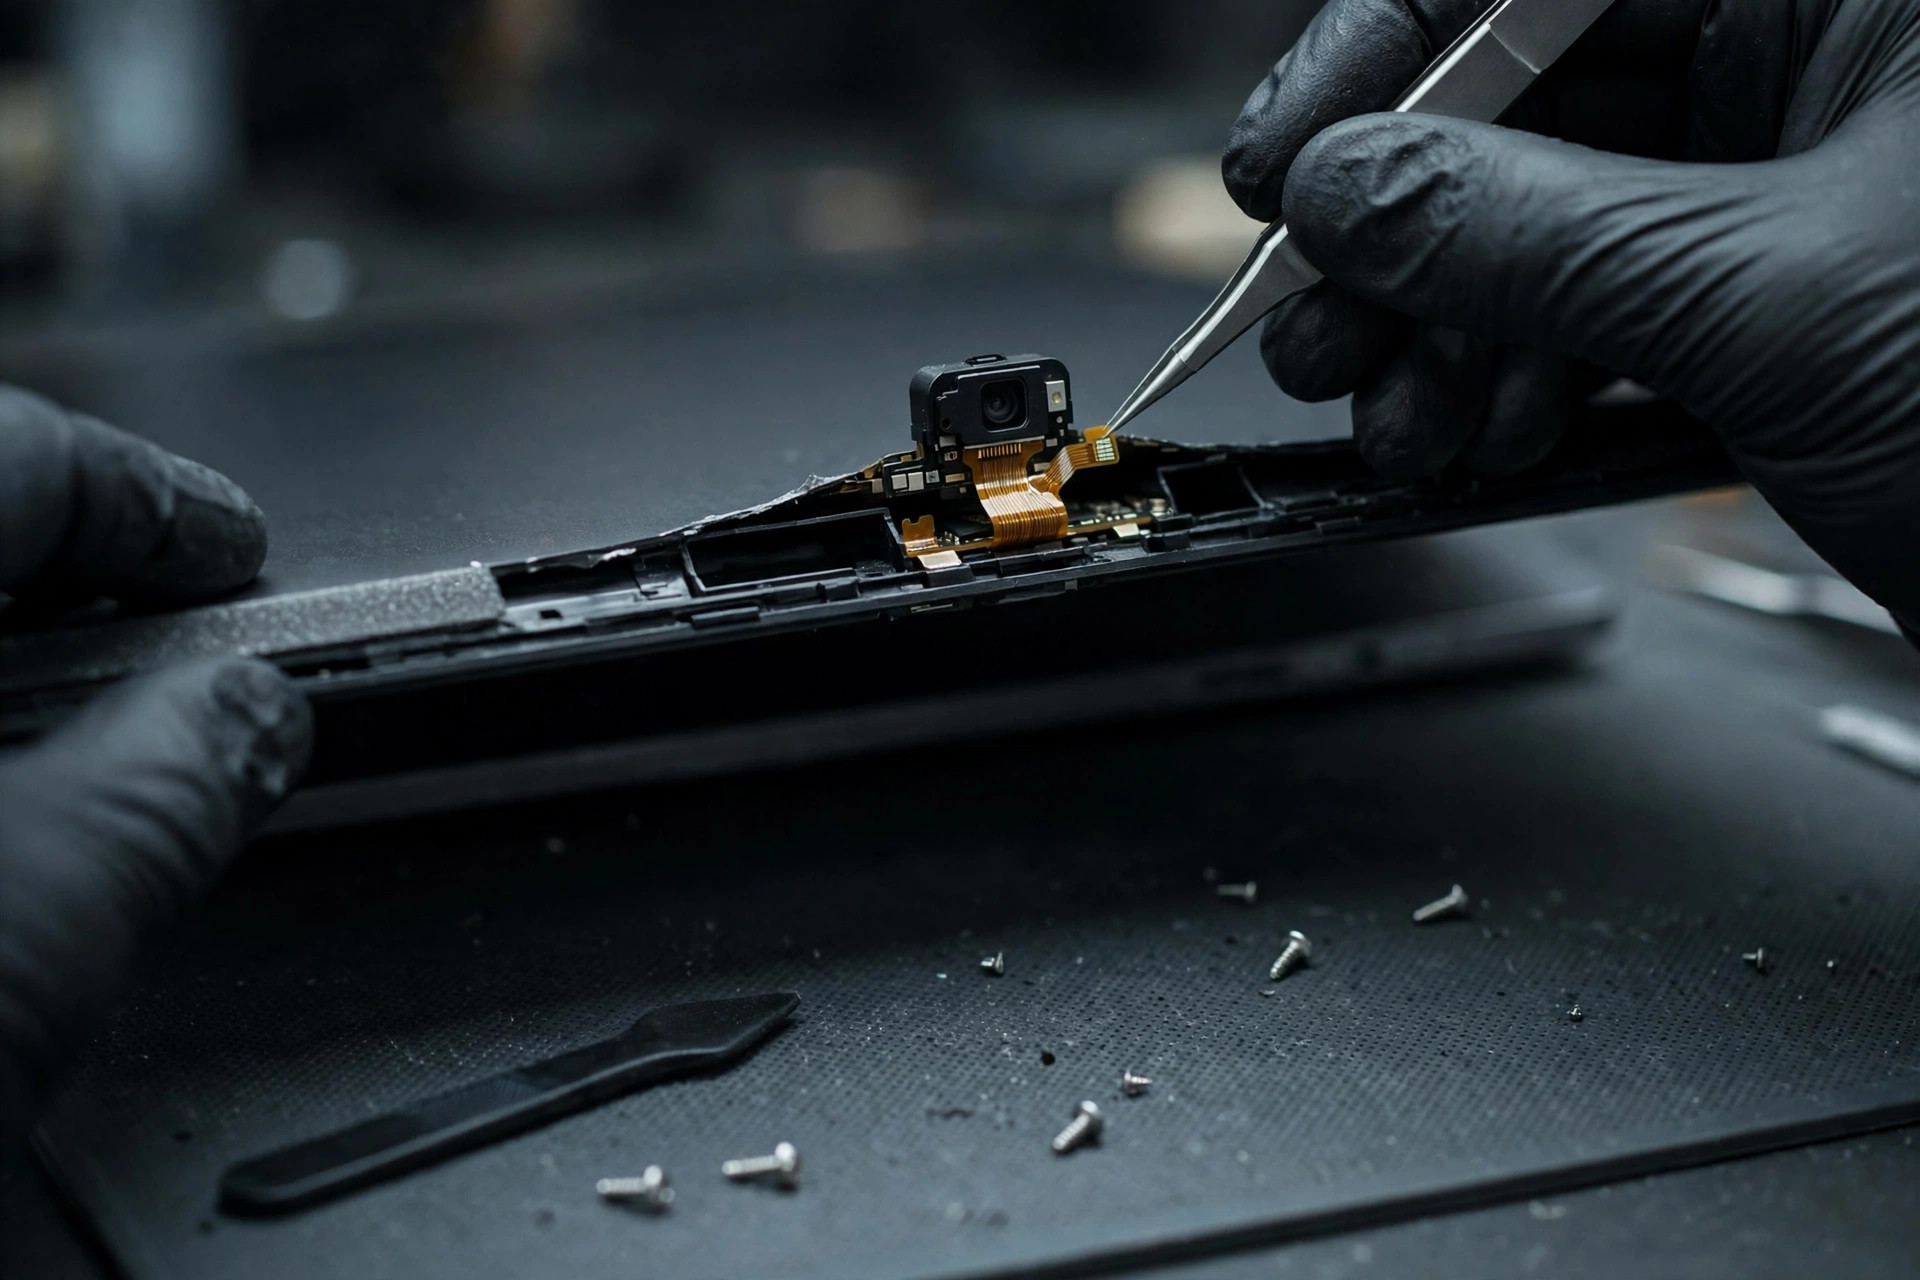
A laptop webcam that shows a black screen, refuses to open in video calls, is reported as "not found" by the system, or works only some of the time is usually blamed on drivers first. Readers reinstall drivers, reset Windows, or conclude the camera is dead. This guide focuses on one layer only: the physical layer of the built-in webcam module in the top bezel. The physical layer means the CMOS sensor module, the lens and bezel, the flex cable routed through the hinge, the connectors at both ends, the physical privacy shutter, and the infrared camera and infrared emitter, and whether any of them is damaged, loose, deformed, oxidised, worn, liquid-damaged or covered. When the physical layer fails, no amount of software work will genuinely fix it; and when the fault is in a driver, a privacy setting or an application, replacing the camera module will not help either. The value of an advanced diagnosis is to establish which layer the fault sits in before jumping to a conclusion.
This guide has a clear division of labour with the basic guide. The basic guide covers what most readers meet first: a closed shutter, a camera held by another application, a privacy setting left off, an out-of-date driver, or a fault that appeared immediately after a Windows update. This is the advanced guide. It assumes the basic checks have already been done, and its question is whether the camera module itself has failed physically, which part of it has failed, how that can be proved, and whether to repair it, replace it, or switch to an external webcam. Basic checks appear here only as comparison steps inside the layered elimination procedure, not as the main subject. Readers who have not yet done the basic checks — inspecting the physical shutter, testing another application, confirming whether the camera appears in Device Manager — should do those first, then use the layered method in this guide to narrow the fault down. One risk must be stated before any testing: repeatedly opening and closing the lid to test angles, or opening the bezel or display assembly, can turn a slight flex-cable problem into a complete break.
Every operation in this guide that involves disassembly, removing the bezel, measurement, soldering, replacing a module, replacing a flex cable, or inspecting a mainboard connector is for professional inspection only. Readers must not attempt it themselves. The only things a reader can safely do are visual inspection with the power off, checking shutters and switches, checking the device status shown by the system, cross-application testing, and cross-system testing. If there is scorching, a burning smell, smoke, a blackened or melted bezel, or a camera that is abnormally hot, stop using that camera at once and do not keep switching it on and off to test it. If liquid ingress is suspected, disconnect power first and do not repeatedly power the machine on to test it. Never poke camera or flex connectors with a metal pin, a toothpick or any hard object: it is easy to turn a loose connector into a broken one, and a repairable job into a parts replacement.
1. A map of the link: seven stages from the camera to the system
Before any layered work, a map is needed. From a built-in webcam to the operating system, the camera link can be divided into seven stages. First, the camera module itself, including the CMOS sensor, the lens, and the microphones on the same small board. Second, the path from the camera module to the mainboard through a flex cable that passes through the hinge. Third, the mainboard side: the connector, the internal USB host or camera subsystem. Fourth, the firmware layer: the camera switch in BIOS or UEFI. Fifth, the driver and the operating system's device enumeration. Sixth, Windows privacy settings and application access rights. Seventh, the application layer: the built-in Camera app, video conferencing software, and browsers. A fault at any stage can end up looking like "the camera does not work", but the repair direction is completely different in each case. The point of layered elimination is to change one variable at a time and narrow the range stage by stage, rather than convicting a part on the strength of a single symptom.
One concept must be stated first: most integrated webcams enumerate to Windows as USB Video Class (UVC) devices, and the in-box Windows driver already drives most of them. That fact has an important diagnostic consequence. A camera that does not enumerate at all behaves like a USB device that has been unplugged: Device Manager shows nothing, not even an error code. A camera that enumerates but has a broken driver behaves completely differently: Device Manager shows a yellow warning or an error code. These two states point at completely different layers and must not be confused. An exception must also be stated honestly: on some newer models the integrated camera does not enumerate through ordinary internal USB at all, but connects through a PCI-based camera subsystem, and such a camera will not appear in a USB device listing even when it is working. So "not found in the USB list" is not by itself evidence of failure; Device Manager plus a vendor hardware diagnostic is the safer combination for a judgement.
2. Module anatomy: not one part, but an assembly
A built-in webcam is not a single part. It is a small assembly in the top bezel, plus a signal path to the mainboard. The anatomy table below sets out each layer, what it is, and how it fails.
| Layer | What it is | What fails |
|---|---|---|
| CMOS sensor module / camera board | A small circuit board in the top bezel carrying a CMOS sensor and a lens, and usually one or two microphones on the same board. On many models it is held by tape or adhesive, not screws | The sensor fails, giving a black, frozen or heavily noisy image, or stops enumerating; the lens is scratched, cracked, fogged or dirty; a microphone on the same board can fail with it — a useful clue, not proof |
| Lens and bezel assembly | A fixed-focus lens set into the display bezel and lid cover; most integrated webcams are fixed-focus and have no focus motor at all | A cracked lens or bezel after a drop or lid impact; a lens pushed out of alignment; dirt, finger oil or sticker residue on the lens, which causes blur — that is not a hardware failure, so clean it first |
| Flex cable through the hinge | A thin ribbon cable from the camera board, routed through the hinge area down to the mainboard. On some models it shares a bundle with the display; on others it is a dedicated microphone and webcam cable | Fatigue at the hinge: repeated opening and closing flexes the cable at the same point until the copper traces develop hairline cracks; intermittent first, then permanent; symptoms change with lid angle, see section 4 |
| Connectors, camera-board end and mainboard end | Small flip-lock and press-fit connectors, often with a locking flap or a brass clip | Loosened by a drop, vibration or a previous repair; not fully seated after a screen replacement; contact oxidation raising contact resistance; a loose connector can look exactly like a dead sensor |
| Physical privacy shutter | A sliding cover over the lens. Brand names include Lenovo ThinkShutter, Dell SafeShutter (automatic on some Latitude models), and the HP sliding privacy cover or privacy switch | A slider stuck half-closed, jammed by dirt, or broken in the closed position; an automatic SafeShutter failing to open; or the user simply has it closed |
| Infrared camera and infrared emitter | On Windows Hello models only: a second imaging path beside the ordinary RGB camera — an infrared sensor, often with its own lens, plus an infrared illuminator next to it | The infrared sensor or emitter fails while the RGB camera still works, or the other way round; the result is that video calls work but face sign-in fails, or Hello fails in the dark; they are separate hardware and must not be confused |
| Mainboard side | The internal USB host or camera interface and the socket the flex plugs into; on some designs the camera sits on an internal USB bus, on newer designs on a different internal camera subsystem | Socket pins damaged by a forced connector, solder-joint failure, or a board-level fault; this is the least common layer and the hardest to prove without substitution testing |
3. RGB camera and infrared camera: two cameras, two failure modes
This is the easiest section in the whole guide to confuse, and the easiest to misdiagnose. A laptop that supports Windows Hello face sign-in effectively has two cameras behind the bezel: an ordinary RGB camera for video calls and photographs, and an infrared camera for face sign-in, with an infrared illuminator beside it. However clear the RGB picture is, an ordinary RGB webcam cannot do face sign-in, because face sign-in requires a camera configured for near-infrared imaging. Device Manager is the way to tell them apart: look for an entry with "IR" in its name, such as "Integrated IR Camera"; a machine showing only a single "Integrated Camera" or "HP TrueVision HD Camera" very likely has no infrared sensor at all, and that is a specification fact, not a fault.
The two paths fail separately, and their symptoms are separate too. If the infrared emitter is damaged, RGB video calls are completely normal, but face sign-in fails, or only works in a bright room and fails in the dark, because infrared light is invisible to the eye and cannot be checked by looking. In the other direction, a dead RGB camera or a closed shutter gives a black video picture while the infrared path may be completely healthy. Diagnosis must test the two paths separately: video with the built-in Camera app, and face sign-in through the sign-in options in Settings. Never report that "the camera works" on the basis of one path alone.
There is one more variable since the April 2025 update. That update requires Windows Hello facial recognition to see a visible face from the colour camera as well as the infrared scan, as an anti-spoofing measure. So a machine whose RGB camera is dead or shuttered may now fail Hello even if its infrared path is healthy, and a machine whose infrared emitter is dead may fail Hello even though video calls are perfect. If face sign-in suddenly stops working in low light after an update, with video calls unaffected, this change in behaviour should be considered before suspecting the infrared emitter hardware. The change applies to builds after that update, not to every Windows machine ever made.
One more optical fact prevents a common misdiagnosis. Most business and consumer laptops in the vendor specification tables describe their cameras the same way: a fixed-focus lens, a CMOS sensor, and video at 1280 by 720 at 30 frames per second. Dell's own tables for the XPS 13 and Latitude families use exactly that wording, with a diagonal viewing angle of 78 degrees on the sampled models. The consequence is that most integrated webcams cannot autofocus at all: there is usually no focus motor to fail. A permanently soft or out-of-focus image is therefore not automatically a focus-motor failure. Fixed-focus modules fail optically through a scratched, fogged or displaced lens, sensor damage, or a module knocked out of alignment in its bezel bracket, not through a stuck autofocus actuator. Autofocus modules do exist on some higher-end and later models, so the exact model's specification sheet must be checked before autofocus is claimed for any particular machine, and fixed-focus must never be written as a universal rule for every model.
4. Flex-cable fatigue: the signature physical failure at the hinge
The most characteristic physical failure of a built-in webcam is not a burnt sensor. It is the flex cable tiring and breaking at the hinge. The mechanism is direct: every opening and closing of the lid bends the ribbon cable at the hinge, and after thousands of cycles the copper traces inside develop hairline cracks. This is the same mechanism as display flex-cable failure, applied to the thinner camera cable that shares the same hinge routing. A damaged hinge, or a lid forced beyond its designed range, accelerates the wear; hinge metal itself fatigues and breaks after years of flexing the display open and closed, and once the hinge is loose the cable inside it is loaded unevenly.
Flex fatigue has one diagnostic feature that is worth more than any other: symptoms that change with lid angle. The camera works at one lid angle and fails at another; the image flickers, freezes or drops out as the lid moves; or the camera only works when the lid is held at a particular angle. That pattern points at the cable, not the sensor and not the driver, because a driver does not change its behaviour when the lid is moved two degrees. Repair literature says the same thing about display cables: symptoms that change when the lid is opened or closed to different angles mean the flex cable is almost certainly at fault, and the camera cable shares the same hinge routing, so the same reasoning applies. A Microsoft question-and-answer case gives the camera-specific instance: a flickering camera light traced to a small tape connector running from the motherboard, through the hinge and up the back of the screen to the webcam, probably loose at one end.
The limits of this test must be stated honestly. First, a cable can fail completely, in which case no angle restores it, so a negative angle test does not clear the cable. Second, a loose connector can also be angle-sensitive, because moving the lid jostles it. Angle dependence proves a fault in the mechanical layer; it does not by itself prove which mechanical part. Final identification is a bench step: reseat the connectors, then substitute the cable, then substitute the module, one at a time. Third, a vibration pattern is also worth recording: stable at any fixed angle, but fluttering when the machine is carried or used on a train, which points at a trace that is barely holding contact.
5. The three Device Manager states: the core distinction in this guide
The first fork in layered elimination is the state of the camera in Device Manager. The three states below lead in three completely different directions, and no driver should be reinstalled before the state is known.
| State | How to confirm it | Which layer it points to |
|---|---|---|
| Not listed at all | No camera under "Cameras" or "Imaging devices" in Device Manager; nothing appears under "View, Show hidden devices" either; nothing appears after "Action, Scan for hardware changes" | Windows cannot see the hardware: BIOS disabled, physical switch off, flex cable broken, connector loose, sensor dead, or board socket fault. Reinstalling a driver cannot help, because there is no device for a driver to attach to |
| Listed with an error | The camera is listed but carries a yellow triangle, a down arrow or a greyed-out entry, and its properties show an error code, such as Code 43 or Code 45 | Windows sees the hardware but cannot start it: a corrupt, wrong or replaced driver, a USB controller problem, or a device fault. This is the one state where driver work is the right first move |
| Listed cleanly, but the image is black, frozen or garbled | Device Manager is clean and the driver loads, but the built-in Camera app shows a black preview, a frozen frame or heavy noise | Go back to the shutter, the physical switch, the vendor privacy mode and lens obstruction first; then suspect the sensor; if the fault is intermittent with lid angle, a partially cracked flex trace that still enumerates is still a suspect |
6. Error-code map: use Microsoft's own table, do not invent others
Need a laptop repair expert?
Free diagnosis · Transparent pricing · No fix, no fee · 180-day warranty
Every error code below comes from Microsoft's own support pages or vendor guidance. No other codes should be invented, and no single code should be written up as a complete diagnosis.
| Code | Microsoft's stated cause | What it means for this guide |
|---|---|---|
| 0xA00F4244 | The system cannot detect the camera | Hardware not enumerating, BIOS off, or physical switch off; not a driver problem in the first instance |
| 0xA00F4243 / 0xA00F4289 | Another app or process is using the camera | The camera is enumerating and is held by another process; close the holder and retry, do not open the machine |
| 0x80070005 | Access denied to the camera | Privacy or permission block |
| 0xA00F4292 | Camera access restricted by policy | Group Policy or administrator restriction, not a hardware fault |
| 0x800705AA | Insufficient system resources to run the camera | Close applications and restart |
| 0xA00F4246 | Camera locked by security software | Antivirus webcam protection; disable temporarily to test, then re-enable immediately |
| 0x80070490 | Device detection error due to registry or hardware issue | Detection-level fault, which can be hardware |
| 0xA00F4294 | Video start failed | The stream cannot start — driver or hardware |
| 0x80004005 | General error often due to hardware or driver failure | Non-specific; needs layered testing |
| 0xA00F4271 | Driver installed but not functioning properly (vendor mapping) | Driver reinstall or roll-back is the right move here |
| Code 43 | Windows has stopped this device because it has reported problems | A driver-reported failure: driver first, hardware second; only suspect hardware if Code 43 returns after a clean original-equipment driver install |
| Code 45 | Currently, this hardware device is not connected to the computer | For a built-in camera this is the strongest Device Manager pointer to a physical disconnection, because there is no USB plug to reseat from outside |
7. The hinge-angle test: the single most discriminating user-safe test
The angle test needs no disassembly and no extra software, takes a few minutes, and is the most discriminating test a reader can safely perform. Open the built-in Camera app so the preview stays on screen, then slowly move the lid through its range while watching the preview. Note the exact angle or angles where the image flickers, freezes, goes black, or returns. Then slowly move the lid back and check whether the symptom reappears at the same angle. Finally, hold the lid at an angle where the symptom appears and tap the lid edge lightly to see whether vibration changes anything. Record three things: which angle produces the fault, whether the symptom is flicker, blackness or a frozen frame, and whether it can be reproduced. A single flicker is not evidence; the symptom must recur at the same angle at least two or three times before it has comparative value.
The reading rule is simple. Symptoms that change with lid angle point at the flex cable and the hinge routing. Symptoms that are identical at every angle point away from the cable: towards the sensor, a connector that is fully seated or fully loose, the shutter, or software. A negative angle test does not clear the cable, because a cable can be completely severed; a positive angle test does not by itself convict the cable, because a loose connector can also be angle-sensitive. The real value of the test is that it splits the investigation in two: a positive result means working towards the mechanical layer, and a negative result means working towards the sensor, the connector, the BIOS and software. It is also the most useful information a reader can take to an inspection, because the inspector can start verification from the suspected layer instead of repeating the basic elimination from zero.
The angle test has two operating rules. First, never push the lid beyond its normal range of travel: forcing it past its designed limit accelerates flex-cable wear, so the test itself would create the disease it is trying to find. Second, do not shake, slap or press the machine hard during the test; vibration testing should be gentle, because its purpose is observation, not forcing a cracked trace back into contact. The angle test is a diagnostic tool, not a repair method: if the symptom disappears after the test, the crack is still there and will return the next time the lid is moved.
8. Layered elimination: work from the outside in, and do not change the order
The principle is to start with the steps that need no disassembly, cost nothing, and can be reversed; write down the result of each layer before moving on, and never change several variables at once, or nobody will ever know which one was the real cause. Change one variable at a time and record four things each time: the Device Manager state, the error code, the preview picture, and the lid angle. The nine layers below must be done in order; skipping a layer leaves a gap in the conclusion.
| Layer | Check | Signature if this layer is the fault |
|---|---|---|
| Layer 0: Physical obstruction | Look at the lens. Is the shutter closed? Is there tape, a sticker, a protective film, dirt, or a cracked lens? Is the lid damaged? | Black preview, but the camera is listed in Device Manager and the app opens without a "not found" error |
| Layer 1: Physical kill switch, function key, or vendor privacy mode | HP shutter key, where a lit LED means the webcam is off; Lenovo Fn plus F8 or Vantage Camera Privacy Mode; Dell F9 or Dell Optimizer camera privacy; Dell SafeShutter state; ASUS F10 camera hotkey; Acer Fn plus the camera-icon key | Same as layer 0: the device is present, the preview is black or a "camera turned off" message appears. Windows cannot always distinguish a hardware kill switch from a working camera that is switched off — Microsoft's own guide warns that when the switch is off, the device may not recognise that a camera is installed |
| Layer 2: BIOS / UEFI | Is the camera enabled in BIOS? On Dell, press F2 during start-up and look under Integrated Devices for Enable Camera. On a Lenovo ThinkPad, press F1 at the logo and look under Security, I/O Port Access, Integrated Camera. On HP, press F10 during start-up and look under Security, Device Security | The camera is absent from Device Manager entirely, and the Camera app reports 0xA00F4244, "We can't find your camera". This looks identical to a severed flex cable, so BIOS must be checked before the machine is opened |
| Layer 3: Windows enumeration in Device Manager | Are "Cameras" or "Imaging devices" present? Is there a yellow triangle, a red cross or a down arrow? Under "View, Show hidden devices", is there a greyed-out camera? After "Action, Scan for hardware changes", does anything change? | Not listed at all, even as a hidden device, points at hardware not enumerating: cable, connector, sensor, BIOS or board. Listed with an error points at a driver or device fault; see layer 4. Listed cleanly but with a black preview means going back to layers 0 to 1, then suspecting the sensor. Dell's guide states this explicitly: if these categories do not appear, the webcam is not being detected |
| Layer 4: Driver and operating system | In-box UVC driver versus vendor driver; roll back after a Windows update; turn Fast Startup off; test in Safe Mode | Listed with an error, for example 0xA00F4271, "the camera driver is installed but not functioning properly"; works in Safe Mode but not in a normal boot, which means a third-party conflict; broke immediately after a Windows update |
| Layer 5: Windows privacy settings | Settings, Privacy and security, Camera: Camera access on, Let apps access your camera on, Let desktop apps access your camera on. Teams, Zoom and browsers are desktop apps and need the third switch | The camera works in the built-in Camera app but not in Teams, Zoom or a browser, or it is listed cleanly in Device Manager but works in no app. Greyed-out toggles mean an administrator or Group Policy restriction, code 0xA00F4292, not a hardware fault |
| Layer 6: Application-level exclusive access | Is another application holding the camera? Close Teams, Zoom and browser tabs, and check Task Manager | Error 0xA00F4243 or 0xA00F4289, "Another app is using the camera". The camera itself is fine |
| Layer 7: Antivirus and security software | Webcam protection or webcam shield in Norton, Kaspersky, AVG and similar products | The camera is locked by security software, code 0xA00F4246. The test is to disable it temporarily and retest, then re-enable it immediately — Dell gives the same procedure with the same caution. Do not diagnose hardware until this is excluded, and do not leave protection off |
| Layer 8: Hardware diagnostic from the vendor | Dell SupportAssist or the hardware diagnostics camera test; HP PC Hardware Diagnostics, F2 at boot, then Component Tests and Webcam; Lenovo diagnostics or Vantage Hardware Scan; ASUS MyASUS System Diagnosis | Pass means the hardware is functional and the fault is software. Fail means the hardware is defective. This is the cleanest hardware-versus-software separator available without opening the machine, and Dell's guide frames it exactly that way |
The symptom map below compresses the nine layers into one quick-reference table. It must be remembered that one symptom never proves one part: this table is a narrowing tool, and each row must be paired with the cross-checks above before a part is named.
| Symptom | Most likely layer | What to check next |
|---|---|---|
| Black screen in every app, camera is listed in Device Manager, LED may be on | Privacy shutter closed, Vantage Privacy Mode, app permission, sensor or lens path | Check the shutter first, then Windows privacy, then BIOS and diagnostics. Dell lists "light on, no image" as a distinct symptom |
| "We can't find your camera", code 0xA00F4244 | Not detected at all: BIOS kill, privacy switch or key, cable or connector, dead module, missing driver | Follow layers 2 to 3 in order; do not reinstall the driver first |
| Camera missing entirely from Device Manager, no Cameras or Imaging devices category | Hardware not enumerated: BIOS disabled, privacy switch off, cable disconnected, module dead, or USB hub fault | Dell's advanced guide: if these categories do not appear, the webcam is not being detected |
| Camera listed with a yellow warning, Code 43 | Driver-reported failure: driver, firmware or hardware fault | Reinstall the original-equipment driver first; suspect hardware only if Code 43 returns after a clean install |
| Camera listed greyed-out or hidden, Code 45 | A previously attached device that is now not connected | For a built-in camera this points to a physical or electronic disconnection |
| Frozen frame, image freezes mid-call, then recovers or needs a restart | Frame-delivery stall: driver, media plug-in, an app holding the stream, resource exhaustion, or an intermittent cable | Check codes 0xA00F4294 and 0x800705AA; close the holding application; run the angle test |
| Flicker, image drops when the lid moves, works at some lid angles | Flex cable or hinge-path trace break, or a loose connector | Run the section 7 angle test and record the angles |
| Grainy, noisy, dull or pixelated image, but an image is present | Sensor, lens dirt or fog, low light, or driver image processing — not usually a dead module | Clean the lens with a soft microfibre cloth, improve the lighting, avoid backlight |
| Colour shift, washed-out or upside-down image | Driver, image processing, app setting, or the wrong module fitted after a repair | Reinstall the original-equipment driver first, then check the part number |
| RGB works, Windows Hello face does not work, or "couldn't find a compatible camera" | Infrared sensor, infrared driver, infrared illuminator fault, or the model has no infrared camera at all | Test the two paths separately; check Device Manager for an "IR" entry |
| Camera works in the Camera app, fails in Zoom, Teams or a browser only | App permission, app camera selection, or another app holding the camera, codes 0xA00F4243 and 0xA00F4289 | Check the desktop-app access switch; close the holding application |
| Camera works but the microphone is dead, or the other way round | Separate branches; if both died together, suspect the shared board or cable | Follow the vendor microphone guide for a microphone-only fault; both together points at the shared layer |
9. Common misdiagnoses and traps
The ten traps below should be checked one by one; readers should compare their own case against each of them before naming a part. First, reinstalling the driver for a broken flex cable. If the camera is not listed in Device Manager at all, there is no device for a driver to drive. Repeated uninstall and reinstall cycles, driver-updater tools and Windows resets will not restore a cracked copper trace. The tell is Device Manager absence, often together with angle dependence. Second, confusing "camera in use by another app" with "module not enumerating". Code 0xA00F4243 means the camera is enumerating and is held by another process — the hardware is alive, and the fix is closing the holder, such as Teams, Zoom, a browser tab, OBS or a virtual-camera application, and restarting. Do not open the machine for a 0xA00F4243. Conversely, 0xA00F4244 means nothing is enumerating — do not waste time closing applications for a 0xA00F4244. Third, confusing Windows privacy settings with a hardware kill switch. Both produce a black preview or a "camera off" message, and Windows privacy toggles can all be on while a hardware switch keeps the camera off — Microsoft's guide notes the device may not recognise that a camera is installed when the physical switch is off. Lenovo adds a third layer: Vantage Camera Privacy Mode can block the camera while every Windows toggle is on. Check in order: shutter, function key or side switch, vendor application privacy mode, then Windows privacy. Fourth, confusing antivirus webcam protection with hardware. Norton, Kaspersky and AVG webcam shields block the stream while the device enumerates cleanly, code 0xA00F4246. The test is a temporary disable and retest, then re-enabling immediately — Dell gives the same procedure with the same caution. Do not diagnose hardware until this is excluded, and do not leave protection off. Fifth, treating Safe Mode as a fix. If the camera works in Safe Mode but not in a normal boot, a third-party driver or application is the conflict. If it fails identically in Safe Mode, the fault is lower down: the driver core, the BIOS, or hardware. Safe Mode is a separator, not a repair. Sixth, treating "works in one app, not another" as a hardware fault. Microsoft's own guidance is to test in the built-in Camera app, and if it works there, the issue lies with the other application's settings. Seventh, confusing dust or a sticker with sensor failure. A blurry or grey image is often a dirty lens or a forgotten protective film, not a dead sensor. Clean the lens with a soft, lint-free cloth before any hardware conclusion; lens-cleaning guidance appears in the IdeaPad webcam-board manual. Eighth, assuming the infrared camera is the RGB camera. Hello failing does not mean the webcam is broken, and a working webcam does not mean Hello should work. Test video through the Camera app and Hello through Settings, Accounts, Sign-in options separately. Ninth, treating "not in the USB listing" as proof on Linux or dual-boot machines. Some integrated cameras sit on a PCI camera subsystem and never appear in a USB listing even when healthy. On Windows, use Device Manager plus vendor diagnostics instead. Tenth, treating the 2025 Hello change as a new fault. After the April 2025 update, Hello needs a visible face from the colour camera as well as the infrared scan, so Hello can stop working in the dark on a machine whose hardware is unchanged. If Hello suddenly fails in low light after an update, with video calls unaffected, check this before suspecting the infrared emitter.
Three further traps appear only after a repair, and they deserve separate attention. After a screen replacement, the first suspect for a camera that died immediately afterwards is the repair itself, not a coincidental module failure. The camera lives in the lid, so any screen or bezel job touches its cable, and a flex cable that was not reconnected, was inserted crookedly, or whose locking flap was not closed will make the camera vanish. After a hinge repair, a cable can be pinched: a hinge job that re-routes the display and camera cable with a sharp bend or a pinch at the hinge barrel can damage the camera traces while the display still works. An aftermarket screen assembly can also carry an incompatible camera module — a different resolution, no infrared sensor, or a different connector pinout — which enumerates as a generic device, gives no image, or breaks Hello. The fix is the correct model-specific module, verified by part number, not any camera board that fits the hole. Finally, one Acer-specific pattern is reported in the community and must be presented only as a pattern to check with a technician, not as established fact: on some Acer Aspire models a vendor media plug-in loads but stops delivering frames after a Windows update, giving a black image in every application, a blinking LED, and a Device Manager report that the camera is healthy. If a reader's Acer machine shows exactly that combination, it should be checked by a technician rather than fixed by following community instructions to delete system components.
10. Hong Kong conditions: why failures are especially likely here
The Hong Kong context must be written as it is, not as a generic article. First, humidity and oxidation. Hong Kong Observatory normals put mean relative humidity at 78 percent for the year, 82 to 84 percent in March to May, and 69 to 73 percent in the driest months. That is a persistently damp environment for small, unsealed connectors. The corrosion mechanism is general electronics, not webcam-specific: moisture and oxygen oxidise copper and other contact metals, raising contact resistance; dissimilar metals in the presence of moisture can suffer galvanic corrosion; and fretting corrosion at connectors shows as intermittent disruption. A room air-conditioned to a cool temperature by day and left warm and humid at night can push a cold circuit board below the dew point, so water condenses on it. The honest framing is that humidity is a plausible contributor to connector-level intermittency in Hong Kong, especially on machines kept in damp rooms, carried in rain, or moved repeatedly between strong air-conditioning and warm humid air. No measured Hong Kong webcam failure rate was found, and none must be claimed.
Second, commuting and daily carrying. Hong Kong laptops are typically carried every day — on the MTR, to the office, to school — opened and closed many times a day, and used in small spaces where the lid is pushed past a comfortable angle or the machine is picked up by a screen corner. That is exactly the cycling that fatigues a hinge-routed flex cable. A lid that is stiff, loose, or has a cracked hinge should be treated as a camera-cable risk factor, not a separate cosmetic issue, because the same hinge movement that wears the hinge wears the cable inside it. The practical advice is to open and close the lid with both hands, never to lift the machine by a screen corner, never to push the lid beyond its normal range, and to have a hinge checked as soon as it feels stiff or loose, rather than waiting until the cable breaks as well.
Third, screen protectors, privacy film and tape over the lens. Many Hong Kong users fit a screen protector or keep tape over the camera, and the edge of a protector or the residue from tape can cover the lens or the infrared sensor, giving a blurry image or a failed face sign-in. Vendor guidance starts with inspecting the camera for obstruction by a screen protector or a privacy film, so the lens should be cleaned and any residue removed before a sensor failure is concluded. On presence-detection models there is a further point: tape over the time-of-flight sensor, a privacy shutter, or a replacement screen or bezel that covers the sensor window can break wake-on-approach and automatic locking while the RGB camera itself still works. Do not confuse a dead presence-sensing function with a dead webcam.
Fourth, the parts reality. Webcam modules and flex cables are model-specific, with different part numbers per model family, and on some models the cable is not sold alone but only with the display cable or the whole lid assembly. Availability and lead time therefore depend on the exact model, which is why the price must be a written quotation after inspection rather than a published starting price. Before any part discussion, the reader should find the exact model number, usually on the base label. United States-style "mail it in" repair framing does not fit a walk-in Hong Kong shop, and any claim about how common webcam failure is in Hong Kong would be fabricated, because none was found in first-hand sources.
11. Repair, replacement and substitution decision framework
The decision table must not be written as a blanket recommendation to repair or to use an external webcam in every case. It must follow the inspection result. The price is always by written quotation after inspection; this guide gives no specific price for webcam repair, because the scope cannot be known until the machine is opened and the part number checked.
| Situation | The more reasonable direction | The trade-off that must be stated |
|---|---|---|
| Fault confirmed in the shutter, switch, BIOS, privacy setting, driver or security software | Correct the setting following the layered elimination; no parts needed | Lowest cost; but confirm the fix by repeating the test several times, not once |
| Fault confirmed in a loose connector, with the cable and module intact | Reseat both connectors, with the battery disconnected and static precautions taken | A disassembly repair; forcing a flip-lock connector can break the socket and turn a cable job into a board job; if reseating does not restore enumeration, do not repeat it — move to substitution testing |
| Fault confirmed in the flex cable, with a positive angle test or a visibly creased or pinched cable at the hinge | Replace the webcam flex; if the model's cable is combined with the display cable or only sold with the lid assembly, the repair scope expands accordingly | The new cable must be routed exactly through the hinge channel; a mis-routed cable fails again quickly; the part number must be confirmed, and a similar-looking cable must not be substituted |
| Fault confirmed in the camera module, with constant failure at all lid angles, a failed vendor diagnostic image test, and a known-good cable already tested | Replace the camera board | The part number must match the model; an RGB-only board fitted to a Hello machine silently removes face sign-in; the microphones on the same board must be tested as well |
| Fault confirmed in the lens or bezel | Replace the lens element if it is separable, otherwise the bezel or lid cover that carries the module | A cracked bezel glued back rather than replaced can keep stressing the cable |
| Fault points at the mainboard connector, with bent or torn socket pins, or a connector that no longer holds the flex | Mainboard-level repair assessment, including micro-soldering of the socket | This is the escalation path, not a first step; if the socket is damaged, a module swap alone will not fix it — the new module will show the same "not detected" symptom |
| Internal hardware repair is uneconomic, the part cannot be ordered, the machine is old, or the user needs video calls working immediately | External USB webcam as a substitute | Immediately usable with no disassembly; but it is not a repair of the internal camera; an ordinary external webcam does not restore Windows Hello face sign-in — only a Hello-compatible infrared external camera does; the built-in dual-microphone array and presence sensing are not replaced by an external webcam |
| Several layers damaged at once, or other parts of the mainboard also faulty | Judge on the whole-machine inspection result | Do not add up separate itemised quotations; the decision should follow the written quotation after inspection |
| The machine has reached replacement age, or other ageing problems remain after repair | Compare repair against replacement together | The comparison must be based on the inspection result and the written quotation, not on a single symptom; this guide gives no replacement-model recommendation |
12. Teaching examples, none of which are real cases
The three examples below are purely teaching illustrations, not real cases, and they do not represent any real user or repair record. Example one, a teaching illustration and not a real case: a laptop used for daily commuting has a camera that works only when the lid is held at one angle, and goes black past another angle, while Device Manager shows the camera appearing and disappearing. Following the layered procedure, the shutter, switch, BIOS and privacy settings have already been excluded, and the positive angle test points at the flex cable or the hinge path. Inspection must confirm whether the fix is reseating a connector, replacing the cable, or replacing the cable together with the display cable. Example two, a teaching illustration and not a real case: a laptop whose video calls are completely normal, but whose Windows Hello face sign-in always fails, and Device Manager shows only one entry called "Integrated Camera", with no device carrying "IR" in its name. This combination points at a machine that simply has no infrared camera, which is a specification fact, not a fault; the correct handling is to explain that clearly, not to replace the camera module and not to reinstall drivers. Example three, a teaching illustration and not a real case: a laptop whose camera vanished immediately after a screen replacement, with no camera at all in Device Manager, while the BIOS shows the camera as enabled. The timing points at the screen job: the flex cable was not reconnected, was inserted crookedly, or its locking flap was not closed. Inspection should start with the connector and the cable, and must not jump straight to declaring the sensor dead.
13. Preparing for inspection, and related links
Before sending a machine for inspection, prepare the following information so the inspector can narrow the fault down quickly: the full model number, including the model on the base label; how the symptom appears, including which lid angles work, which do not, whether vibration affects it, and whether cold and warm states differ; the Device Manager state, including whether the camera is listed, whether there is a yellow warning, and which error code appears; the results of the layered tests already done, including the shutter, switch, BIOS, privacy settings, cross-application test and vendor diagnostic result; any history of drops, liquid ingress, screen replacement or hinge work; and whether the RGB camera and face sign-in fail separately or together. This information is not meant to let the reader diagnose the machine alone; it lets the inspector start verification from the suspected layer instead of repeating elimination that has already been done.
For related links, readers can first look at pricing and service scope to understand the service framework; the price is always by written quotation after inspection. Readers who need to arrange an inspection can go to inspection booking for the inspection arrangements. Disassembly, bezel removal, measurement and soldering are for professional inspection; readers should only do visual inspection and layered testing, and that safety line holds from the first section to the last, however deep any section goes.
If inspection finds other components faulty at the same time, the published starting prices for those lines are battery from HK$580, screen from HK$1,280, keyboard from HK$480, and mainboard chip-level repair from HK$880; everything else is by written quotation after inspection.
The shop details are: Room 1209, Dalton Plaza, Shek Mun, Shatin; telephone +852 2186 8010; WhatsApp +852 6558 6806; opening hours 12:00–19:00. Before asking for help, please complete the non-disassembly parts of the layered elimination above, and record the Device Manager state, the error code, the preview picture and the lid angle, so inspection can start directly from the suspected layer instead of repeating basic elimination. The most difficult thing about a physical webcam failure is not a fault that is total, but a fault that is ambiguous: the camera enumerates, the light is on, and the image comes and goes, which makes it look like a driver problem. Separating the module, the flex cable, the connector, the shutter and the infrared path into their own layers is the first step towards genuinely repairing the built-in camera.
Frequently asked questions
Q1: The camera cannot be found in Device Manager at all. Does that mean the camera is dead?
A: Not directly. A camera that does not enumerate at all can be disabled in BIOS, switched off at a physical switch, disconnected by a broken flex cable, loose at a connector, dead at the sensor module, or disconnected at the mainboard socket. The correct order is to check the shutter and the physical switch first, then confirm in BIOS that the camera is enabled, then run the vendor hardware diagnostic, and only then suspect the cable, the connector or the module. Reinstalling a driver cannot help, because there is no device for a driver to attach to.
Q2: The camera works sometimes and goes black at other times, and moving the lid brings it back. Is the driver unstable?
A: That is not the typical pattern of a driver problem. Symptoms that change with lid angle point at the mechanical layer of the flex cable or the hinge path: the copper traces inside the cable have cracked, so they make contact at some angles and break at others. The correct step is the angle test in section 7: record which angles fail and whether the symptom can be reproduced, then hand the machine to inspection to confirm whether the fault is in the connector, the cable or the module. A driver does not change its behaviour when the lid is moved two degrees.
Q3: Video calls work, but Windows Hello face sign-in does not. Is the webcam broken?
A: Not necessarily. Video calls use the RGB camera, while face sign-in uses the infrared camera and the infrared emitter, and they are separate paths. The correct step is to test them separately: first confirm the RGB preview is normal, then check Device Manager for a device with "IR" in its name. If there is no infrared device at all, the machine has no infrared camera, which is a specification fact, not a fault. If there is an infrared device but sign-in fails, then suspect the infrared sensor, the emitter or the driver. Since the April 2025 update, face sign-in also requires the colour camera to see a face, so an RGB camera that is covered can make sign-in fail as well.
Q4: An external USB webcam works. Does that mean the built-in camera needs no repair?
A: No. A working external webcam only proves that the external camera and the system are broadly normal; it does not prove the built-in camera is healthy, because the external camera bypasses the internal camera rather than repairing it. The internal flex-cable crack, loose connector or module fault is still there. It must also be stated clearly that an ordinary external webcam does not restore face sign-in — only an external camera explicitly marked as supporting Windows Hello infrared does that — and the built-in dual-microphone array and presence sensing are not replaced by an external webcam either. If daily work depends on the built-in camera and face sign-in, the external webcam is only an interim measure.
Q5: The camera vanished immediately after a screen replacement. Did the screen replacement damage it?
A: The timing makes that suspicion reasonable, but it still has to be confirmed layer by layer rather than assumed. The camera lives in the lid, so any screen or bezel job touches its flex cable, and a cable that was not reconnected, was inserted crookedly, or whose locking flap was not closed can make the camera disappear. The correct steps are to check BIOS first to confirm the camera is enabled, then look at the Device Manager state and the vendor diagnostic, and then hand the machine to inspection to check the connector and the cable. Inspection in this situation should start with the connector and the cable, not with declaring the sensor dead, and the bezel should not be opened by the reader to check.
Need Professional Laptop Repair?
Laptop King has 15+ years of repair experience in Shek Mun, Sha Tin. Free diagnosis, transparent pricing, no fix no fee. 180-day warranty for your peace of mind.