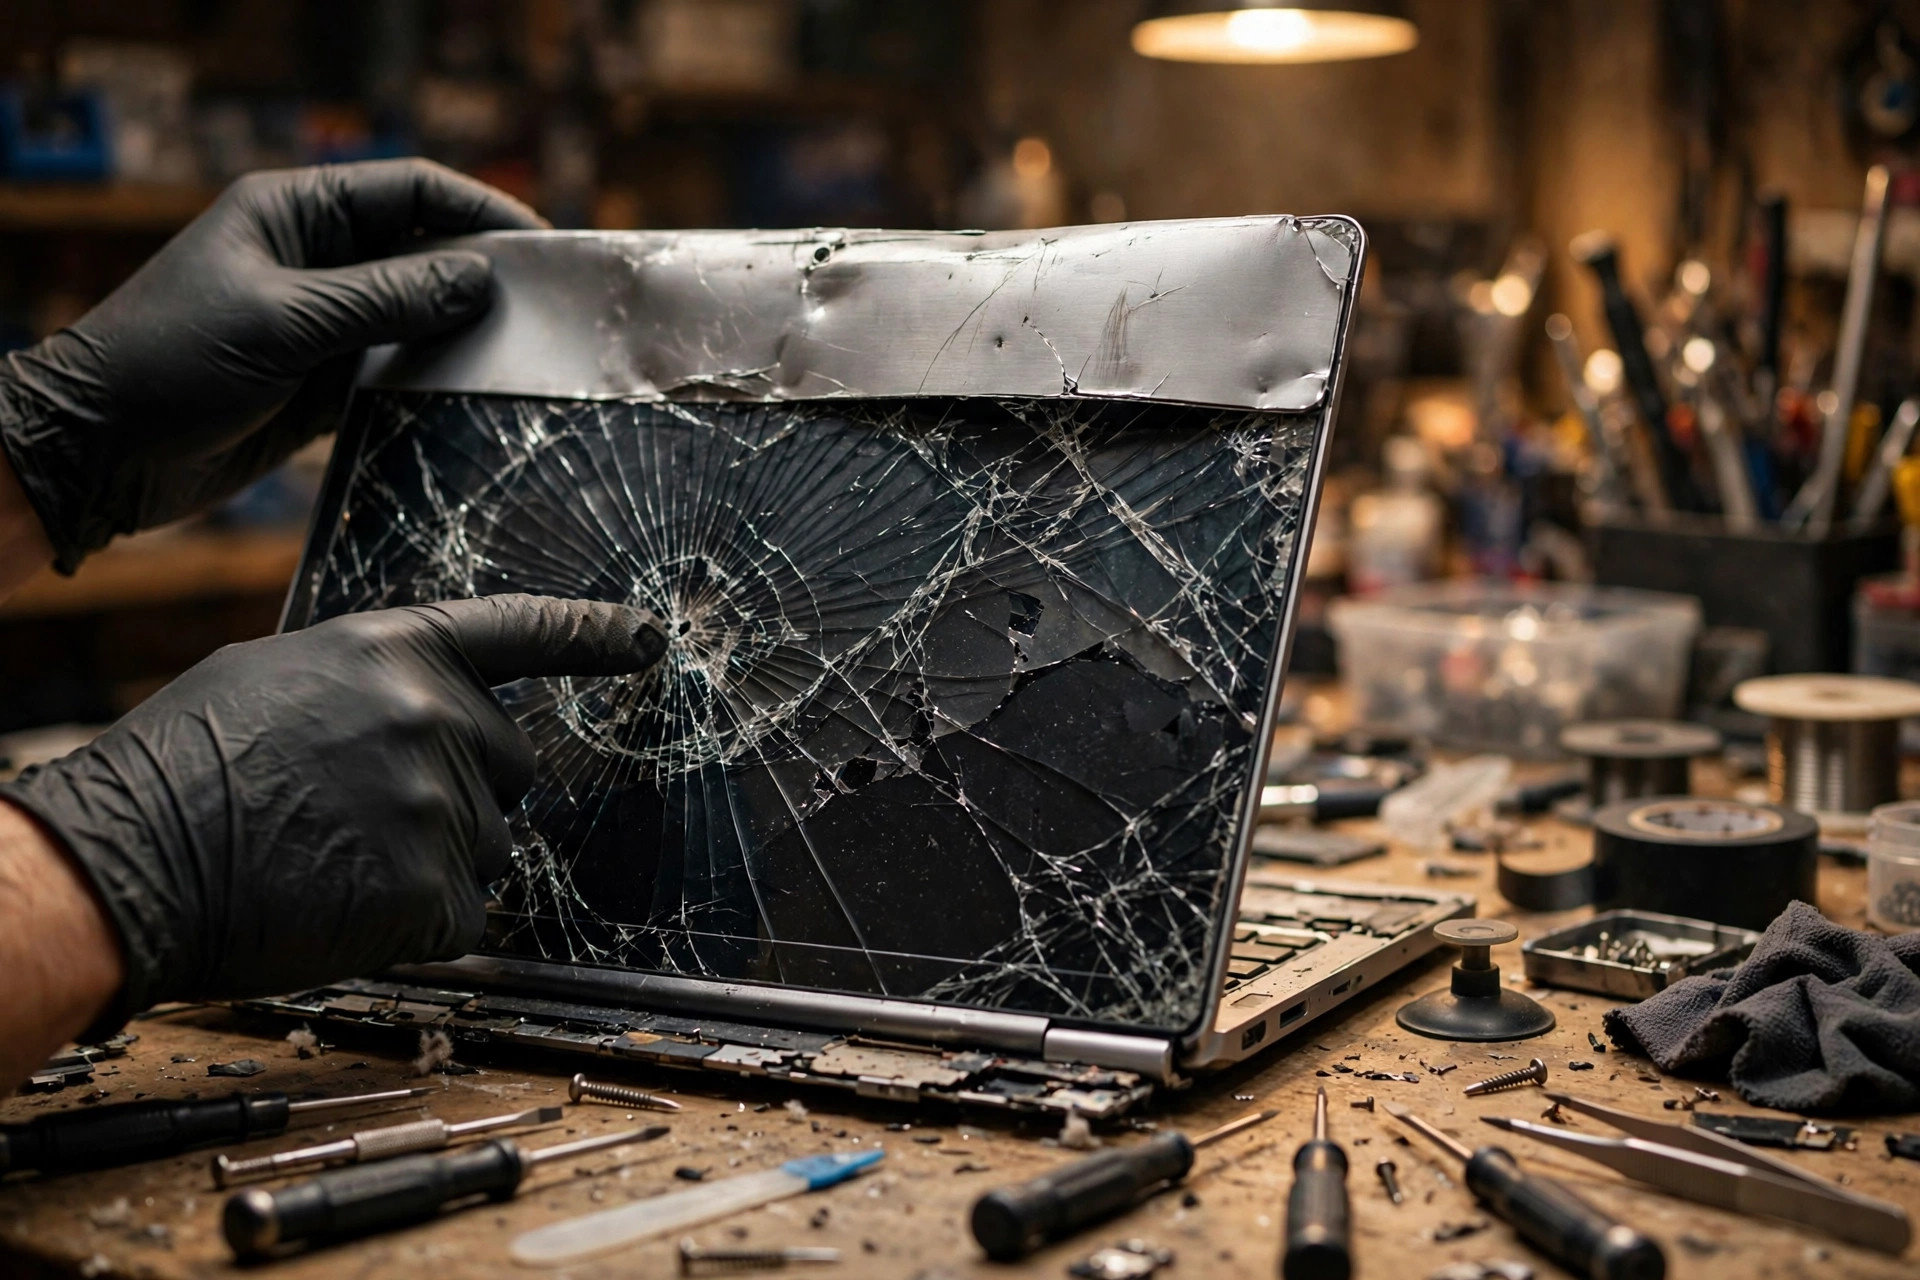
When a user says "my screen is broken," the repair bench can be looking at a dozen completely different things: a spider-web crack across the glass, an ink-black blotch fixed in one spot, a picture that only flickers at certain lid angles, a bezel lifting away from the hinge corner, a hinge that has grown steadily stiffer, a dented lid corner with a white spot blooming in exactly the same place. Behind those symptoms the hardware can differ by an entire assembly — from the metal lid shell on the outside, to the glue and clips of the bezel, to the outer glass and polariser, to a liquid-crystal layer only about three to four micrometres thick, to the light-guide plate and diffuser films of the backlight, to a single loosened brass insert inside a hinge mount. Any one of those layers failing will present itself as "the screen is broken." This article uses a seven-layer model, treating the laptop display module as a stacked structural system, and works through each layer's materials, failure mechanisms and test methods, then narrows the fault with a symptom-to-mechanism cross-reference, a layered elimination flow, twenty-two misdiagnosis traps, the Hong Kong humidity and commuting context, the aftermarket panel reality, the manufacturers' own warranty wording, and a repair, replace or upgrade decision framework.
This is an advanced diagnosis article, focused on the physical and mechanism layers. The electronic and signal layers — the signal integrity of the display cable, the timing controller, the backlight driver circuit, and the electronic failure of dead and stuck pixels — have been covered in separate articles. This article only explains, where symptoms overlap, how to eliminate layer by layer and prove the fault is physical rather than electronic; it does not rewrite the mechanisms of those articles. Basic steps such as restarting the machine or checking a settings switch are only summarised inside the elimination flow, not rewritten as a beginner tutorial. Any step that involves opening the chassis — disassembly, measurement, swapping, soldering — belongs to professional testing, and this article does not teach the reader to open the machine, remove a panel, take apart a hinge, or prise off a bezel. The only prices quoted in this article are the four confirmed items: battery replacement from HK$580, screen replacement from HK$1,280, motherboard chip-level repair from HK$880, and keyboard replacement from HK$480. Any figure with no public first-hand source is marked in this article as having no public first-hand source, or as subject to inspection of the actual machine. No customer cases, statistics, reviews or prices are invented. Wherever possible, each factual claim keeps its research source code, and the full source list appears at the end.
Chapter 1: The display module is not one piece of glass, it is seven systems
To the user, the laptop display module is a single thing that has cracked, gone black, or started flickering. At the hardware mechanism level, it is at least seven systems stacked together. Researcher B's seven-layer model runs from the outside in: L0 the lid structure layer, L1 the bezel and bonding layer, L2 the surface optical layer, L3 the liquid-crystal cell layer, L4 the backlight optical layer, L5 the hinge and fixing layer, and L6 the assembly connection layer. Researcher A starts from the assembly instead: the lid, the hinges, the bezel, the panel module, the backlight unit, and then the cables, camera, microphones, antennas and Hall sensor magnets. The two models describe the same object from different angles: A follows the service-manual disassembly order, B follows structural depth. This article merges them, using the seven-layer model as the skeleton of the whole piece and matching each layer against the manufacturers' disassembly order, so that a reader can go from a symptom to a layer, and from a layer to a repair option.
The first job of the seven-layer model is to correct the most common misunderstanding: treating the "screen" as one thing. In fact, the outer glass the user touches every day is only L2; the black blotch the user sees is usually in L3; the white spot is usually in L4; the dent the user feels is in L0; the lifting bezel is in L1; the stiffening opening action is in L5; the flicker that follows the lid angle is usually in L6. One sentence, "the screen is broken," can point at any one of the seven layers, or at several at once. The first step of diagnosis is always to ask which layer has failed, not which part to order first.
The second job is to explain how layers pass damage to each other. The display module is, in Restarters Wiki's words, a sandwich: the screen, the camera and the wireless antennas are clamped between the bezel at the front and the lid at the back, and the hinges sit inside the sandwich, anchoring the display module to the base while allowing it to open and close. That sandwich structure means that a deformation in any one layer is transmitted to its neighbours: a bent lid holds the panel under uneven stress for as long as the machine is used; a cracked hinge mount twists the panel edge every time the lid moves; a separated bezel leaves the panel edge unsupported, and dust and moisture enter the assembly more easily; a cable pinched by a hinge turns a structural problem into an electronic-looking symptom. Almost every recurrence trap in this article is a story of repairing only the most visible layer and missing the second one.
The third job is to set the boundary of the repair options. The manufacturers' manuals split the display into separately replaceable units: Dell's manual lists the display assembly, the display panel, the display hinges, and the display back cover and antenna assembly as separate units, each with its own removal procedure; Lenovo's hardware maintenance manual removes the LCD module in the order bezel, then panel, then camera board, then camera cable, then display cable, then hinges, then hinge caps, then LCD cover. That disassembly order is itself information: on a machine that can be taken apart piece by piece, replacing only the panel is a viable option; on a machine that cannot, replacing the assembly is the manufacturer's stated route. Some Dell models, such as the Precision 5470, use a Hinge-Up Design (HUD) assembly that cannot be disassembled any further once removed; the manufacturer's instruction is to replace the whole display assembly if any part inside it fails. On recent Apple laptops the hinge is already integrated into the display assembly and there is no separate hinge to buy. The same symptom can mean "replace the panel" on one model and "replace the assembly" on another; the deciding factor is whether that model's assembly can be taken apart, and it must never be written as if all machines were the same.
Terminology is fixed for the whole article. The lid, or A cover, is the outer shell at the back of the screen, called the LCD cover or display back cover. The bezel, or B cover, is the frame around the screen. The palm rest and keyboard area is the C cover, and the bottom cover is the D cover. That A, B, C and D naming is the manufacturers' common classification, also summarised by Restarters Wiki. A hinge is one of the two metal friction hinges joining the lid to the base. A screw boss is a moulded plastic post inside the shell with a brass insert embedded in it, and the hinge screw threads into that insert. The panel module is the LCD panel itself, together with its backlight unit. The display assembly is the whole upper half — lid, panel, bezel, hinges, cables, camera and antennas, depending on the model. The reader needs these terms, because every judgement later in this article will state which layer it belongs to and which layer of evidence is still missing before a case can be closed.
| Layer | Name | Contents | Key problem in this article |
|---|---|---|---|
| L0 | Lid structure layer | Lid, aluminium or magnesium alloy or plastic shell, reinforcing ribs | Deformation, denting, twisting, holding the panel under uneven stress |
| L1 | Bezel and bonding layer | Front frame, rubber gasket and seal, double-sided tape and adhesive, clips | Separation, lifting, dust and water entry, pinching the panel edge |
| L2 | Surface optical layer | Outer glass, touch glass and sensor layer on touch models, upper polariser, anti-reflective and anti-glare coatings | Cracking, scratching, polariser bubbling and peeling, touch failure |
| L3 | Liquid-crystal cell layer | Front and rear glass substrates, liquid-crystal layer, thin-film transistor array, colour filter, photo spacers, edge seal | Glass cracking, liquid-crystal leakage, black and ink blotches, bright and coloured lines, cell-gap change |
| L4 | Backlight optical layer | LED light bar, light-guide plate, diffuser sheet, brightness-enhancement and prism film, reflector sheet | Local dark corners, bright spots and white spots, uneven light, broken light bar |
| L5 | Hinge and fixing layer | Hinge body, friction clutch, screw bosses and brass inserts, hinge mounts, base fixing points | Screw boss cracking, hinge mount breakage, hinge too tight or too loose, one-sided loading |
| L6 | Assembly connection layer | Display cable, camera cable, Wi-Fi antennas, joint between display assembly and base | Cable pinched and pulled, assembly out of square, symptoms that follow the lid angle |
Chapter 2: L2, the outer glass and the polariser — cracking, scratching, bubbling, delamination
The outer glass is the outermost layer of the display module and the first place the user sees damage. But "the outer glass is cracked" already covers several completely different situations, with completely different repair directions, and it must never be reduced to "there is a crack, order a panel."
The first situation is impact cracking. A glass substrate of about 0.5 mm in magnitude will crack in a brittle way when a point impact or bending stress exceeds its strength, with cracks radiating outwards or forming a spider-web pattern that can spread from the impact point. When the outer layer has cracked but the inner layer has not, touch and display may still work for a while, but the crack edge will keep extending and the fragments carry a risk of cuts. The crack tip is a stress concentration point: opening and closing, temperature change, and even light pressure can extend a crack along the weak planes of the glass. This article must not write that a crack will definitely spread. The correct wording is that there is a risk of spreading, that the area must not be pressed again, and that tape must not be used to hold it together. Photograph the crack's position and length, and compare again after an interval.
The second situation is the internal crack. Dell's official catalogue of damage types not covered by basic support distinguishes cracked glass from internal cracked glass: the surface feels smooth, with no crack to the touch, but the glass inside has already cracked and the display shows cracks or black spots. This is an important distinguishing point in this article, and it must never be written that a smooth surface means no breakage. The way to tell is to switch the machine off, look at the screen surface at an angle under good light, and then run a finger lightly across it — without pressing — to feel whether a crack can be felt. A crack that can be felt is usually in the outer glass; a black blotch that appears on power-up but cannot be felt usually means the inner layers are already damaged. The repair direction for an internal crack is a panel or assembly replacement, depending on the model. It must never be written that a smooth surface means nothing is wrong.
The third situation is polariser damage. The polariser is a stretched polyvinyl alcohol iodine-dyed layer sandwiched between triacetyl cellulose protective films. It is a thin film, not glass. High temperature can relax and deform the stretched polyvinyl alcohol and, at worst, delaminate it from the protective layers; the pressure-sensitive adhesive can also fail under high or low temperature or thermal cycling. For Hong Kong, leaving a laptop in a hot car or in a sunlit window, together with the thermal cycling of air-conditioned rooms, will accelerate ageing of the polariser and adhesive layers — but there is no direct data on laptops for a claim that Hong Kong weather causes polariser delamination, so this article can only write that high heat and humidity accelerate film ageing and that inspection is needed, not a statement of cause. Polariser damage shows as surface scratching, rainbow patterns, cloudy patches, and Newton's rings, an oil-film-like pattern, especially when the bonding is damaged. The point for the writer is that a scratched polariser does not necessarily mean the whole panel must be replaced, but the judgement needs a professional teardown; the reader must never be told to peel the film off.
The fourth situation is surface abrasion. Dell's catalogue also lists LCD surface abrasion from external pressure as physical damage. It usually comes from long contact with the keyboard, hard objects, or coarse cloth, or from a hard object pressed against the screen when the lid is closed. A screen should only be cleaned with a soft cloth and a light wipe, never with force, and cleaning fluid must never be sprayed directly onto the screen. That preventive advice is derived from the mechanism and is presented here as preventive advice, not as a guarantee.
Touch and laminated glass are a special case and must be kept separate. Some models, especially Apple laptops from the Retina generation onwards and high-end touch laptops, are laminated all-glass assemblies: the outer glass, the touch layer and the LCD are laminated into one unit, and the outer glass cannot be replaced on its own without taking the assembly apart. Apple's official repair manual lists the display of the MacBook Pro 16-inch 2021 as a single orderable part, and a system configuration step is required after replacement, with calibration values customised per part. The iFixit guide for the MacBook Pro 13-inch Retina, early 2015, likewise replaces the whole Retina display, display glass and camera assembly, not just the glass. A non-laminated machine where the outer glass is cracked but the display still works is a different matter from a laminated machine where a cracked outer glass is an assembly problem, and the two must never be confused. When touch failure accompanies a cracked glass, and the area of touch failure matches the area of the crack, the usual route is an assembly replacement; the glass must never be separated from the LCD by force.
Chapter 3: L3, the liquid-crystal cell — glass, liquid crystal, and thin-film transistors under pressure
The liquid-crystal cell is the heart of the display module and also the layer where pressure damage most often becomes permanent. To understand why one press can break it, first understand its structure. From the viewing side to the back, a typical thin-film transistor LCD laptop panel runs: front polariser, colour-filter glass with its indium tin oxide common electrode and alignment layer, liquid-crystal layer, thin-film transistor array glass, rear polariser, and then the backlight unit. That stacking order is supported by patent text: LG Display patent US20050140839A1 states that an LCD includes a lower thin-film transistor substrate, an upper colour-filter substrate, and a liquid-crystal layer in between; the first polariser is attached to the back of the lower substrate and the second to the front of the upper substrate, with their transmission axes at right angles; and the backlight unit sits below the panel.
The numbers are themselves the mechanism. The polariser is about 0.1 mm thick, the glass substrate about 0.5 mm, and the liquid-crystal layer only about three to four micrometres thick. The liquid-crystal layer provides no structural support of its own. The two glass sheets are held parallel and at the right spacing by tiny resin pillars or beads — photo spacers — in the black areas between pixels. Pressure can crush the spacers first, and then crush the thin-film transistor layer. Because the liquid-crystal layer is so thin and depends on a precise cell gap for its optical behaviour, any force that changes the local distance between the two glass sheets — pressing, bending, twisting — directly changes the light transmission and colour of that area, even if the glass has not cracked. That is a mechanism inference, not a directly measured figure, and it must be labelled as such; but it is the key to every symptom in this chapter.
The first effect of pressure is a bruise-like dark blotch or cloudy patch. External force compresses the microscopic cell gap between the two glass sheets, the liquid-crystal molecules take on a permanently wrong orientation, and light scatters into a cloudy or bruised patch. An official HP Support Community reply states that the black patch is caused by local pressure or impact, damaging the liquid-crystal layer inside the panel and causing blotches or leakage, and that LCD damage from pressure does not recover on its own. The boundary between a light pressure mark and permanent damage must be handled carefully. Some content sites claim a light pressure mark can fade within hours or days, while a leaking black blotch and a cracked glass are permanent; that claim has not been confirmed by a manufacturer and sits in tension with HP's statement that pressure damage does not recover on its own. This article therefore never promises that leaving it alone for a few days will fix it. The correct wording is that a light pressure mark sometimes looks slightly fainter, but the underlying damage remains; if the blotch is fixed, spreading, or accompanied by lines, it should be treated as physical damage and sent for inspection. Online remedies such as massaging, heating, or using a suction cup to repair a pressure mark must never be repeated here — multiple sources agree that pressing, rubbing, and heating must not be done.
The second effect is leakage. An impact that breaks the liquid-crystal cell lets liquid crystal escape, forming a black, ink-like blotch that can spread over several days. A black blotch with a spreading edge means the leak is active, and the panel will not recover on its own. Photographing the blotch and comparing again after a few days is important evidence; it must not be written that a black blotch will definitely spread, but that spreading points to leakage. The repair direction is a panel replacement. The area must not be pressed or heated, and the user must never be told to press a black blotch to push the liquid crystal back — pressing a pressure-damaged panel does not heal it, it only makes it worse.
The third effect is a fixed vertical or horizontal coloured line. Once pressure has crushed the spacer pillars, it can go on to crush the thin-film transistor layer and the row conductors, producing a fixed vertical or horizontal coloured line — red, blue, yellow, or white — in a fixed position that does not move with the picture. A repair discussion describes a real case: a thumb supporting the weight of the whole machine pressed onto the screen, and a quarter of the screen developed a vertical line that made it unreadable; the only remedy was a screen replacement. A second mechanism is a glass crack cutting through the gate and data lines on the thin-film transistor glass, so that the pixels in that row or column lose control and show a fixed bright or coloured line; damage to the edge seal or the edge conductors makes the line start from the edge. A physical bright line is usually fixed in position, does not change with a restart or a driver change, and is already visible on the BIOS screen. An electronic bright line may change with the cable angle or temperature, but where the two overlap, only a professional teardown can settle it, and this article must not pretend that a symptom alone can give a hundred percent certain diagnosis.
| Order | Layer | Function | Physical weak point |
|---|---|---|---|
| 1 | Front polariser | Passes light of one polarisation only, at right angles to the rear polariser | A thin film; can be scratched, bubbled, delaminated; can deform under pressure |
| 2 | Colour-filter glass with indium tin oxide common electrode and alignment layer | Upper glass substrate, red, green and blue sub-pixels | Brittle glass |
| 3 | Liquid-crystal layer | An optical valve about three to four micrometres thick, controlling light by molecular orientation | Extremely thin; pressure changes the cell gap, the molecules lose orientation, and a permanent blotch forms |
| 4 | Thin-film transistor array glass | Lower glass substrate, one thin-film transistor per sub-pixel, a grid of gate and data lines | Brittle glass; transistors and lines crush under pressure and produce fixed lines |
| 5 | Rear polariser | Turns the backlight into linearly polarised light | A thin film; can delaminate |
| 6 | Backlight unit | LEDs, light-guide plate, diffuser, prism sheet, reflector | Light-guide plate and optical films in pressure contact cause white spots and light leakage |
Chapter 4: Point pressure, line pressure, and area pressure — three kinds of pressure, three fingerprints
The single phrase "the screen got pressed" covers at least three completely different kinds of pressure at the mechanism level, and each leaves a different fingerprint. Telling them apart is the most useful question in the intake: what was on the keyboard before the lid was closed, how was the machine carried in the bag, and was it sat on or pressed by something heavy. The distinction below separates what the sources support from what is mechanism inference, and the inference must never be written as a measured engineering conclusion.
Point pressure is a small hard object concentrating force when the lid is closed: a pen, earphones, a charger, a USB stick, a hard object on the keyboard, a camera cover. Sources support the claim that pens, earphones and cables left on the keyboard cause concentrated pressure when the lid is closed, and Apple warns that the lid gap is extremely tight and that any material can interfere with the display. The inferred appearance is a small, fairly sharply bounded black blotch, bright spot, or crack starting point, often close to the pressure point; if the force is large enough, cracks radiate outwards from that point in a spider-web pattern. Asking the reader to remember what was on the keyboard before closing the lid is the most useful intake question. Apple's official warning is more specific still: the lid gap is extremely tight, a camera cover of 0.1 mm is the upper limit, and anything thicker must be removed before closing; keyboard covers, camera covers, and palm-rest covers should all be removed before the lid is closed. That 0.1 mm figure comes from an Apple support document checked first-hand; it must not be written as a universal figure for all brands, but it shows how tight the gap is.
Line pressure is the edge of the keyboard, a cable trapped when the lid is closed, a hard edge of the bezel or hinge, or a bag zip or hard edge pressing one line across the lid. The inferred appearance is a straight bright, dark, or coloured line along the pressure line, or a row of dead pixels; if the line pressure damages the conductors or edge seal at the edge of the glass, the line can extend along the direction of the crack. Note that a straight symptom can also come from the electronic layer, including the cable and the timing controller, so line pressure must never be diagnosed from "a straight line" alone. It must be combined with the history of force, whether the position matches the pressure line, and the lid-angle test in Chapter 12.
Area pressure is a bag packed too full, a heavy object resting on the closed lid, sitting or kneeling on the machine, or the squeezing of a commute. The appearance is a larger bruise-like black blotch, cloudy unevenness, a whole area darker or brighter, or uneven backlight; the outer glass may show no crack at all, while the inner layers are already damaged. The mechanism is that area pressure changes the cell gap over a wide area and deforms the light-guide plate and diffuser at the same time, so the optical layers add up and the symptom is more diffuse with a blurrier edge. Sources support the contrast: a wide bag pressure leaves a larger bruised area, while a small object leaves a smaller concentrated mark.
| Pressure type | Common source | Typical fingerprint | Key intake question |
|---|---|---|---|
| Point pressure | Pen, earphones, charger, USB stick, Octopus card left on the keyboard when the lid is closed | Small, sharply bounded black blotch or bright spot; cracks radiating from the pressure point | What hard object was on the keyboard before the lid was closed |
| Line pressure | Keyboard edge, a trapped cable, a bag zip, a hard bezel edge | A straight bright, dark, or coloured line along one line | Does the symptom line up with the pressure line |
| Area pressure | Overstuffed bag, a heavy object on the lid, sitting pressure, commuting squeeze | A large bruise-like blotch, cloudy unevenness, a whole area darker or brighter | How was the bag packed, and was anything heavy on top |
The crack-spreading mechanism should also be stated plainly. The tip of a glass crack is a stress concentration point, and opening and closing, temperature change, and further light pressure can extend the crack along the weak planes of the glass. Small cracks can grow with temperature change or movement, and even a small crack can spread over time. Those statements have source support, but they must not be written as "a crack will definitely spread." The correct wording is that there is a risk of spreading, that the area must not be pressed, and that tape must not be used to hold it together. The black-blotch spreading mechanism is the same story: the glass substrate cracks, liquid crystal leaks or the liquid-crystal layer is displaced, the liquid crystal in that area can no longer modulate polarised light normally, and a black, ink-like blotch appears that can spread over time. A spreading black blotch means the liquid-crystal layer is already broken; it is not dirt and not a dead pixel, and the user must never be told to press or heat the liquid crystal back into place.
Chapter 5: L4, the backlight optical layer — the light-guide plate, the LED bar, and the optical films
The backlight optical layer is the layer most easily mistaken for the electronic layer, because its symptoms — a local dark corner, a bright spot, uneven light — look like a brightness setting or a driver problem. The mechanism is completely different. The backlight driver circuit and the step-up circuit belong to the electronic layer and are not developed here; this chapter covers only physical damage to the backlight optics: a broken LED bar, a scratched or cracked light-guide plate, a displaced diffuser, and a damaged reflector.
First, the basic structure. Almost all laptops of the last decade use edge-lit LED backlighting: one LED bar along one edge of the panel emits light, a light-guide plate spreads it evenly across the whole screen, and then diffuser sheets, brightness-enhancement films, and a reflector sheet finish the job. The light-guide plate works by total internal reflection to carry the edge light, and then printed dots or microstructures on its underside scatter the light upwards. The LED bar needs roughly 20 to 40 volts of drive voltage, depending on the model, supplied by the motherboard's backlight step-up circuit; the bar, the light-guide plate, the diffuser, and the reflector are one optical chain, and physical damage to any link changes the light distribution. The 20 to 40 volt figure is a range given in a repair article and is written here as model-dependent, never as a universal value for all machines.
The white-screen mechanism of a pressed light-guide plate is supported by patent literature. The background of US Patent 8,113,705 states plainly that when a flat light-guide plate is subjected to outside physical pressure, it is forced into contact with other optical parts, such as a prism sheet; the two are normally separated by an air layer that refracts light, and once they touch, the light path is blocked and light escapes directly at a low angle, causing the white screen phenomenon. The patent's solution is to add a cushioning structure to the surface of the light-guide plate to reduce contact under pressure. A second patent, US 9,535,207, states that the light-guide plate and diffuser can expand, contract, or shift with temperature change, humidity change, vibration, or impact; the design uses guide structures to fix them, but the fixing points are themselves point contacts, and a metal guide pin can reflect light and affect picture quality; the patent's aim is to absorb outside force and impact and prevent the light-guide plate and diffuser from deforming or shifting.
Local damage to the light-guide plate shows as increased light scattering, forming a white spot. The patent background states that scratching the light-guide plate or the reflector, or breaking the beads on the light-guide plate, creates white spots and degrades display quality. Outside force that shifts the light-guide plate inside its housing can scratch the surface of the light-guide plate or the reflector and cause stains and white spots; friction between the light-guide plate and the diffuser during assembly can also cause scratches that show as stains on the panel. A cracked or aged light-guide plate can cause locally abnormal brightness, local dark areas, and uneven brightness; a completely failed light-guide plate can make the picture impossible to display normally. The point for the writer is that a bright spot caused by a scratched light-guide plate is usually fixed in position, does not change with the picture content, and is visible on both pure white and pure black backgrounds. It is not a driver or settings problem. A white spot in a fixed position, with limited change as the viewing angle changes, points towards pressure contact or deformation of the optical layer; a wide area of edge light leakage that changes greatly with angle may be a panel glow or assembly tolerance, and must not be blamed on physical damage without further evidence.
Physical damage to the LED bar has three forms. First, individual LEDs failing: with edge-lit backlighting, one failed LED makes a whole line or one side dimmer, and dark or black dots are often the sign of one or more backlight LEDs failing. Second, a broken bar or a solder joint cracked open by impact: that section goes completely dark, producing a local dark corner or one dark side; if the bar shorts, it can trigger backlight protection and the whole screen loses backlight — that boundary belongs to the electronic-layer article on driver protection and is not developed here. Third, a lens falling off or shifting on the LED: that produces a local white spot or over-bright area. The practical point is that the LED bar inside a laptop panel is normally integrated with the panel, unlike a television where bars can be changed one at a time; in laptop practice the panel or the assembly usually has to be replaced, and it must never be written that changing the light bar alone will fix it.
Damage to the diffuser, brightness-enhancement film, and reflector shows as edge light leakage, glowing corners, and uneven brightness. An aged diffuser, a damaged reflector, or a misaligned light-guide plate, diffuser, and brightness-enhancement film can all cause leakage; pressure or dampness that wrinkles, shifts, or sticks the optical films together causes cloudy patches and local bright or dark areas. These symptoms are the most easily mistaken for brightness settings, night mode, or a driver problem, and they need the triple elimination of a solid-colour background, a torch test, and an external display. Physical backlight damage is not the same as a backlight driver or LED driver board electronic fault. An external display that works, together with uneven brightness on the internal screen, points at the internal screen's optical layer or panel rather than the motherboard backlight circuit — but the final word still needs a teardown, and an external test alone must never be used to close the case.
| Optical part | Physical damage | Typical symptom | How it differs from the electronic layer |
|---|---|---|---|
| Light-guide plate | Pressure contact with the prism sheet, scratching, cracking, shifting | Fixed white spot or white blotch, local abnormal brightness, uneven brightness | Fixed position, does not follow the picture, no abnormality in a screenshot |
| Diffuser and brightness-enhancement film | Wrinkling, shifting, sticking, misalignment | Cloudy patches, edge light leakage, glowing corners, local bright or dark areas | Fixed on solid colours, limited change with angle |
| Reflector sheet | Scratching, damage | White spots, stains, uneven brightness | As above; teardown needed to confirm |
| LED bar | Individual LEDs failing, bar broken, solder joint cracked, lens fallen off | One side dimmer, local dark corner, one side black, local white spot | Dark corner fixed in position, does not change with brightness settings |
Chapter 6: L0, the lid — metal deformation and plastic fatigue, the panel's structural backplate
The lid, or A cover, is not a decorative part; it is the panel's structural backplate. That idea is the starting point of the most important recurrence trap in this article: once the lid bends, the panel's four fixing points are no longer in one plane, and the panel stays under bending stress for as long as the machine is used. The stress concentrates at the fixing screws and near the hinges, letting micro-cracks at the glass edge grow slowly, or cracking a newly fitted panel in the same place. Replacing a panel without measuring the flatness of the lid is like fitting new glass into a bent frame.
Metal and plastic lids fail in completely different ways. A metal lid — aluminium or magnesium alloy — has high rigidity and resists repeated stress better; but once an impact dents it, the deformation is plastic and does not spring back, and the dent keeps pressing on the panel edge or the hinge mount, causing chronic stress. Straightening a metal lid risks putting force on the panel again; it is not simply a matter of pressing it flat. The claim that aluminium and magnesium alloys resist repeated stress better than plastic is general materials knowledge plus repair-shop description, with no manufacturer data for any particular model, and it is written here as a general material property, never as a guarantee for a particular brand. The failure of a plastic lid and a plastic hinge mount is covered in detail in Chapter 8, but one relationship should be remembered first: the most common fatigue failure is not the metal hinge breaking, but the plastic fixing mount cracking and the brass screw insert coming loose.
Lid deformation comes from a drop, usually landing on a corner first; from heavy pressure in a bag; from carrying the machine by the edge of the lid with one hand; and from the twisting force of long-term one-sided opening. The clues a user can check are: whether the gap between the lid and the base is symmetrical when closed; whether one corner lifts when the machine is placed on a flat table; whether the lid visibly twists when it is opened; and whether the panel edge shows a bright or dark area that lines up with the deformed position. When the lid bends, the hinges and the panel are damaged with it; if the lid is bent and both hinge mounts are torn, the repair cost can stack up layer by layer. The repair direction is that a dented lid together with a white spot or a spreading crack at the panel edge, with the dent lining up with the panel symptom, should be treated by replacing the lid and assessing the panel. Replacing only the panel does not fix the cause, and the new panel can develop a white spot or a crack again in the short term.
The difference between metal deformation and plastic fatigue also decides the repair option. A dented metal lid is risky to straighten and usually has to be replaced; a cracked plastic lid can, depending on the position and extent of the crack, be reinforced or have its shell part replaced, but reinforcement must be done by qualified personnel, and a method that can bear torque is not something ordinary glue can replace. In either case, the judgement needs a teardown to confirm; a visual check can only place the fault within the assembly range and is never enough to place an order.
Chapter 7: L1, bezel separation — adhesive failure and broken clips are two different things
The bezel is the frame around the screen. It is held by plastic clips plus double-sided tape, with light glue at the bottom on some models. Removing and refitting a bezel must be done by a qualified technician following the service manual for that model; this article does not teach readers to pry a bezel open. The rubber gasket between the bezel and the lid has three jobs: cushioning when the lid closes, sealing against dust and moisture, and absorbing shock. Bezel separation does not necessarily affect the display immediately, but once separated, the panel edge loses its support, and dust and moisture enter the assembly edge more easily, accelerating damage to the surface optical layer and the liquid-crystal cell layer. A lifted bezel can also catch the panel edge when the lid is opened and closed, causing secondary stress. It must never be written off as a purely cosmetic problem that can be ignored.
Separation starts in two places. The first is the hinge corner, where the mechanical stress is greatest: hinge torque weakens the adhesive over the long term, and thermal cycling fatigues the adhesive layer. An HP Support Community case states that the black bezel detached at the left hinge corner, and the official reply called it a common laptop problem, especially where pressure and torque near the hinge slowly weaken the bond. The second is the top edge, where thermal expansion stress concentrates. The ageing mechanism of adhesives is supported by academic and industrial sources: water, being highly polar, weakens adhesion; all polymers absorb water; water can penetrate the adhesive and replace the interfacial bond, and it is the most common mechanism for loss of bond strength in humid environments; a water-vapour environment degrades bond strength faster than liquid water. Humidity combined with high-temperature ageing makes the epoxy and aluminium interface absorb moisture, weakens hydrogen bonding, and significantly reduces bond strength, with the fracture mode changing from cohesive to interfacial peeling. Moisture is a main cause of failure in non-conductive adhesive attachments, bond strength falls with time spent in a humid environment, and failure appears as delamination. In Hong Kong's humid environment, that ageing mechanism is worth mentioning more, but this article states plainly that it is a mechanism inference from general literature, not direct data for any particular laptop model.
Adhesive failure and broken clips need completely different repairs and must be kept apart. Adhesive failure means the bezel as a whole is intact and only its edge has lifted by one to two millimetres; the repair direction is for a qualified technician to deal with the bonding failure following the service manual for that model, and readers must not apply adhesive themselves. HP also has an official adhesive kit, part number N36079-001, containing the top, left, and right display cover tapes. Broken clips mean the plastic clips or catches themselves have broken or deformed; tape alone will not hold for long, and the bezel has to be replaced. HP's example bezel parts are N36078-001 and N36180-001, differing by colour. There are clips all around the bezel; some may have broken, or may fortunately only be bent. How broken clips are dealt with, and the hinge cover involved with the clips at the bottom near the hinge, are for a qualified technician to judge following the service manual for that model; readers must not remove the hinge cover themselves. The choice of adhesive is for a qualified technician to decide following the repair guidance for that model, and this article gives no adhesive-application steps; it must never be written as the officially specified product.
The adhesive taboo must be stated clearly: never use superglue, that is cyanoacrylate, to stick a bezel or a hinge mount. Superglue becomes brittle, its fumes can fog the screen, and it damages plastic; universal glue hardens, restricts natural flexing, traps moisture, makes later repair harder, and can seep into the backlight diffuser layer and cause permanent halos and discoloration. Glue spilling onto the panel edge can cause a permanent halo. HP's support channel recommends thin double-sided tape; the adhesive type and any curing requirement are for a qualified technician to decide following the service guidance for that model, and readers must not apply adhesive themselves. Reinforcing a hinge mount needs a method that can bear torque, done by qualified personnel; ordinary glue must never be used on its own.
Chapter 8: L5, hinges and screw bosses — usually it is not the hinge that breaks
Hinge failure is the most misunderstood layer in this article, because when a user says "the hinge is broken," what the repair bench usually finds is not a broken hinge, but a broken hinge fixing point. That distinction decides whether the repair is a hinge replacement, a shell replacement, or a rebuild of the screw boss, and the price and labour are completely different.
The core fact is that a hinge is usually screwed into a screw boss inside the plastic shell — a moulded plastic post with a brass insert embedded in it — and every time the lid is opened, the hinge pulls on those posts with leverage. On cost-driven models the screw boss is the weakest link in the whole assembly, and after hundreds or thousands of openings the post fatigues and cracks. Restarters Wiki states it plainly: hinge screws generally thread into threaded brass inserts in the plastic; when the stress is too great, the plastic cracks, the insert comes loose, and the hinge is no longer fixed. Three independent sources confirm the same mechanism. A computer repair business notes that most hinges are metal but are fixed to moulded plastic brackets, that repeated opening torque creates micro-cracks in the plastic fixing points, that the plastic eventually fails completely and the metal hinge is pulled out of the shell, and that cheaper machines with thinner plastic are especially prone. Manchester PC, using a Lenovo IdeaPad 5 as a real case, notes that the plastic part holding the hinge screws internally had failed and the hinge had lost its anchor, and that it is almost always the plastic fixing mount that fails, not the metal hinge itself; once the mount comes loose, every opening twists and levers the surrounding structure, pulling the cable, loosening other screw posts, cracking the bezel, and eventually passing stress into the panel itself. Restarters Wiki also notes that thinner designs have made hinge fixing points easier to break than on machines from ten years ago, and that when one side breaks, the other side takes more force, so both sides usually have to be dealt with.
Hinge failure reaches the display assembly through four paths, and each must be explained separately rather than summarised as "the hinge is broken." First, torque transmission: the friction torque of the hinge passes through the fixing mount into the plastic of the lid and base every time the lid moves; the tighter the hinge is made to hold the screen angle, the more force is passed into the fixing mount with each opening. Restarters Wiki suggests that when a hinge mount is repaired with adhesive, the hinge tension can be eased moderately to reduce the twisting force and give the adhesive a chance to hold long term — but too loose, and the screen will not stay at its angle. That balance must be judged by qualified personnel and the reader must never be told to adjust hinge tension. Second, one-sided opening: opening the lid with one hand from one corner twists the screen and concentrates almost all the force on one hinge; after hundreds or thousands of repetitions, one side weakens and shifts first. Three repair sources agree that single-corner opening is a main avoidable cause. Third, over-angle opening: every machine has a designed maximum opening angle, generally about 130 to 180 degrees depending on the model, except 360-degree convertible machines; forcing the lid past its angle puts extreme stress on the hinge mechanism and the surrounding shell, and even if nothing breaks at the time, the fixing points have already been weakened. That angle range comes from a repair article and has not been verified per model, so this article writes "depending on the model, please check that machine's manual" and never as a universal specification. Fourth, pulling the cable and antenna: the display cable and Wi-Fi antennas run through the hinge channel, and once the hinge comes loose or shifts, every opening pulls the cable and causes flicker, intermittent black screens, or a completely blank display. This is the classic crossover where a physical hinge problem pretends to be an electronic cable or panel fault.
The chain reaction from a hinge fault to the display assembly is clear. Step one: the screw boss cracks, the hinge shifts inside the shell, the lid twists when it opens, the panel edge takes uneven stress, and the glass develops micro-cracks or the polariser peels. Step two: the shifted hinge pinches, pulls, or wears the display cable and Wi-Fi antennas in the hinge channel, causing flicker, a black screen, or Wi-Fi disconnection that follows the lid angle. Step three: the hinge mount breaks, a gap opens between the lid and the base and the internal cable becomes visible; continuing to open and close tears the fixing points, snaps the cable, and cracks the panel. The symptom clues are a lid that has become tight or makes a clicking sound, uneven resistance on the two sides, a lid that will not stay at its set angle, a lid that falls forwards or backwards on its own, a lid that wobbles while typing, cracked plastic near the hinge, and a lifting bezel. A hinge that is too tight holds the panel edge under force for a long time, and in a severe case can crack the glass directly at the corner nearest the faulty hinge. Screws tightened too far, tightened too far during a previous repair, a foreign object jammed in the hinge, or a swollen battery pushing against the base can all make a hinge tight or misaligned.
For emergency handling, the user can stop opening and closing the lid frequently, fix the lid at an angle that will not pull further, back up the data, and send the machine for inspection. Glue and forced fixing must not be used, and a screw must never be tightened again on an already cracked screw boss — it will only widen the crack. Apple has two special cases. First, on the late 2008 MacBook Pro 15-inch, a hinge that had gone stiff needed more force to open, and over time that broke the adhesive holding the outer shell and delaminated the top case; hot air blown through the hinge towards the body also softened the adhesive. That is a recorded case of a stiff hinge causing adhesive separation, but it is limited to machines of that era and must not be generalised to all Apple laptops. Second, from 2016 the MacBook Pro changed to a pressed-in hinge pin with a clutch spring, and the pin can come loose inside the lid frame and let the lid swing freely; Apple treats the display as a single part and does not sell the hinge separately. On recent Apple laptops the hinge is already integrated into the display assembly and there is no separate hinge to replace, so a hinge fault usually means replacing the display assembly.
Chapter 9: Flexgate as supporting evidence — a design case of hinge stress pulling a cable
Flexgate is not the main subject of this article, but it is the strongest design-failure evidence for the chain "opening stress, then cable fatigue, then a backlight symptom," and it deserves a chapter of its own — with a clear distinction from physical damage to the panel glass.
On the 2016 and 2017 MacBook Pro 13-inch, the display cable was too short and wrapped around the hinge, so every opening pulled it tight. The copper conductors fatigued and broke, first producing a stage-light band of brightness at the bottom of the screen, and then losing the backlight completely. Stage light means a row of stage-light-like bright bands at the bottom of the screen that become more obvious the wider the lid is opened. In 2019 Apple offered a free display backlight repair programme for the 2016 13-inch model, with a coverage period of about four years from the date of purchase; by now the great majority of those machines are out of coverage. From 2018 the cable was lengthened by about 2 mm and the problem was largely resolved.
This article uses Flexgate as supporting evidence for the hinge-pulling section, and draws the distinction explicitly: Flexgate itself is a cable, electronic-layer problem, and it must not be written as physical damage to the panel glass. The way to tell them apart is that the Flexgate bottom band changes with the lid angle and becomes more obvious the wider the lid is opened, while a bright line caused by a cracked panel glass stays in a fixed position and does not change with the lid angle. Mistaking Flexgate stage light for a broken panel glass leads to a panel replacement that is not the most targeted repair; depending on the model, Apple's own approach is to replace the assembly. Flexgate must never be written as something all Apple laptops have. It is limited to the 2016 and 2017 13-inch models, with some discussion of the 15-inch models, and it was improved from 2018 onwards.
Chapter 10: Structural damage to the display assembly — assessing the whole
Assembly damage is not one part breaking; it is several layers breaking at once. A single corner impact can dent the lid, separate the bezel, crack the glass, shift the light-guide plate, and crack the hinge mount — five layers at once. The assessment order in professional testing is: appearance, including lid flatness and gap symmetry; the bezel and bonding; the glass and polariser; the powered symptoms, including solid colours, an external display, and a torch test; the lid-angle test; and the teardown, including the hinge mounts, screw bosses, cable, and optical layers. That order is itself the diagnostic logic: from the outside in, from no disassembly to disassembly, from cheap evidence to expensive evidence.
The structural criteria for replacing the assembly rather than the panel are as follows. Replacing only the panel is enough when the glass or liquid-crystal cell is broken but the lid is flat, the bezel clips are intact, the hinge mounts are uncracked, and the cable is undamaged. The assembly must be replaced for hinge-up design models, where the manufacturer states it cannot be taken apart further; for recent Apple models, where the hinge and cable are integrated; where the lid, bezel, and hinge mounts are damaged in several places; and where the touch glass is bonded to the LCD and the glass is broken. The lid or base parts must be replaced when the lid deformation has not been corrected, when a screw boss has burst and cannot be rebuilt reliably, or when a hinge mount is broken. Touch machines have a special point: when the touch glass and the LCD are bonded together, a broken glass usually means the assembly route; a non-touch machine has a better chance of a panel-only replacement.
Whether a model can be taken apart is the key point of this chapter. Lenovo LOQ models can be taken apart piece by piece following the manual, which is a design that allows part-by-part repair. HP Pavilion x360 models supply the display assembly only as sub-component spares and must be taken apart piece by piece following the manual. Dell Precision 5470 hinge-up design assemblies cannot be taken apart further once removed. Apple MacBook Pro 2016 and 2019 models are replaced as a whole display assembly, and the assembly already contains the integrated display and backlight cable; the T2 chip may make an aftermarket display fail to work normally, or even prevent the machine from starting. This article must speak model by model and never write that all machines are the same. For any particular machine, the official service manual must be consulted to confirm whether it can be taken apart or must have its assembly replaced; this article cannot replace the manual.
| Situation | Structural criterion | Likely option |
|---|---|---|
| Only the glass is cracked, lid flat, hinge mounts intact, cable undamaged | Damage in only one layer | Replace the panel only |
| Glass cracked plus a slightly deformed lid | Two layers damaged, deformation lining up with the symptom | Replace the lid plus the panel |
| Glass cracked plus a cracked hinge mount plus a pinched cable | Several layers damaged, part-by-part replacement costs more in labour and risk | Replace the assembly, or lid plus panel plus cable |
| Hinge-up design model with a broken panel | Manufacturer states it cannot be taken apart further | Replace the assembly |
| Recent Apple model with a broken panel | Hinge and cable integrated into the assembly | Replace the assembly |
| Touch glass broken, glass bonded to the LCD | Replacing the glass alone is unreliable | Replace the assembly |
| Old machine plus an expensive panel plus ageing battery and performance | Repair share high, remaining life short | Consider replacing the machine, compared on a written quotation |
Chapter 11: Symptom-to-mechanism cross-reference
The table below merges Researcher A's section 4 with Researcher B's section 5, covering fifteen symptoms. The reading instruction is: the symptom points to the most likely physical mechanism, then the electronic layer or other possibility that still has to be excluded is listed, and finally a preliminary repair direction is given. The cross-reference is a probability guide, not a diagnosis. Every row must keep its "needs teardown to confirm" tail, and one symptom can have more than one mechanism.
| Symptom | Most likely physical-layer mechanism | How to tell it apart from the electronic layer | Repair direction |
|---|---|---|---|
| Radiating or spider-web cracks with a clear impact point | Outer glass and thin-film transistor glass cracking | Crack fixed in position, does not change with the picture or the angle; still visible on solid BIOS colours | Replace the panel; laminated models need the assembly |
| Smooth surface but cracks and ink-black blotches visible | Internal crack | As above; Dell's catalogue lists this as a separate category | Replace the panel or assembly; never write that a smooth surface means nothing is wrong |
| Fixed ink-black blotch spreading over days | Liquid-crystal leakage, the cell broken | Blotch still present on BIOS and solid colours; external display normal; screenshot normal | Replace the panel; do not press or heat |
| Fixed bruise-like dark blotch or cloudy patch | Liquid-crystal layer pressed, cell gap changed | Fixed in position on many background colours; history of pressure or an object trapped when the lid was closed | Replace the panel; a slight case can be observed, but no recovery is promised |
| Fixed bright white spot, most obvious on dark backgrounds | Light-guide plate or optical film in pressure contact, or a deformed diffuser | White spot fixed in position; does not follow the picture; screenshot normal | Replace the panel, the optical layer is not replaced alone; teardown needed to confirm |
| Edge light leakage (IPS glow / assembly tolerance) | Panel glow or assembly tolerance, or uneven lid clamping, are all possible | Large change with angle, no fixed crack or black blotch — do not diagnose physical damage at once | First compare angles and inspect the lid clamping; do not order a panel at once |
| Fixed vertical or horizontal coloured line, position unchanged | Thin-film transistor glass and row or column conductors crushed by pressure | Line still present on BIOS and built-in self-test; external display normal | Replace the panel |
| Symptoms changing with the lid angle, flicker, intermittent black screen | Hinge pulling the display cable, socket loosened | The angle link is the key evidence; the panel itself may be undamaged | Inspect the hinge and cable first; do not replace the panel at once |
| Bottom bright band, more obvious the wider the lid opens | Cable fatigue, Flexgate, typical of the 2016 and 2017 MacBook Pro 13-inch | Band changes with angle, panel itself may be undamaged | Replace the cable or assembly, depending on the model |
| Bezel lifting and separating, corners first | Adhesive ageing and clip breakage; hinge stress concentrated | Check clip integrity; adhesive failure and broken clips need different repairs | Adhesive failure: leave to a qualified technician; broken clips need a new bezel |
| One dented lid corner plus a bright or dark area near that corner | Lid deformation holding the panel under long-term uneven stress | Dent position lines up with the panel symptom position | Straighten or replace the lid plus replace the panel; never replace the panel alone |
| Lid stiff to open, strange sounds, cracked plastic near the hinge | Screw boss burst and hinge mount broken | Appearance plus symmetry of feel; teardown confirms mount versus hinge itself | Depending on how badly the mount is cracked: reinforce, replace the lid, replace the hinge, or replace the assembly |
| Touch failure and ghost touch with a cracked glass | Laminated assembly outer glass and touch layer damaged | Touch failure area matches the crack area | Laminated models usually need the assembly; never try to separate the glass |
| Polariser scratched, rainbow patterns, cloudy patches | Polariser scratched, peeled, bubbled | Coating ageing can look similar | Professional assessment; never peel the film off |
| Edge light leakage (misaligned optical films) | Optical films misaligned and aged; or a separated bezel letting light out | Backlight driver can look similar | Teardown of the optical layer plus the bezel |
Need a laptop repair expert?
Free diagnosis · Transparent pricing · No fix, no fee · 180-day warranty
Chapter 12: Layered elimination — from the outside in, without skipping steps
The layered elimination flow is the spine of this article. It runs from the outside in without skipping steps, and each step states what to do, what a finding means, and what the absence of a finding means — not just the name of the step. The user only does observation and external tests that need no opening of the case. Disassembly, measurement, swapping, and soldering belong to professional testing.
Step zero is the stop-and-check step, covering safety and evidence. Photograph the position and extent of the cracks, black blotches, white spots, lid dents, and bezel lifting; photograph a black blotch again after a few days to compare whether it has spread. Back up the data first, and do not keep opening and closing a machine with suspected structural damage to test it. If the battery is swollen, the body is bowed, or there is abnormal heat, stop using the machine and send it for inspection; do not press the screen to test it. Never press, rub, heat, freeze, or pull with a suction cup on a suspected pressure area — multiple sources agree on this. If the machine still starts, back up important files first, and then record what happened before the symptom appeared: a drop, pressure, an object trapped when the lid closed, or a gradual onset. That history of force is the starting point for every layer judgement that follows.
Step one is the visual check, with the machine off and on. For the lid, look for dents, twisting, cracks, and corner impact marks; place the machine flat on a table and see whether all four corners sit flat and whether one side lifts. For the bezel, look for lifting on all four sides, cracked clip positions, and separation near the hinges. For the hinges, check whether the tightness is symmetrical on the left and right, whether opening makes a strange sound or catches, whether one side is loose and the other tight, and whether the lid sits crooked. For the panel surface, look for radiating or spider-web cracks, scratches, and abrasion; run a finger lightly across the surface, without pressing, to tell a surface crack from an internal crack. The keyboard check is essential: is there a pen, earphones, a USB stick, or any other hard object on the keyboard before the lid is closed — a trapped pen is a classic cause of pressure damage.
Step two is the angle and pressure association test. Note that this is not a pressure test that presses the screen until it breaks; it is an observation of how the symptom relates to the angle. Slowly change the opening angle and watch whether the symptom changes with it. If it changes with the angle, or flickers or goes black at a certain angle, it points at the display cable in the hinge area being pulled or making poor contact — a physical hinge problem dragging down an electronic connection — and the hinge area needs a teardown; the panel must not be condemned directly. If it does not change with the angle and stays in a fixed position, it points at the panel or the optical layer itself. The light-touch test has a forbidden zone: never press hard on a suspected area to see whether it changes. The correct method is to observe how the symptom changes against different background colours and different angles, not to apply new pressure. The BIOS and start-up screen comparison also belongs here: if the symptom is already present on the BIOS or start-up logo screen, the Windows and driver layers are excluded; if it only appears in one application, it is not a physical-layer problem. That is basic work shared with the electronic-layer articles and needs only one sentence here, not a driver tutorial.
Step three is the external display comparison, with Dell's built-in self-test as a supplement. An external display that works while the internal screen is abnormal means the problem is confined to the internal screen assembly — the panel, the backlight optics, the display cable, or the hinge area — and the motherboard display output is broadly normal; but that must never be used to conclude that the panel is definitely at fault, because the display cable and hinge damage are in the same range. An external display that is abnormal in the same way points at the motherboard and display output, which is not the physical-layer subject of this article, and should be referred to the motherboard and display diagnostic flow. The screenshot comparison is key evidence: a screenshot only records the image the graphics card outputs and cannot capture physical screen damage; a screenshot that is normal while the eye sees an abnormality is evidence for the physical layer, and a screenshot that is also abnormal points at the signal and graphics card layer. Dell's LCD built-in self-test applies only to some Dell models: with the machine off, hold the D key and press the power button, and the screen cycles through solid black, white, red, green, and blue. The enhanced built-in self-test, on newer BIOS versions, can detect cracked glass and physical damage and gives extra diagnosis through the battery and power LED blink codes. Dell's official text states that if cracks, pressure marks, or spider-web patterns are seen, the screen glass is damaged and will need replacement, and that these tests only check the screen hardware and do not check Windows settings, graphics drivers, or software. The writing note is that passing the built-in self-test does not mean there is no physical damage, and failing it does not mean the warranty definitely covers it. Non-Dell machines have no universal built-in self-test; use the BIOS screen plus solid-colour backgrounds — black, white, grey, red, green, and blue — plus an external display comparison instead, and never write that all laptops have a built-in self-test.
Step four is the teardown judgement, limited to qualified repair personnel, and this article does not teach disassembly. The teardown checklist is: first, the panel's rear label model number, confirming the panel maker, size, resolution, and connector; second, the inside of the lid, checking whether the hinge-mount plastic is cracked, the brass inserts are loose, and the screw posts are broken; third, the hinges themselves, checking whether the metal is bent or broken, whether the friction torque is symmetrical, and whether one side is clearly looser; fourth, the bezel clips, checking each catch one by one to tell adhesive failure from a broken clip; fifth, the panel edge and backlight frame, checking whether the light-guide plate is cracked, the optical films have shifted or creased, and the rear frame is deformed and pressing on the panel; sixth, the hinge section of the display cable, checking for pressure marks, wear, and creases, and whether the socket is loose — this is evidence of the physical layer dragging down the electronic layer, not of the electronic layer itself failing; and seventh, on touch and laminated models, whether the outer-glass crack extends into the LCD layer, and if the assembly is laminated as one piece, the glass and the LCD must never be separated. The diagnostic value of a teardown is that appearance plus an external test can only place the fault within the assembly range; only a teardown can distinguish replacing the panel alone, replacing the assembly, or replacing the lid and hinges. This article must make that boundary clear and must not leave the reader thinking a visual check is enough to place an order.
| Step | What to do | Which layer it eliminates | What to record |
|---|---|---|---|
| Step 0 | Stop, back up, photograph | Prevents worsening | What happened before the symptom appeared |
| Step 1 | Visual check with the machine off, under good light, looking at an angle, finger lightly swept without pressing | Surface optical layer versus liquid-crystal cell layer: a crack that can be felt is usually the outer glass; a black blotch that cannot be felt is usually the inner layer | Crack position, length, spider-web pattern, fragments |
| Step 2 | Solid-colour background test, full-screen pure white, pure black, red, green, blue in turn | Liquid-crystal cell layer versus backlight optical layer: a blotch or line in a fixed position on every solid colour points at the panel and backlight layers | On which colour the blotch or line is most obvious, whether the position is fixed |
| Step 3 | External display test, HDMI or USB-C to an external display or television | Graphics card and motherboard versus display assembly: a normal external display means the problem is in this machine's display assembly | External display normal or abnormal |
| Step 4 | Torch test, in a dark room with a black screen but the machine still running, shining a torch at an angle | Backlight optical layer versus liquid-crystal cell layer: a faint image means the panel still has an image and the backlight has no light | Faint image seen or not seen |
| Step 5 | Lid-angle test, gently, once, stopping the lid at different angles | Hinge and cable layers: symptoms appearing or disappearing with the angle point at the hinge and cable being pulled | Which angle fails, which angle works |
| Step 6 | Lid flatness and hinge feel, checking whether the gaps are symmetrical when closed | Lid structure layer and hinge layer: asymmetrical gaps mean a deformed lid | Photographs of the gaps, description of any sound |
| Step 7 | BIOS and start-up screen check | System and driver versus hardware: a symptom already in BIOS means the hardware layer | Symptom present or absent in BIOS |
| Step 8 | Professional teardown | All six layers seen at once | Panel model, hinge mounts, screw bosses, cable, optical layers |
Chapter 13: Common misdiagnoses and traps — all twenty-two
The traps below merge Researcher A's sixteen with Researcher B's fifteen, with overlaps combined, giving twenty-two in total. Each one states what the misjudgement is, why it is wrong, and what the correct action is — not just a heading.
Trap 1: Mistaking a loose cable for a cracked panel. A hinge pull or an impact can loosen the display cable socket or crease the cable, so the picture flickers, goes black, or shows lines, and to the eye it looks like a dead panel. The correct action is to do the angle test, the external display comparison, and a teardown of the hinge section of the cable before ordering a panel. Impact force can damage the panel and the cable in the hinge channel at the same time, so a new panel fitted without checking the cable can show a line or flicker in the same place and be wrongly blamed as a faulty new part. Check the cable for pinching and wear first, and repeat the angle test afterwards.
Trap 2: Replacing the panel without correcting a deformed lid, so the new panel cracks again. A bent lid holds the new panel under uneven stress in the same position, and the same corner can crack again weeks or months later. The correct action is to measure the flatness of the lid before replacing the panel, and to replace or straighten the lid first if the deformation is severe. Treating a dented lid as a purely cosmetic problem and replacing only the panel leaves the dent pressing on the new panel edge, and a white spot or crack can return in the short term. This is one of the most important recurrence traps in this article.
Trap 3: Mistaking physical backlight damage for a driver or backlight circuit problem. A white spot or a local dark area is treated as a driver, brightness setting, or backlight driver board fault, and the driver is reinstalled and the brightness adjusted again and again. The correct action is that a white spot in a fixed position, with a normal screenshot and still present in BIOS, is an optical-layer or panel physical problem; no driver will repair a deformed light-guide plate or diffuser. A local dark corner treated as a brightness setting, night mode, power saving, or an out-of-date driver, with the driver reinstalled again and again, lets the light-bar and light-guide plate damage grow; the solid-colour, torch, and external display triple test shows that a dark corner fixed in position and unchanged by settings is a hardware-layer problem.
Trap 4: Treating a crack as a software or driver problem. Coloured lines and black blotches are treated as a graphics driver or Windows update problem, and the system is reinstalled again and again. The correct action is that a symptom still present on BIOS, on the built-in self-test, and on solid-colour backgrounds, with a normal external display, is a hardware physical-layer problem, not software.
Trap 5: Mistaking a hinge problem for a panel problem, the reverse error. The symptom changes with the lid angle, but the repair only replaces the panel, and the symptom remains because the cause is a cracked hinge mount or a pulled cable. The correct action is that the angle link is the hinge's fingerprint and the hinge must be checked first. Treating angle-related flicker as a broken panel will not fix it, and the disassembly itself can damage the cable further.
Trap 6: Mistaking an internal crack for "a smooth surface means no breakage." The surface feels smooth, but the glass inside has already cracked, and the black blotch or crack is treated as dirt or a software problem. The correct action is that Dell's catalogue has a separate internal cracked glass category, and a smooth surface does not exclude an internal crack.
Trap 7: Treating a pressure black blotch as dirt or a dead pixel and rubbing or pressing it. A black or bruised blotch is treated as surface dirt and rubbed or pressed hard, spreading the liquid-crystal leak and cracking the thin-film transistor layer further. The correct action is never to press, rub, or heat; photograph it and send it for inspection. Pressing a leaking black blotch pushes the liquid crystal further out and widens the glass crack.
Trap 8: Believing that massaging, heating, a suction cup, or a pixel-repair video can fix a pressure mark. Online remedies claim a pressure mark can be massaged away, but multiple sources agree that pressing, rubbing, and heating must not be done, and HP states plainly that pressure damage does not recover on its own. The correct action is never to try the remedy; a light pressure mark that looks slightly fainter does not mean the underlying damage has recovered. Waiting for a bright spot to heal itself is the same error: a bright spot from a scratched light-guide plate or a damaged reflector will not heal, and pixel-exercising tools do nothing for physical damage. Tell a single small bright pixel apart from a larger, cloudy optical bright spot; the second needs a panel or assembly replacement.
Trap 9: Mistaking panel glow and edge light leakage for physical damage and replacing the panel at once. A wide area of edge glow that changes greatly with angle, with no fixed crack or black blotch, is treated as impact damage. The correct action is to compare angles first and check the lid clamping before ordering a panel.
Trap 10: Mistaking an aftermarket panel's colour or brightness problem for "that is just how a replaced panel looks." After fitting an aftermarket or compatible panel, the colour is off, the brightness is low, or the refresh rate has dropped, and it is treated as normal or as a driver problem. The correct action is to compare the original panel's brightness, colour gamut, panel type, refresh rate, and matte or glossy finish before replacing; a colour or brightness difference is a wrong part choice, not a driver problem. See Chapter 15.
Trap 11: Matching only the size and pin count, not the panel model. The assumption is that the same size and the same 30-pin or 40-pin connector means the panel is universal, while the connector pitch, display cable lane count, voltage, touch support, and mounting holes are ignored. The correct action is to use the full model number on the rear label of the panel, including the suffix and version. Two panels that are both 15.6-inch and 40-pin can differ in resolution, brightness, colour gamut, refresh rate, touch support, and mounting holes; buying the wrong one can cause display errors, a panel that will not fit, or a large difference in brightness and colour.
Trap 12: Treating a lifting bezel as a purely cosmetic problem and ignoring the hinge behind it. A bezel lifts at the hinge corner and is only glued back, without checking the hinge mount; the hinge keeps twisting, the bezel lifts again, and it can even pull at the panel edge. The correct action is that bezel separation must be checked together with the hinge mount and the clips.
Trap 13: Using superglue on a bezel or a hinge mount. Superglue becomes brittle, its fumes can fog the screen, and it damages plastic; glue spilling onto the panel edge can cause a permanent halo. The correct action is to use thin electronic double-sided tape or the specified tape kit; reinforcing a hinge mount needs a method that can bear torque, done by qualified personnel, and never ordinary glue on its own. Universal glue hardens, restricts natural flexing, traps moisture, makes later repair harder, and can seep into the backlight diffuser layer and cause a permanent halo and discoloration.
Trap 14: Reading a screenshot backwards. A screenshot with an abnormality is taken to mean the panel is fine, or a screenshot without an abnormality is taken to mean the panel is faulty. A screenshot only reflects the graphics card output; an abnormal screenshot points at the signal and graphics card layer, and a normal screenshot with a visible abnormality is what points at the physical layer. Reading it the other way round causes a misdiagnosis.
Trap 15: Concluding from a passed built-in self-test that there is no physical damage. Dell's built-in self-test only checks whether the screen hardware can display solid colours; a slight internal crack, an early leak, or an intermittent hinge problem can pass unnoticed. The correct action is to treat the built-in self-test as supporting evidence, not as a final ruling that excludes physical damage.
Trap 16: Assuming the warranty definitely covers, or definitely does not cover, physical damage. Promising that the warranty covers a cracked screen, or that it definitely does not, without checking the contract. The correct action is that Lenovo's hardware maintenance manual explicitly lists an LCD panel cracked by excessive force or a drop as an example of what may not be covered; Dell also excludes accidental damage from basic support and requires a separate accidental damage cover; but each machine must be checked against its own contract and service tag. See Chapter 16.
Trap 17: Treating a loose hinge as a matter of tightening the screws. Tightening the screws again when the screw boss is already cracked only widens the crack, and the hinge comes off completely sooner. The correct action is to inspect the screw boss and brass insert in a teardown; if it is cracked, it must be rebuilt or the shell part replaced. Fitting a new hinge onto a cracked base shell will only pull out again.
Trap 18: Treating Flexgate stage light as a broken panel glass. The bottom bright band on a 2016 or 2017 MacBook Pro 13-inch is cable fatigue, and the panel itself may be undamaged; replacing the panel is not the most targeted repair, and Apple's own approach, depending on the model, is to replace the assembly. The correct action is to match the model and year against the Flexgate range.
Trap 19: Replacing only the glass on a broken touch screen. Most touch machines have the glass bonded to the LCD as one piece, so replacing the glass alone is not feasible or reliable, and forcing the two apart damages the LCD. The correct action is to decide between a panel or an assembly replacement according to the model.
Trap 20: Pretending a hinge-up design or integrated-assembly model can be repaired piece by piece. On a Dell Precision 5470 hinge-up assembly, the manufacturer states it cannot be taken apart further once removed, so a quotation and labour estimate based on piece-by-piece replacement will be wrong. The correct action is to check that model's official service manual to confirm whether it can be taken apart or must have its assembly replaced.
Trap 21: Ignoring a swollen battery pushing against the hinge and the base. A hinge that has become tight, a bowed base, and a gap that has opened up may be caused by a swollen battery rather than by the hinge itself, and continuing to use the machine carries a safety risk. The correct action is to stop using the machine immediately when the base is bowed or a gap is abnormal, and send it for inspection, without opening and closing it again. A swollen battery, a bowed body, or abnormal heat means stop using it and send it for inspection; the screen must not be pressed to test it.
Trap 22: Handing the machine back after a panel replacement without a re-test. Without the four re-tests — a full-screen solid-colour check, a lid-angle test, an external display test, and a hinge-feel check — a second layer of damage, such as a pinched cable, lid stress, or a shifted optical film, is missed, and the user only discovers the recurrence after taking the machine home. The correct action is to do all four re-tests before handover, with photographs kept on file. See Chapter 18.
Chapter 14: The Hong Kong context — humidity, commuting, and objects trapped when the lid closes
The Hong Kong context is not a statistic; it is the mechanism expressed through local ways of living. Every situation below is supported by a mechanism, but there is no Hong Kong statistic, so this article writes them as descriptions of situations, never as claims such as "a certain percentage of Hong Kong laptop damage comes from commuting," because no such statistic exists.
Commuting squeeze is the first situation. A laptop squeezed in a backpack, knocked by other passengers on the MTR or a bus, or pressed on a lap is a typical source of sustained low pressure and sudden point pressure. In busy MTR and bus hours, a bag being squeezed, kicked under a seat, or pressed by a heavy object on the lid are common Hong Kong scenes of area and point pressure. Slipping from a hand when getting off, a bag hitting a railing, or a machine sliding off a seat concentrates the impact force on one lid corner, which most easily causes the triple damage of a dented lid, a cracked glass corner, and a cracked hinge mount. The preventive advice is derived from the mechanism and is presented as advice, not a guarantee: use a bag with a separate laptop compartment, do not put heavy objects on top of the laptop compartment, do not put the laptop in the outermost layer of the bag where it takes the squeeze, and use a padded sleeve.
Objects trapped when the lid closes are a high-frequency Hong Kong situation and deserve a section of their own. An Octopus card, earphones, a charging cable, a pen, a mask, or a tissue left on the keyboard when the lid closes is one of the most common causes of pressure damage. A hard object on the keyboard pressed by the lid onto the panel is the classic source of point pressure. Apple's official warning is that the lid gap is extremely tight, a camera cover of 0.1 mm is already the upper limit, and anything thicker must be removed before closing; keyboard covers, camera covers, and palm-rest covers should all be removed before the lid is closed. The first item on the prevention list is to check the keyboard before closing the lid and leave no pen, earphones, or USB stick on it. That check takes a few seconds and can prevent the most expensive kind of panel damage.
Humidity and temperature difference are the second situation. In a high-humidity environment, moisture can condense on component surfaces and promote metal corrosion and electrochemical migration; moving from a cold air-conditioned room out into hot, humid air can let moisture condense inside the machine. That is a general humidity mechanism for electronic products, not a dedicated study of laptop display modules. For polariser and adhesive ageing, high heat and humidity can accelerate the relaxation of the polariser's polyvinyl alcohol and the failure of the pressure-sensitive adhesive, but there is no direct data on laptops; this article writes that high heat and humidity accelerate film and adhesive ageing and that inspection is needed, never that Hong Kong weather causes polariser delamination. For bezel separation, water vapour weakens adhesion and penetrates the adhesive interface, so the bezel, gasket, and panel bonding separate earlier; once separated, dust and water entry accelerates panel damage, and it must not be left. For moisture entering the assembly, a lifting bezel or a crack in the lid lets moisture and dust into the assembly edge more easily; in Hong Kong's humid environment that secondary risk is worth mentioning more than in a dry climate, but it is likewise an inference, and this article says so. Letting the machine adjust for a while when coming out of an air-conditioned room into humid outdoor air before switching it on is preventive advice, not a guarantee. Leaving a laptop in a hot car or a sunlit window, together with the thermal cycling of air-conditioned rooms, accelerates polariser and adhesive ageing; this article can only write that it accelerates ageing and that inspection is needed.
The local parts and aftermarket panel reality is the third situation. The common practice in the Hong Kong repair market is to fit a compatible panel instead of an original one; the key question is not the label "original versus aftermarket," but whether the specification matches. A scarce panel — high refresh rate, high resolution, touch, OLED, a narrow-bezel special mounting, or a discontinued model — may need a waiting time, acceptance of a compatible specification difference, or an assembly that is in stock first; this article says that a scarce panel needs its availability and specification checked first, and that same-day availability must never be promised. Specific waiting times and stock figures must never be written, because they have not been verified; the wording is "subject to a written quotation and availability after inspection." For prices, the only display-related starting price this article may write is screen replacement from HK$1,280, which is the site-wide permitted starting price and is not the price of any particular model's assembly, lid, or panel; replacing an assembly, a lid, a hinge, or an Apple laminated assembly must never be priced on its own, and the wording is "subject to a written quotation after inspection." Readers can check the pricing page for the scope of screen replacement from HK$1,280, or arrange an inspection through the diagnostic page to get a written quotation first.
The prevention list for Hong Kong readers has six items. First, check the keyboard before closing the lid; leave no pen, earphones, or USB stick on it. Second, use a bag with a separate laptop compartment, do not put heavy objects on top of it, and do not put the laptop in the outermost layer of the bag where it takes the squeeze. Third, open the lid from the middle, never with one hand from one corner, and never lift the whole machine by the screen. Fourth, never leave the laptop in a sunlit window or a hot car; when coming out of an air-conditioned room into humid outdoor air, let the machine adjust for a while before switching it on. Fifth, send the machine for inspection early when the bezel lifts, the hinge makes a strange sound, or the lid sits crooked; do not wait until the hinge mount has cracked as well. Sixth, clean the screen with a soft cloth and a light wipe, never with force, and never spray cleaning fluid directly onto the screen. All six are preventive advice derived from the mechanism, presented as advice, not as a guarantee.
For the practical side of sending a machine for repair, bring the history of force — when it was dropped, pressed, or trapped — photographs of the symptom, one on a pure white background and one on a pure black background, and a record of the lid angles. If the machine still starts, back it up first. The shop details are: Room 1209, Daly Plaza, Shek Mun, Shatin; telephone +852 2186 8010; WhatsApp +852 6558 6806; opening hours 12:00–19:00. Readers can arrange an inspection through the diagnostic page and receive a written quotation before deciding whether to repair.
Chapter 15: The aftermarket panel reality — identify the panel model, not the laptop model
The aftermarket panel is the part of the Hong Kong repair market where things most easily go wrong, and the cause is not that aftermarket panels are necessarily bad, but that the wrong panel is identified. This chapter first explains how to identify a panel, then gives the compatibility checklist, and finally the writing limits and the acceptance method.
The most reliable method is to read the full model number on the rear label of the panel, taking the old screen out and turning it over to read the sticker, rather than relying on the laptop model alone. The laptop model only identifies the computer; the panel model identifies the screen actually fitted. One laptop series can be fitted with several screens, including HD and Full HD, 30-pin and 40-pin, touch and non-touch, 60 Hz and high refresh rate, standard colour and wide colour gamut, LCD and OLED. During a production run, a manufacturer can fit panels from several panel makers, including LG Display, Samsung Display, BOE, AU Optronics, and Innolux. The manufacturer prefixes are a common pattern, with exceptions and version differences, and are given here as a guide only, never as a guarantee: AU Optronics uses B plus the size, for example B156 for 15.6 inches and B140 for 14 inches; LG Display uses LP plus the size, for example LP156; BOE uses NV, NE, NT, HT, or HB plus the size, for example NV156; Samsung uses LTN for LCD and ATN or ATNA for OLED; Innolux uses N156 and similar. Suffixes, versions, and bracket codes, such as V.0, Rev.C1, or HW0A, can distinguish important variants; this article reminds the reader to photograph the whole label and never to copy only the first few letters. Removing a panel to read the label must be done by qualified personnel; this article does not teach the reader to open the machine.
For the compatibility checklist — what must match and what goes wrong when it does not — the table below is used. For the connector type, low-voltage differential signalling and embedded DisplayPort are completely different, and the wrong one cannot be plugged in or carries a risk of burning the board. For the pin count, pitch, position, and direction, the same pin count can have a different pitch, function, or embedded DisplayPort lane count; 30-pin does not mean universal. For the embedded DisplayPort lane count, resolution, and refresh rate, high resolution and high refresh rate usually need 40-pin with two or four lanes, and a mismatch can cause a black screen or a reduced speed. For the voltage and backlight arrangement, a mismatch can damage the panel or the motherboard. For touch and stylus support, 40-pin does not necessarily mean touch; touch needs extra circuitry. For the mounting method, size, thickness, and screw-hole positions, a wrong panel will not fit, or will pinch the panel and create new stress. For brightness, colour gamut, panel type, and matte or glossy finish, a downgraded specification means the screen cannot be seen outdoors, the colours are wrong, and there is glare.
| Must match | What goes wrong if it does not |
|---|---|
| Connector type, low-voltage differential signalling versus embedded DisplayPort | Completely different; cannot be plugged in, or a risk of burning the board |
| Pin count plus pitch plus position plus direction | The same pin count can have a different pitch, function, or embedded DisplayPort lane count; 30-pin does not mean universal |
| Embedded DisplayPort lane count, resolution, refresh rate | High resolution and high refresh rate usually need 40-pin with two or four lanes; a mismatch can cause a black screen or a reduced speed |
| Voltage and backlight arrangement | A mismatch can damage the panel or the motherboard |
| Touch and stylus support | 40-pin does not necessarily mean touch; touch needs extra circuitry |
| Mounting method, size, thickness, screw-hole positions | Will not fit, or pinches the panel and creates new stress |
| Brightness, colour gamut, panel type, matte or glossy finish | Downgraded specification: cannot be seen outdoors, colours wrong, glare |
The role of the panel datasheet is worth explaining. Panelook, the Global LCD Panel Exchange Center, holds approval specifications for panels from many makers, for example the CMO N156B6-L06, a 15.6-inch thin-film transistor LCD with LED backlight, a 40-pin low-voltage differential signalling connector, and 1366 by 768 resolution. This article can say to check the Panelook datasheet to compare brightness and connectors, but it must never write the specification of one model as a universal specification. For a brightness reference, the Notebookcheck display guide uses about 250 candela per square metre as an example for a contemporary panel, and outdoor visibility needs 350 candela per square metre or more; that is a quotation from that article, noted as a source here, and must never be written as a standard for all panels. Samsung Display's official press release states that a tandem OLED laptop panel can reach a peak brightness of 1,600 nits, and that VESA DisplayHDR True Black 1400 requires a peak of 1,400 nits and a black level of 0.0005 nits or less; that is for a brightness-standard comparison, not a universal OLED value, and still less a universal LCD value.
Compatible does not mean identical, and that is the most important idea in this chapter. An aftermarket or compatible panel can differ from the original in brightness, colour gamut, refresh rate, touch support, and matte treatment; this article must say that the specification — brightness, colour gamut, refresh rate, touch, and matte or glossy finish — must be confirmed in writing before the panel is replaced, and never only that it fits. An original or original-specification panel is more likely to match the factory specification exactly, with more predictable brightness, colour, and touch, but an older model's original panel may be limited in supply and higher in price. An aftermarket or compatible panel is more widely available and lower in price, but its quality varies by supplier; an "OEM-grade" label is not the same as original, and the actual panel model plus specification must be used as the test. The reader should ask three questions: which panel model will be fitted; whether the resolution, brightness, colour gamut, and refresh rate match the original; and whether dead pixels, light leakage, and flicker will be tested after fitting. Can a panel replacement also be an upgrade? Only on the condition of the same connector, the same mounting, and the same power supply — for example from twisted nematic to in-plane switching, from low brightness to high brightness, or from 60 Hz to a higher refresh rate, provided the motherboard and cable bandwidth support it. This article must state that each item must be checked against the panel model and that not every upgrade is possible; it must never be written as "replacing the panel upgrades it."
On the writing limits, this article must never write that any particular aftermarket brand is definitely good or definitely bad; it must never write that an aftermarket panel definitely has a colour difference or definitely has none — the correct wording is that a different specification can cause a colour or brightness difference, so compare the specification before replacing and check it after fitting; and it must never write a specific aftermarket panel price, apart from the site-wide permitted starting price of screen replacement from HK$1,280, with all other prices given as subject to a written quotation after inspection. On the Hong Kong market reality, it can be written that aftermarket panels are more widely available and that a compatible panel is easier to find for an older machine, while an original panel for an older machine may need to be ordered and take longer; it must never write any unverified Hong Kong street price, which shop has stock, or which panel is cheapest. Readers can check the pricing page, or arrange an inspection through the diagnostic page and get a written quotation first.
Chapter 16: Warranty and coverage — only as the manufacturers' own words state
Warranty and coverage is the chapter in this article where it is easiest to say the wrong thing, because the answer the user most wants to hear — does the warranty cover a cracked screen — has no universal answer. This chapter only restates the manufacturers' own words and never writes a general rule that the warranty covers or does not cover something for the whole industry; every machine must be checked against its own contract and service tag.
For Lenovo, the hardware maintenance manual, in wording common to several models, states: "During the warranty period, the customer may be responsible for repair costs if the computer damage was caused by misuse, accident, modification, unsuitable physical or operating environment, or improper maintenance by the customer." The list of items not covered includes an LCD panel cracked from the application of excessive force or from being dropped, plastic parts, latches, pins, or connectors that have been cracked or broken by excessive force, and distortion, deformation, or discoloration of the cosmetic parts. The application in this article is that a deformed lid, a broken plastic catch, and a cracked panel are examples the Lenovo manual explicitly lists as possibly not covered; but the final word rests on that machine's warranty contract, and it must never be written that Lenovo never covers anything.
For Dell, the official catalogue of types of damage not covered by Dell basic support states that damage caused by accident, abuse, or misuse is not covered by the Dell limited hardware warranty or the basic support terms; the catalogue lists cracked glass, internal cracked glass, black spots, surface abrasion, pressure marks, and vertical lines, as well as broken plastic, corner cover damage, a dented back cover, LCD bezel damage, and hinge cover damage in the cover and bezel categories. Dell's official built-in self-test article also states that if cracks, pressure marks, or spider-web patterns are seen, the screen glass is damaged and will need replacement, and that physical damage is usually not covered by the standard warranty, but that Dell technical support can be asked about repair options. Enhanced cover, including accidental damage coverage, has to be bought separately, and it must never be assumed that premium support is the same as cover for accidental damage; the service tag must be used to check.
For HP, an official HP Support Community reply states that pressure damage to an LCD does not recover on its own, and recommends contacting HP Support or an authorised service centre to assess and discuss repair and replacement options. HP's maintenance and service guide has an official spare-part numbering system, for example for the bezel adhesive kit and the bezel itself, and repair should look up the part number in that machine's service guide rather than guessing from appearance.
For Apple, the official repair manual states that the display is listed as a whole orderable part; after replacing the display, the lid angle sensor, the logic board, the top case, or the Touch ID board, a system configuration step is required, and the display and other parts have calibration values customised per part. The application in this article is that an Apple laminated assembly must never be described as a job where only the glass can be replaced; the wording must be that Apple's factory process treats the whole display as one unit and needs a system configuration after replacement, and all other prices are subject to a written quotation after inspection. Apple offered a free display backlight repair programme in 2019 for the 2016 13-inch model, with a coverage period of about four years from the date of purchase, and by now the great majority of those machines are out of coverage; this article must never write that it is still in force.
Before sending a machine for repair, the reader should first check the warranty status and whether there is accidental damage cover, and should not promise a free warranty repair to a repairer, nor report a self-paid repair without checking the warranty first. Before a teardown, it must be explained that opening the machine can void the cover, and the cover must be checked first. This article never writes any specific warranty period in days; warranty cover is provided by the supplier and the terms differ, and the wording is subject to a written quotation after inspection.
Chapter 17: The repair, replace, or upgrade decision framework
The decision framework is advisory logic, not a quotation. All prices are subject to a written quotation after inspection; the only price this article may write is screen replacement from HK$1,280, and everything else is subject to a written quotation after inspection. The framework uses four options plus a decision tree, and it must never be written as "always replace" or "never replace." Every branch must state the condition under which it holds.
The four options must be defined first and never mixed up. Option A is replacing only the panel: only the LCD panel module is changed, keeping the lid, bezel, hinges, cable, camera, and antennas. It applies when the panel itself is broken, the lid is not deformed, the hinge mounts are intact, and the bezel clips are intact. Option B is replacing the display assembly: the whole upper half — lid, panel, bezel, hinges, cable, and antennas — is changed in one go. It applies when several layers are damaged at once, for a laminated one-piece model, when the lid, panel, and hinges are broken in several places, or when the labour plus parts of replacing piece by piece comes close to the price of an assembly. Option C is replacing the lid, hinge, and bezel structural parts: only the structural parts are changed, keeping a panel that is still sound. It applies when the panel is sound, the damage is confined to the lid, the hinge mounts, and the bezel, and the panel shows no pressure symptoms. Option D is replacing the machine: no repair, and a new or second-hand machine instead. Its conditions are in the replacement checklist below.
The decision tree is the spine of this article. Step one: does the panel have physical damage. If not — for example the symptom changes with the angle, the external display is abnormal, or it is purely a cable problem — do not replace the panel; check the hinge, cable, and motherboard direction. If it does — for example cracks, leakage, fixed lines, or fixed white spots — go to step two. Step two: do the lid, hinges, and bezel have structural damage. If not, option A, replacing only the panel, is the most direct; but the panel model and specification must still be matched before replacing. If there is damage, but it is limited and the panel symptom lines up with the structural damage, do options A and C together — replace the panel and repair or replace the structural parts; never replace only the panel, or the new panel will be pressed again. If there is damage in several places, or the model is laminated as one piece, or replacing piece by piece is not economical, take option B and replace the assembly. Step three: how scarce is the panel. A common panel — mainstream 13.3-inch, 14-inch, and 15.6-inch Full HD in-plane switching panels from AU Optronics, BOE, LG Display, and Samsung mainstream models — can usually be replaced on its own, and supply is wider. A scarce panel — high refresh rate, high resolution, touch, OLED, a narrow-bezel special mounting, or a discontinued model — may need a waiting time, acceptance of a compatible specification difference, or an assembly that is in stock first; this article says that a scarce panel needs its availability and specification checked first and that same-day availability must never be promised. Specific waiting times and stock figures must never be written, because they have not been verified; the wording is subject to a written quotation and availability after inspection. Step four: the age of the machine and the value of the whole machine. A young machine, with performance still good enough and the other parts healthy, is more reasonably repaired. An old machine, with the battery, motherboard, and keyboard ageing in several places and the total repair cost close to the remaining value of the machine, points towards option D; but the judgement of "close to the remaining value" must be made on a written quotation after inspection, and this article must never write a fixed money threshold. Step five, the laminated and Apple special case: on a laminated one-piece model, a cracked outer glass usually means option B; it must never be written as general advice that only the glass can be replaced.
Before deciding, ask three questions: how old is the machine, is there accidental damage cover or warranty, and was there a history of force before the symptom appeared. On the extent of structural damage: only one layer, for example only the glass cracked, points to option A; two or more layers, for example glass cracked plus a deformed lid plus a cracked hinge mount, points to option B or C; structural damage plus other major parts such as the motherboard and battery also failing points towards option D. On whether the model can be taken apart: check the official service manual — if the panel can be taken apart, option A can be considered; for hinge-up design and integrated models, option B is the only manufacturer-recognised route. On panel supply: mainstream models have ample panel supply, so options A and B; discontinued, uncommon, or high-specification panels are scarce or expensive, so options B and D must be weighed again. On the repair-cost share: the higher the repair cost as a share of the price of a comparable replacement machine, the more the balance tips towards option D; this article uses the share as a concept and never writes a single percentage as an industry standard, because no source supports a single threshold. On age and remaining value: a new machine, within warranty or one to two years old, should be repaired; a middle-aged machine, three to five years old with the other functions still sound, should be decided on the cost share; an old machine, more than five years old with the battery, solid-state drive, and performance also ageing, points towards option D, with a reminder to back up and transfer data. Those age bands are reference divisions in the advisory framework, not hard thresholds, and this article states that they are advisory logic, not an industry standard.
| Situation | Likely option | Reason |
|---|---|---|
| New machine, only the glass cracked, lid flat, panel can be taken apart | A, replace the panel only | Lowest cost, keeps the other parts of the original assembly |
| Glass cracked plus a slightly deformed lid | C plus A, replace the lid plus the panel | Not dealing with the lid will cause a recurrence |
| Glass cracked plus a cracked hinge mount plus a pinched cable | B, replace the assembly, or C plus A plus the cable | Several layers damaged, part-by-part replacement costs more in labour and risk |
| Hinge-up design or recent Apple model, panel broken | B, replace the assembly | Manufacturer states it cannot be taken apart further, or it is integrated |
| Touch glass broken, glass bonded to the LCD | B, replace the assembly | Replacing the glass alone is unreliable |
| Old machine plus an expensive panel plus ageing battery and performance | D, replace the machine | Repair share high, remaining life short |
| Accidental damage cover or warranty covers accidental damage | Follow the warranty and cover process first | Never report a self-paid repair without checking the cover first |
The replacement checklist is listed here, and this article never decides for the reader. First, age and performance: do the processor, memory, and solid-state drive still meet daily work, and if several parts are already ageing, is repairing only the screen the best value. Second, panel scarcity and waiting time: does the waiting time for parts affect work. Third, the extent of structural damage: when the lid, hinges, and panel are all broken, the assembly price plus labour may come close to the cost of replacing the machine — but that must be compared on a written quotation, and no figure must ever be written as a fixed number. Fourth, data and settings: replacing the machine involves data migration and software reinstallation, while a repair keeps the original machine's data, but a backup is still needed before a repair. Fifth, the warranty state: if the manufacturer's accidental cover is still valid, check the cover first, and do not open the machine and void the cover; the cover must be explained before a teardown.
The decision rules that must never be written are three. First, never write that a machine over a certain age is definitely not worth repairing — no source supports any particular number of years. Second, never write that replacing the assembly is definitely cheaper than replacing piece by piece, or the opposite — the comparison must be made on that machine's written quotation. Third, never write that an aftermarket panel is definitely cheaper by a certain percentage — there is no verified data. Readers who want to know the scope of screen replacement from HK$1,280 can check the pricing page; readers who want a written quotation for their own model can arrange an inspection through the diagnostic page.
Chapter 18: Acceptance and re-testing after a panel replacement — four checks before handover
Replacing a panel is not the end of the repair; acceptance is. Handing a machine back after a panel replacement without a re-test is trap twenty-two: a second layer of damage is missed, and the user only discovers the recurrence after taking the machine home. This chapter lists the acceptance checklist after a panel replacement, with four re-tests before handover, none of which may be skipped.
The first is a full-screen solid-colour check. Display full-screen pure white, pure black, red, green, and blue in turn, and check for bright spots, dark spots, white blotches, and lines. For bright and dark spots, a single small bright pixel is different from a larger, cloudy optical bright spot, and the two must be told apart; for white blotches, a fixed bright white spot is most obvious on a dark background; for lines, a fixed vertical or horizontal coloured line stays in the same position. The second is a lid-angle test. Gently stop the lid at different angles, about 30, 60, and 90 degrees, and see whether any symptom appears or disappears with the angle, checking whether the hinge and cable have been pinched. The third is an external display test. Connect an external display for comparison: a normal external display means the problem is confined to this machine's display assembly, while an abnormal external display must be referred to the motherboard and display diagnosis. The fourth is a hinge-feel and bezel-fit check. Is the opening resistance even on the left and right, is there a strange sound, are all four sides of the bezel fitted, and is any part lifting. On a touch model there is one more item: test the touch area by area, and check whether the area of touch failure lines up with the area of the crack. For brightness and colour, compare with the state before replacement: do the brightness, colour gamut, refresh rate, touch support, and matte or glossy finish match the original. Only after all four re-tests, with photographs kept on file, may the machine be handed over.
Acceptance must also check the flatness of the lid. Place it flat and measure diagonally to decide whether to straighten it, replace the lid, or replace the assembly. A deformed lid that has not been corrected will crack the new panel again — that is trap two. The rear label model of the panel must be photographed, confirming that the panel maker, size, resolution, and connector match the state before replacement. Whether the light-guide plate and optical films have shifted or creased, and whether the rear frame is deformed and pressing on the panel, must be confirmed during the teardown. Whether the hinge section of the display cable has pressure marks, wear, or creases, and whether the socket is loose, must be confirmed during the teardown. All of these are professional testing items; this article lists them as a checklist and does not teach the reader to open the machine to check them.
Chapter 19: Common misconceptions and a quick diagnostic check
This chapter clears up the most common misconceptions in question form, each one tied back to the mechanism in an earlier chapter. First, the screen has a crack but the display still works — can it keep being used. When the outer layer has cracked but the inner layer has not, the display may still work for a while, but the crack edge will keep extending, fragments carry a risk of cuts, and the crack tip is a stress concentration point, so opening and closing and temperature change can extend the crack. The correct action is to photograph it, arrange an inspection soon, and not press it again. Second, will a black blotch heal on its own. HP's official reply states that pressure damage to an LCD does not recover on its own; a leaking black blotch can spread, and a cracked glass is permanent damage. A light pressure mark sometimes looks slightly fainter, but the underlying damage remains. Third, is a white spot a brightness setting problem. A white spot in a fixed position, unchanged by the picture, with a normal screenshot and still present in BIOS, is an optical-layer or panel physical problem; no driver will repair a deformed light-guide plate. Fourth, is a lifting bezel a purely cosmetic problem. Bezel separation leaves the panel edge unsupported, dust and water entry accelerates panel damage, and a lifted bezel can catch the panel edge when the lid is opened and closed, causing secondary stress. Fifth, is a loose hinge fixed by tightening the screws. Tightening the screws again when the screw boss is already cracked only widens the crack, and the hinge comes off completely sooner. Sixth, is an aftermarket panel necessarily worse. Aftermarket panel quality varies by supplier, and the key is specification matching plus testing after fitting; the label alone must never be used to judge. Seventh, does the warranty definitely cover a cracked screen. Every machine must be checked against its own contract and service tag; the Lenovo and Dell manuals explicitly list a panel broken by accident or excessive force as an example of what may not be covered.
For a quick diagnostic check, the reader can use five questions to place the fault quickly. First, is the symptom already present on the BIOS screen. If it is, it is a hardware layer; if it only appears after entering Windows, a driver or settings cause is more likely. Second, is there an abnormality in a screenshot. A normal screenshot with a visible abnormality points at the physical layer; an abnormal screenshot points at the signal and graphics card layer. Third, is the external display normal. A normal external display means the problem is in this machine's display assembly; an abnormal external display in the same way means the motherboard and display output. Fourth, does the symptom change with the lid angle. Changing with the angle means the hinge and cable; a fixed position means the panel and backlight themselves. Fifth, can a crack be felt on the surface. A crack that can be felt is usually the outer glass; a black blotch that cannot be felt but appears on power-up is usually the inner layer. Answering all five questions still does not close the case; the final word needs a professional teardown. Disassembly, measurement, swapping, and soldering belong to professional testing.
One more thing the reader should remember is the time character of physical damage: a crack spreads, a leak spreads, a cracked hinge mount is pulled wider and wider, and a separated bezel lifts more and more. The cost of delay does not rise in a straight line; it goes from one layer to two, and from two to three. A black blotch that first appears may be only the liquid-crystal cell layer, but after months of lid stress, hinge twisting, and moisture entry, it can become three layers at once — panel plus lid plus hinge mount. Photographing early, backing up early, and sending the machine for inspection early is not a sales push; it is stopping damage from spreading from one layer to several. The other way round, a light pressure mark that looks slightly fainter does not mean the underlying damage has recovered; a bezel that has only slightly lifted is not a purely cosmetic problem; a hinge that only makes a slight strange sound is not something to leave for another month. Every early signal from each layer deserves to be taken seriously, because the display assembly is a sandwich structure, layers pass force to each other, and today's small symptom can be tomorrow's multi-layer damage.
Chapter 20: Preparing for repair and the inspection flow — what to bring, what to ask
Preparing well before sending a machine for repair lets the technician place the fault in its layer faster, and lets the reader avoid unnecessary trips. This chapter lists the preparation checklist, the inspection flow, the questions to ask before a quotation, and the things to check after receiving a quotation.
The preparation checklist has six items. First, back up the data. If the machine still starts, back up important files first; a backup is still needed before a repair, and replacing the machine involves data migration and software reinstallation even more. Second, photograph the damage. Photograph the position and extent of the cracks, black blotches, white spots, lid dents, and bezel lifting; photograph a black blotch again after a few days to compare whether it has spread; take one photograph on a pure white background and one on a pure black background, so the technician can place the fault in its layer faster. Third, record the history of force. What happened before the symptom appeared — a drop, pressure, an object trapped when the lid closed, or a gradual onset; what hard object was on the keyboard before the lid was closed; and how the bag was packed. Fourth, record the lid angles. Which angle fails and which angle works, and whether the symptom changes with the angle. Fifth, record the BIOS screen. Is the symptom already present on the BIOS and start-up logo screen. Sixth, check the warranty state. Check the warranty status and whether there is accidental damage cover first, bring the contract information, and do not report a self-paid repair without checking the warranty first.
For the inspection flow, the value of professional testing is not "having a look" — it is seeing all six layers at once, so that only the most visible layer is not replaced while the second layer is missed. The inspection flow runs from the outside in: appearance, including lid flatness and gap symmetry; the bezel and bonding; the glass and polariser; the powered symptoms, including solid colours, an external display, and a torch test; the lid-angle test; and the teardown, including the hinge mounts, screw bosses, cable, and optical layers. The teardown must confirm the panel's rear label model number, whether the light-guide plate is cracked, whether the optical films have shifted or creased, whether the LED bar is broken or burnt, whether the hinge mounts, screw bosses, and brass inserts have burst, whether the cable is pinched or worn, and whether the antennas have been pulled off. Cross-testing with a substitute panel or a substitute assembly can distinguish a broken panel from a broken cable and a broken motherboard backlight driver; that is an electronic-layer boundary and must be judged by the technician. All of these are professional testing items; this article lists them as a checklist and does not teach the reader to open the machine to check them.
After receiving a quotation, there are five questions to ask. First, which panel model will be fitted. The full model number on the rear of the panel, including the revision, for example V.0, Rev.C1, or HW0A, must be written down. Second, do the resolution, brightness, colour gamut, and refresh rate match the original. Third, do the touch support and the matte or glossy finish match the original. Fourth, will dead pixels, light leakage, and flicker be tested after fitting. Fifth, which layers does the quotation cover: replacing only the panel, or replacing the panel plus the lid, or replacing the assembly; and are a deformed lid, a cracked hinge mount, and a pinched cable included. Asking all five questions first avoids the recurrence trap of replacing the panel and only then discovering that the lid was never repaired. On prices, screen replacement from HK$1,280 is the site-wide permitted starting price and is not the price of any particular model's assembly or lid; everything else is subject to a written quotation after inspection. Readers can arrange an inspection through the diagnostic page, receive a written quotation after inspection, and then decide whether to repair.
Appendix: Layer, symptom, and first test at a glance
The table below brings the seven layers, their typical symptoms, the first test, and the repair direction together in one place, so the reader can use it as a quick reference card before sending a machine for repair. The card is not a diagnostic tool; every row keeps its "needs teardown to confirm" tail.
| Layer | Typical symptom | First test | Repair direction |
|---|---|---|---|
| L0 Lid structure layer | Dented lid, one corner lifting, gaps asymmetrical left and right | Place flat on a table and check whether all four corners sit flat | Replace the lid plus assess the panel |
| L1 Bezel and bonding layer | Bezel lifting, separation at the hinge corner, gasket perished | Check clip integrity, telling adhesive failure from broken clips | Adhesive failure: leave to a qualified technician; broken clips need a new bezel |
| L2 Surface optical layer | Spider-web cracks, scratching, rainbow patterns, touch failure | Look at an angle with the machine off, then feel lightly to tell a surface crack from an internal crack | Replace the panel; laminated models need the assembly |
| L3 Liquid-crystal cell layer | Ink-black blotch, bruise-like blotch, fixed coloured line | Solid-colour background plus external display plus screenshot comparison | Replace the panel; never press or heat |
| L4 Backlight optical layer | Fixed white spot, local dark corner, uneven brightness | Solid-colour background plus torch test plus external display comparison | Replace the panel or assembly; the optical layer is not replaced piece by piece |
| L5 Hinge and fixing layer | Lid stiff to open, strange sounds, lid crooked, one side loose and the other tight | Check the symmetry of the opening feel | Reinforce, replace the lid, replace the hinge, or replace the assembly |
| L6 Assembly connection layer | Symptoms changing with the lid angle, flicker, intermittent black screen | Lid-angle test | Inspect the hinge and cable first; never replace the panel at once |
The table is also a reminder that layers mask each other. A deformed lid can cause a panel white spot and a cracked hinge mount at the same time; a cracked hinge mount can cause a pulled cable and a separated bezel at the same time; a separated bezel can cause dust entry and pressure on the panel edge at the same time. One symptom can have more than one mechanism, and one mechanism can have more than one symptom. The value of diagnosis is not in memorising the table, but in eliminating layer by layer in order, narrowing the range with each layer excluded, until the teardown confirms the last layer. Disassembly, measurement, swapping, and soldering belong to professional testing.
Frequently asked questions
Q1: A black ink-like blotch has appeared on the screen. Will it disappear on its own, or will it spread?
A1: It will not disappear on its own, and there is a risk that it will spread. The blotch is an ink-like patch formed when the liquid-crystal cell breaks and liquid crystal leaks out, and HP's official reply states that pressure damage to an LCD does not recover on its own. A black blotch with a spreading edge means the leak is active, and the panel will not recover on its own. The correct action is to photograph the position and extent of the blotch, photograph it again after a few days to compare whether it has spread, and never press, rub, or heat the blotch — pressing only pushes the liquid crystal further out and widens the glass crack. The repair direction is a panel replacement, and on a laminated model usually an assembly replacement. The final judgement is subject to inspection of the actual machine.
Q2: The screen surface feels completely smooth, with no crack to the touch, but a black blotch or a crack is visible when the machine is switched on. Does that mean it was never broken?
A2: No. Dell's official catalogue explicitly distinguishes cracked glass from internal cracked glass: the surface feels smooth, with no crack to the touch, but the glass inside has already cracked and the display shows cracks or black spots. A smooth surface does not exclude an internal crack, and it must never be written that a smooth surface means nothing is wrong. The way to tell is to switch the machine off, look at the screen surface at an angle under good light, and run a finger lightly across it, without pressing, to feel whether a crack can be felt; a black blotch that cannot be felt but appears on power-up usually means the inner layers are already damaged. The repair direction is a panel or assembly replacement, depending on the model, and the final judgement is subject to inspection of the actual machine.
Q3: Should I replace the panel or the assembly, and how is that decided?
A3: It is decided by the extent of the structural damage and whether the model can be taken apart, not by how serious the symptom looks. Replacing only the panel is enough when the glass or liquid-crystal cell is broken but the lid is flat, the bezel clips are intact, the hinge mounts are uncracked, and the cable is undamaged. The assembly must be replaced for a hinge-up design model, where the manufacturer states it cannot be taken apart further; for a recent Apple model, where the hinge and cable are integrated; where the lid, bezel, and hinge mounts are damaged in several places; and where the touch glass is bonded to the LCD and the glass is broken. A cracked glass plus a deformed lid needs the lid plus the panel replaced — never the panel alone, or the new panel will be pressed again. On prices, screen replacement from HK$1,280 is the site-wide permitted starting price and is not the price of any particular model's assembly or lid; everything else is subject to a written quotation after inspection. Readers can check the pricing page, or arrange an inspection through the diagnostic page.
Q4: My laptop was dropped and the screen cracked. Does the warranty cover it?
A4: It cannot be generalised; every machine must be checked against its own contract and service tag. Lenovo's hardware maintenance manual explicitly lists an LCD panel cracked by excessive force or a drop as an example of what may not be covered; Dell's official catalogue excludes damage caused by accident, abuse, or misuse from basic support, and a separate accidental damage cover has to be bought; an Apple laminated assembly is treated as a whole display unit and needs a system configuration after replacement. Enhanced cover has to be bought separately, and it must never be assumed that premium support is the same as cover for accidental damage. Before sending a machine for repair, first check the warranty status and whether there is accidental damage cover, and never promise a free warranty repair to a repairer, nor report a self-paid repair without checking the warranty first. If the cover is still valid, the warranty and cover process should be followed first, and the machine must not be opened by the user. The final judgement is subject to inspection of the actual machine and a check of the contract.
Conclusion
Physical failure of a laptop display module looks like a problem with one part, but at the mechanism level it is a problem of seven systems stacked together. The brittle cracking of the outer glass, the delamination of the polariser, the three-to-four-micrometre gap of the liquid-crystal layer, the crushing of the thin-film transistor conductors, the white screen caused by the light-guide plate touching under pressure, the shifting and wrinkling of the diffuser, the uneven stress caused by a deformed lid, the fatigue of the bezel adhesive and clips, the cracking of the plastic hinge mounts and the loosening of the brass inserts, and the pulling of the cable by the hinge — any one layer failing will present itself as "the screen is broken." Remember the seven-layer model, and the screen will never again be treated as one piece of glass. Remember the three fingerprints of point, line, and area pressure, and the intake questions will be the right ones. Remember the five-way comparison of screenshots, an external display, a torch test, the lid angle, and the BIOS screen, and the elimination will be layered. Remember the twenty-two traps, and the mistake of repairing only the most visible layer will not be repeated. The correct order of diagnosis is: safety first, then performance; layers first, then parts; measurement first, then conclusions. Any approach that decides to replace the panel from one sentence, "the screen is broken," is a diagnosis left unfinished. Any case of a spreading black blotch, a dented lid, a strange hinge sound, or a lifting bezel should first be stopped, backed up, and photographed, and only then diagnosed. For prices, apart from screen replacement from HK$1,280, everything is subject to a written quotation after inspection. Shop details: Room 1209, Daly Plaza, Shek Mun, Shatin; telephone +852 2186 8010; WhatsApp +852 6558 6806; opening hours 12:00–19:00. Readers who have already completed the five-way comparison in this article and bring photographs, a history of force, and a record of lid angles to an inspection will let the technician place the fault in its layer faster, and the quotation will be more accurate. Each layer of the display module speaks its own language, and learning to hear them is what stops one sentence, "the screen is broken," from deciding the fate of the whole machine.
Sources
Researcher A sources, codes A1 to A13, B1 to B9, C1 to C12: A1: Dell, How to Test Your Dell Laptop Screen, built-in self-test procedure, solid-colour order, cracks and pressure marks needing replacement, physical damage usually not covered by the standard warranty, https://www.dell.com/support/kbdoc/en-il/000134936/how-to-run-the-lcd-built-in-self-test-on-a-dell-laptop. A2: Dell, Types of Damages Not Covered by Dell Basic Support, cracked glass, internal cracked glass, black spots, surface abrasion, pressure marks, vertical lines, cover, bezel, and hinge cover damage, https://www.dell.com/support/kbdoc/en-bj/000332239/types-of-damages-not-covered-by-dell-basic-support?lang=en. A3: Dell Pro Max 14 Owner's Manual, Removing the display hinges, display assembly, panel, hinges, and back cover as separate replaceable units, https://www.dell.com/support/manuals/en-ca/dell-pro-max-mc14255-laptop/dell-pro-max-14-mc14255-om/removing-the-display-hinges?guid=guid-30fa5d95-3429-46fd-a11e-26cba516ecec&lang=en-us. A4: Lenovo LOQ 15 Hardware Maintenance Manual, LCD module disassembly order, bezel, panel, camera board, camera cable, display cable, hinges, hinge caps, LCD cover, https://manuals.plus/m/a90fdd02f0457ecb024236abc1ba9895e344c9b9c7af86090c117b98054d0232. A5: Lenovo G50-80 Hardware Maintenance Manual, warranty terms, LCD panel cracked by excessive force or a drop, plastic parts cracked by excessive force, cosmetic deformation, listed as examples of what may not be covered, https://www.manualowl.com/m/Lenovo/G50-80-Touch-Laptop/Manual/450787?page=24. A6: Lenovo ThinkPad W520 Hardware Maintenance Manual, warranty terms, same as A5, ThinkPad version, https://www.manualowl.com/m/Lenovo/ThinkPad-W520/Manual/312956?page=36. A7: HP Support Community, black patch as pressure damage, official reply, pressure damaging the liquid-crystal layer, does not recover on its own, contact HP Support or an authorised centre, https://h30434.www3.hp.com/t5/Notebook-Video-Display-and-Touch/Hey-i-got-a-black-patches-on-my-screen-on-7-i-think-it-due/td-p/9483219. A8: HP Support Community, bezel detached at the hinge corner, pressure and torque near the hinge weakening the bond, thin double-sided tape recommended, superglue taboo, https://h30434.www3.hp.com/t5/Notebook-Hardware-and-Upgrade-Questions/Black-Frame-around-Screen-Detached-on-Left-Hinge-Corner/td-p/9461329. A9: HP Support Community, bezel adhesive coming loose, quoting the service guide, HP adhesive kit N36079-001, bezel parts N36078-001 and N36180-001, broken clip versus adhesive failure, https://h30434.www3.hp.com/t5/Notebook-Hardware-and-Upgrade-Questions/HP-Laptop-Screen-Bezel-Glue-Adhesive-Coming-Loose/td-p/9719539. A10: Apple MacBook Pro 16-inch 2021 Repair Manual, via Archive.org, display as a whole orderable part, system configuration required after replacement, calibration values customised per part, https://archive.org/stream/appleservicemanuals/macbookpro-16-2021-07300327A-repair_djvu.txt. A11: US Patent 8,113,705, optical plate and backlight assembly, light-guide plate pressed into contact with the prism sheet causing the white screen phenomenon, https://patents.justia.com/patent/8113705. A12: US Patent 9,535,207, LCD backlight unit, light-guide plate and diffuser expanding, contracting, and shifting with temperature, humidity, vibration, and impact, guide structures and shock absorption, https://patents.justia.com/patent/9535207. A13: LG Display US20050140839A1, LCD device, lower thin-film transistor substrate plus upper colour-filter substrate plus liquid-crystal layer in between, front and rear polarisers at right angles, backlight below the panel, https://patents.google.com/patent/US20050140839A1/en. B1: Restarters Wiki, Fixing Laptop Hinges, display module sandwich structure, usually the fixing mount breaks rather than the hinge itself, brass insert loosening, A, B, C, and D cover naming, bezel tape removal, hinge tension and adhesive repair, https://wiki.restarters.net/Fixing_Laptop_Hinges. B2: iFixit, MacBook Pro 15-inch Unibody stiff hinge causing top case separation, stiff hinge, more force to open, adhesive breaking and delamination, hot air softening adhesive, https://www.ifixit.com/Guide/How+to+prevent+top+case+separation+by+lubricating+the+stiff+hinges+on+MacBook+Pro+15-Inch+Unibody+Late+2008+and+Early+2009/96669. B3: iFixit, MacBook Pro 13-inch Retina early 2015 display assembly, Retina display replaced as an assembly, including display glass and camera, https://ifixit-guide-pdfs.s3.amazonaws.com/pdf/ifixit/guide_45135_en.pdf. B4: iFixit Answers, re-attaching a bezel, bezel clips plus double-sided tape, broken clips needing adhesive help, bottom clips needing the hinge cover removed, https://www.ifixit.com/Answers/View/633231/re-attaching+a+bezel+to+laptop+screen. B5: iFixit Answers, MacBook hinge loose and lid falling shut, 2017 model, pressed-in hinge pin coming loose after 2016, Apple treating the display as a single part, https://www.ifixit.com/Answers/View/745396/Screen+hinges+loose,+falls+shut. B6: Laptop-LCD-Screen, identifying a panel model, reading the full model on the rear label, B, LP, NV, and LTN prefixes, importance of suffix versions, https://www.laptop-lcd-screen.co.uk/blog/post/2023/10/04/how-to-identify-your-laptop-screen-model.aspx. B7: Laptop-LCD-Screen, compatibility guide, same size and pin count does not mean universal, connector, pitch, embedded DisplayPort lanes, brightness, colour gamut, and touch must all match, https://www.laptop-lcd-screen.co.uk/shop/laptopbuyersguide.asp. B8: Notebookcheck, replacing a laptop screen with a better panel, embedded DisplayPort as mainstream, 30-pin two-lane versus 40-pin two- and four-lane, brightness, colour gamut, refresh rate, and touch, https://www.notebookcheck.net/How-to-replace-a-laptop-screen-Getting-a-better-display-panel-for-your-laptop.715222.0.html. B9: Panelook, CMO N156B6-L06 datasheet, via Archive.org, panel datasheet example, size, LED backlight, connector, resolution, https://archive.org/download/Panel_CMO_N156B6-L06_1/Panel_CMO_N156B6-L06_1.pdf. C1: Laptop Judge, white spots, pressure damage, white spots in fixed positions, most obvious on dark backgrounds, screenshots cannot capture physical damage, do not press or heat, https://laptopjudge.com/what-is-a-laptop-lcd-white-spot/. C2: Laptop Judge, Dell cracked screen warranty, standard warranty generally does not cover accidental damage, premium support is not the same as accidental damage cover, check by service tag, https://laptopjudge.com/dell-cracked-screen-warranty/. C3: ScreenDetect, laptop screen pressure damage, objects trapped when the lid closes and bag squeezing as causes, do not press or heat, screenshot comparison, https://screendetect.com/damage/pressure-damage/laptop-screen-pressure-damage. C4: 10Lappy, black spot causes, HP pressure damage does not recover on its own, telling pressure marks from dead pixels and backlight problems, https://10lappy.com/how-to-fix-black-spots-on-laptop-screen/. C5: PC Genie, hinge damage, repair versus replacement, plastic fatigue, over-angle opening, lifting the machine by the screen, hinge pulling the cable causing flicker and black screens, https://www.pcgeniecomputerrepair.com/blog/laptop-hinge-damage/. C6: Manchester PC, Lenovo IdeaPad 5 hinge repair, plastic fixing mount failure as a real case, a loose hinge mount dragging the cable, bezel, and panel, https://www.manchester-pc.co.uk/blog/lenovo-ideapad-5-repair/. C7: Refurbo, why laptop hinges break, single-corner opening twisting, aluminium and magnesium alloy versus plastic, a tight hinge passing force into the fixing mount, https://refurbo.in/blogs/why-laptop-hinges-break. C8: TechTrenderys and HowTellMe, LCD spot damage, leaking black blotches spreading, pressure changing the cell gap, the outer glass uncracked while the inner layer is damaged, https://techtrenderys.com/lcd-screen-spot-damage/ and https://howtellme.com/lcd-spot-damage/. C9: Laptop Judge, laptop screen and keyboard replacement, the same pin count does not mean the same pinout or voltage, a mismatch can damage the panel or motherboard, check the EDID and the original part number, https://laptopjudge.com/laptop-screen-keyboard-replacement-mod/. C10: Vectree, TFT LCD diagram, stacking order and thickness magnitudes, polariser about 0.1 mm, liquid-crystal gap three to four micrometres, glass about 0.5 mm, https://vectree.io/pdf/c/tft-lcd. C11: Ask MetaFilter, monitor damage discussion, spacer pillars holding the glass spacing, pressure crushing the spacers first and then the thin-film transistor layer, a thumb supporting the weight causing a vertical line, https://ask.metafilter.com/68983/Monitor-Damage. C12: ITStillWorks, LCD pressure damage, liquid crystal between two glass sheets, pressure disturbing the liquid-crystal orientation causing permanent marks, manufacturer warranties mostly not covering pressure damage, https://itstillworks.com/12559039/pressure-damage-to-an-lcd-screen.
Researcher B sources, codes B-A1 to B-C45: B-A1: Dell Precision 5470 Service Manual, removing the display assembly, hinge-up design assembly cannot be taken apart further once removed, whole display assembly must be replaced, https://www.dell.com/support/manuals/cs-sk/precision-14-5470-laptop/precision_5470_sm/removing-the-display-assembly?guid=guid-cfb087f7-42e9-46e3-99c7-88a26e8acc62&lang=en-us. B-A8: Apple Support, do not close your MacBook with a cover over the camera, lid gap extremely tight, camera cover limit 0.1 mm, thicker covers must be removed, https://support.apple.com/en-my/102177. B-A9: Lenovo Hardware Maintenance Manual, warranty exclusions, LCD panel cracked by excessive force or a drop, plastic parts and catches and connectors cracked by excessive force, https://www.manualowl.com/m/Lenovo/Y400-Laptop/Manual/432644?page=24. B-B12: iFixit, MacBook Pro 16-inch 2019 screen replacement, whole display assembly replaced, assembly contains the integrated display and backlight cable, T2 chip may stop an aftermarket display working normally, https://www.ifixit.com/Guide/MacBook+Pro+16-Inch+2019+Screen+Replacement/135189. B-B17: Restarters Wiki, Fixing Laptop Hinges, thinner designs make hinge fixing points easier to break, usually the fixing point breaks rather than the hinge itself, inserts coming loose, one side breaking affecting the other, https://wiki.restarters.net/Fixing_Laptop_Hinges. B-C19: Panox Display, How LCD Displays Work, thin-film transistor LCD structure, backlight module, polariser, photo spacer function, https://www.panoxdisplay.com/solution/how-lcd-displays-work-structure/. B-C20: DisplayModule, Basic Structure of LCDs, glass substrates sandwiching the liquid-crystal layer, thin-film transistors, colour filter, upper and lower polarisers, backlight with light-guide plate and diffuser, https://www.displaymodule.com/blogs/knowledge/basic-structure-of-liquid-crystal-displays-lcds. B-C21: Vectree, TFT LCD, liquid-crystal layer about three to four micrometres, polariser about 0.1 mm, glass about 0.5 mm, edge-lit LED light carried by the light-guide plate by total internal reflection, https://vectree.io/pdf/c/tft-lcd. B-C22: Manchester PC, Lenovo X390 cracked screen and backlight diagnosis, LED bar along one edge of the panel, light spread evenly by the light-guide plate, backlight needing about 20 to 40 volts, motherboard step-up, fuse, and cable chain, torch plus external display tests, https://www.manchester-pc.co.uk/blog/lenovo-x390-backlight-repair-manchester/. B-C27: ScreenDetect, Laptop Screen Pressure Damage, point and area pressure, objects trapped when the lid closes, bag squeezing, do not press or heat, photograph and back up, https://screendetect.com/damage/pressure-damage/laptop-screen-pressure-damage. B-C29: 10lappy, How to Fix Black Spots on a Laptop Screen, HP guidance, pressure when the lid closes causing permanent black blotches in the LCD layer, pressing does not heal and only makes it worse, solid-colour plus external display plus BIOS tests, https://10lappy.com/how-to-fix-black-spots-on-laptop-screen/. B-C31: iDevice, laptop hinge broken or loose, screw boss as the weakest link, a hinge too tight cracking the glass at the corner, cable pinched causing flicker and Wi-Fi disconnection, do not use glue and do not tighten a cracked screw boss again, https://idevice.sg/laptop-hinge-broken/. B-C32: Xigox, laptop hinge loose or stiff, metal hinge strong and plastic fixing point cracking first, one-hand single-corner opening twisting the fixing point, swollen battery pushing against the base, recent Apple laptop hinges integrated into the assembly, https://xigox.com/blog/laptop-hinge-loose-stiff-repair-guide. B-C34: BidiScreen, the MacBook Flexgate problem, 2016 and 2017 MacBook Pro 13-inch cable too short, stage light, Apple free programme about four years and now expired, cable lengthened by about 2 mm from 2018, https://bidiscreen.com/macbook-flexgate-display-cable-repair-cost/. B-C36: Laptop-LCD-Screen, Laptop Screen Compatibility Guide, full panel model on the rear label as the authority, one laptop model can take several panels, 30-pin and 40-pin not interchangeable, brightness, colour gamut, refresh rate, and touch must be checked, https://www.laptop-lcd-screen.co.uk/shop/laptopbuyersguide.asp. B-C38: UMA Technology, Why a Replacement Laptop Screen Looks Different, compatible does not mean looking the same, brightness in nits, Notebookcheck about 250 candela per square metre example and 350 candela per square metre or more for outdoor use, http://umatechnology.org/why-a-replacement-laptop-screen-looks-different-from-the-original/. B-C41: Loctite, Humidity and Water, water weakening adhesion, water vapour degrading bond strength faster than liquid water, water replacing the interfacial bond, https://www.loctitex.com/en/manuals/bonding/4.5.3-humidity-and-water/. B-C44: Alibaba Electronics, How to Fix Laptop Screen Rubber Bezel, three functions of the gasket, separation common at the hinge corner and top edge, do not use universal glue, re-bonding with 3M 9731 or TESA 61395, gasket more than thirty percent perished should be replaced, https://electronics.alibaba.com/buyingguides/laptop-screen-rubber-bezel-fix-guide. B-C45: UMA Technology, Dell XPS 13 Plus screen problem all because of glue, thin design using adhesive instead of screws, adhesive degrading with heat, humidity, and pressure causing the screen to separate, glass cracking in severe cases, https://umatechnology.org/dells-xps-13-plus-has-a-screen-problem-all-because-of-glue/.
This article is an advanced diagnosis article, focused on the physical and structural failure mechanisms of the display module itself, and on how symptoms point back to a failure layer. Display cable signals, the timing controller, the backlight driver circuit, and the electronic failure of dead pixels are mentioned only where they meet the display module, not developed as a main subject. Every conclusion that needs teardown measurement ends with subject to inspection of the actual machine, and no case is settled from symptoms alone. Display modules differ by brand and model in panel system, connector, hinge structure, and whether the assembly can be taken apart, and the specific thresholds and part numbers must follow that model's service manual and datasheet. The temperature, voltage, and brightness figures in the literature are mostly approximate ranges or principle-level descriptions that vary with test conditions, and readers must not treat them as the datasheet of any one model.
Need Professional Laptop Repair?
Laptop King has 15+ years of repair experience in Shek Mun, Sha Tin. Free diagnosis, transparent pricing, no fix no fee. 180-day warranty for your peace of mind.