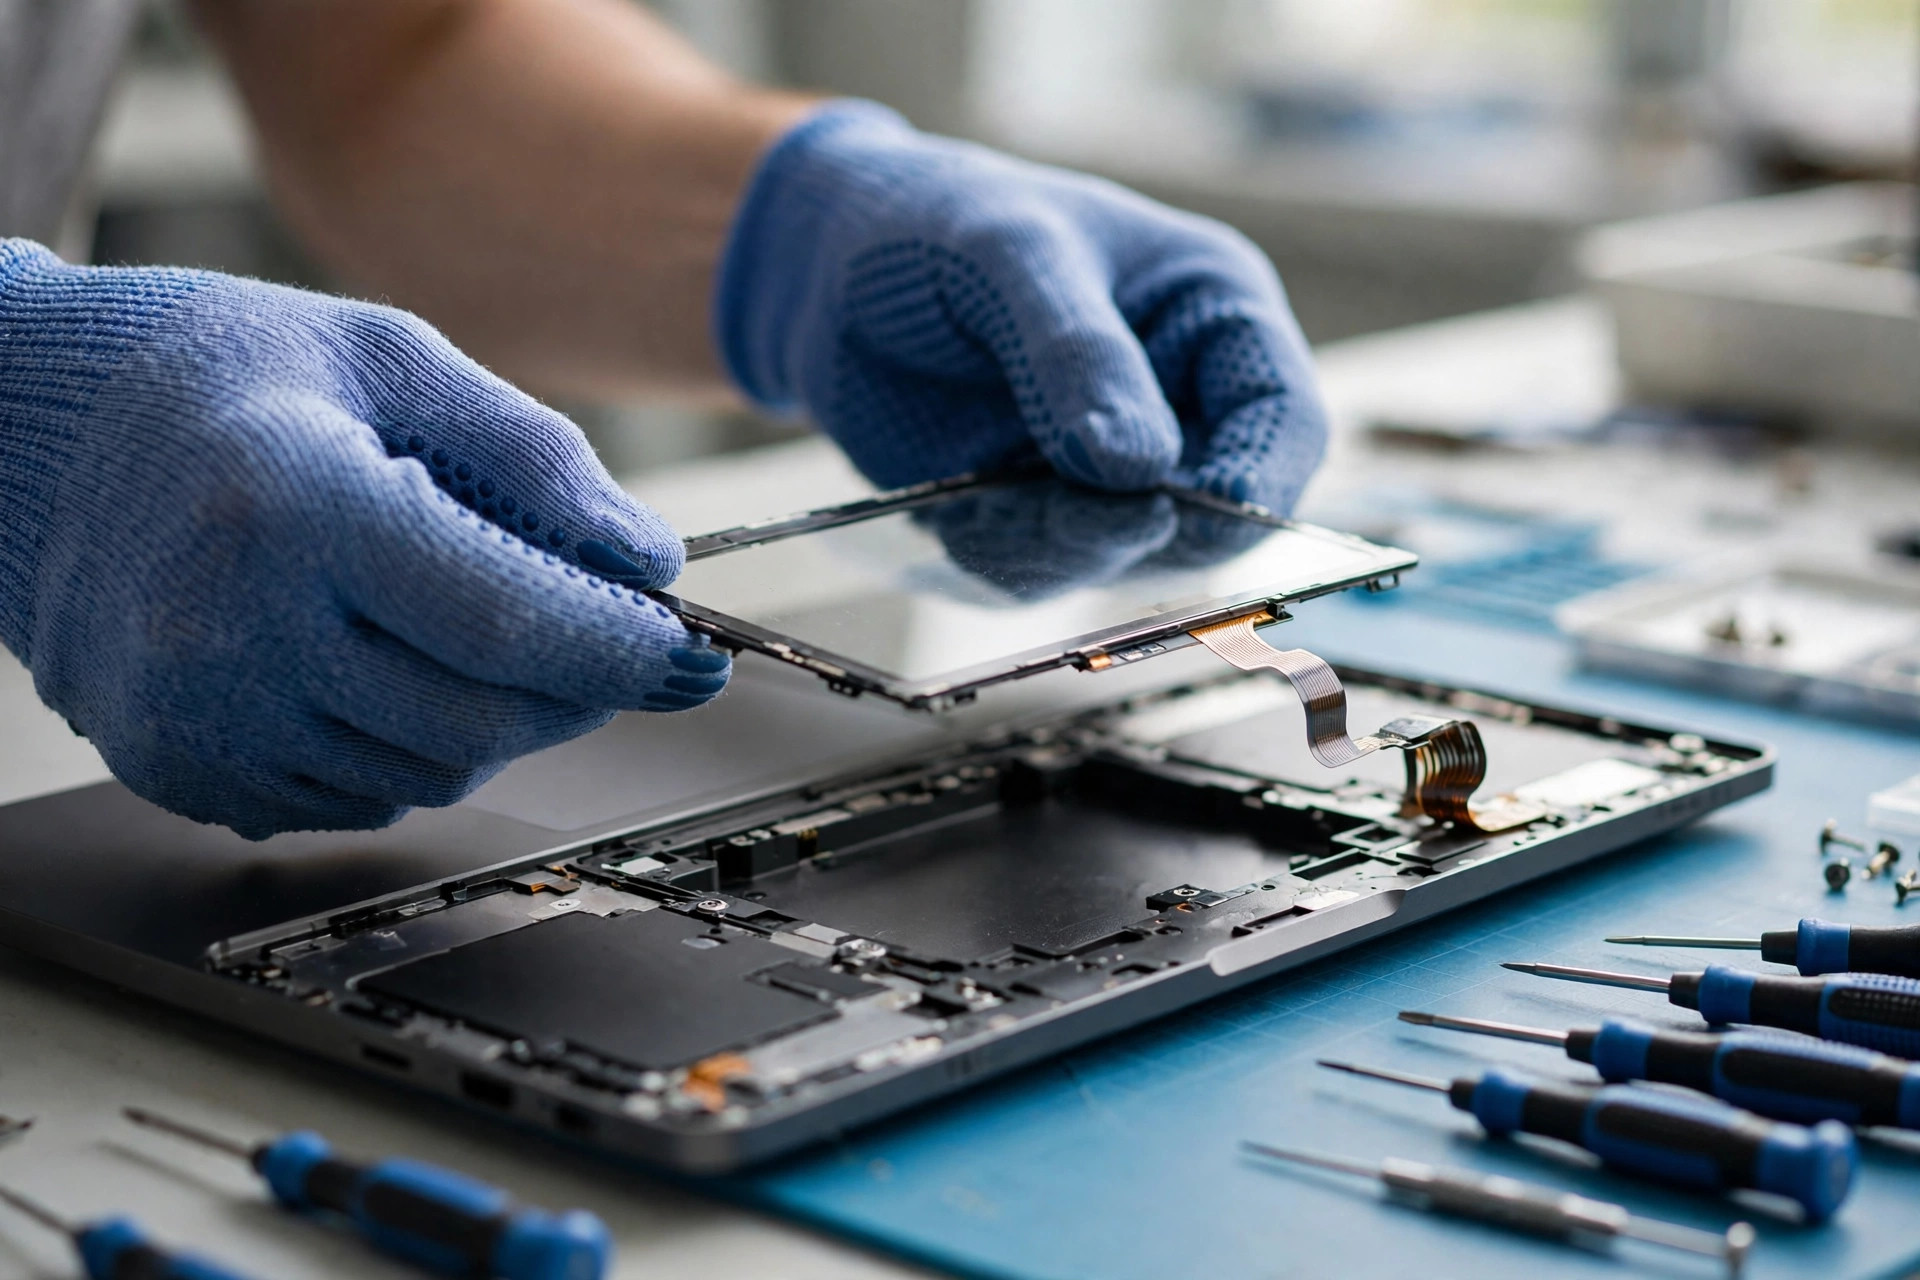
When a user says "my touchpad is broken," the repair bench can be looking at a dozen completely different things: a cursor that jumps on its own, one corner that will not click, a whole panel that is completely dead, intermittent failure, erratic behaviour after a spill, a click that feels loose and rattles, or a cursor that wanders while typing. The hardware behind those symptoms can differ by an entire module — from the glass at the very surface, to the palmrest bracket at the very bottom, to the flex cable and the motherboard connector in between. Any layer can fail and present itself as "a broken touchpad." This article uses a seven-layer model, treating the touchpad as a stack, and explains each layer's materials, failure mechanisms and test methods in turn. It then works through a sixteen-symptom mechanism cross-reference, an eight-step layered elimination process, a software elimination checklist, twenty-four misdiagnosis traps, and a repair, replace, substitute or replace-the-machine decision framework.
This is an advanced diagnostic article focused on the physical layer. Basic steps such as restarting the machine or checking a settings toggle are only summarised inside the elimination process, not rewritten as a beginner tutorial. Any step that involves opening the machine — disassembly, measurement, swapping a flex cable, soldering — is left to professional inspection throughout; this article does not teach readers to open their own machines. Touchpad modules, palmrest assemblies, flex cables and all other charges are quoted only after inspection, in a written quotation; this article invents no touchpad price. The only prices quoted are the four confirmed items: battery from HK$580, screen from HK$1,280, motherboard chip-level repair from HK$880, and keyboard from HK$480. Any figure with no public first-hand source is marked as having no public first-hand source, and no figure is invented. This article contains no customer cases, reviews or statistics.
1. Why a "Broken Touchpad" Is Never One Fault
A touchpad is not a single board. It is a stack. Beneath the glass surface the user touches sits the capacitive sensing layer; beneath that, the controller and its firmware; beside the controller, the click mechanism; the whole module connects to the motherboard through a flex cable; the module is fixed into the palmrest structure; and the entire system needs grounding, shielding and stable power. Any one of the seven layers can fail, the symptoms can look very similar, and the repair method is completely different. Getting the layer wrong is expensive in Hong Kong in particular: on some models the touchpad can be replaced on its own, while on others it is glued to the palmrest and the whole palmrest assembly must be replaced, with parts cost and labour differing several-fold. Good layered elimination means the user does not pay assembly money for a cable fault; poor elimination means a second repair after "the new touchpad is still broken."
The skill of repair is not "replace it" but layered elimination — narrowing down to the layer that actually failed, with the least disassembly and the fewest parts swapped. The working principles are: software before hardware, outside before opening the machine, cheap before expensive, and substitution testing before parts replacement. These principles run through the whole article, especially in the eight-step process in Section 11 and the software checklist in Section 15.
Before the seven layers, three pairs of concepts that are constantly confused must be separated, or the cross-reference tables later will be misread. The first pair is sensing versus clicking. Sensing uses capacitance and answers where the finger is and where it is moving; clicking uses a mechanical switch, a dome or a haptic actuator and answers whether a press registered. One touchpad can sense normally but not click, or click normally while the cursor does not move, and the two faults live in completely different places. On Apple Force Touch trackpads the split is most extreme: the surface does not move at all, and the click sensation is entirely simulated by the Taptic Engine, so sensing and clicking are literally two separate pieces of hardware.
The second pair is ClickPad versus the traditional touchpad. A traditional touchpad has separate physical left and right buttons, with the sensing area and the button area apart; a ClickPad integrates the buttons into the touchpad itself, so the whole panel is one button, and left and right are distinguished by finger position or finger count. The ClickPad mechanism is a hinge plus a spring, and the whole module pivots on a hinge at the top like a diving board. That explains why the top of a ClickPad is particularly hard to press and why the corners are prone to dead zones: the closer to the hinge, the more force is needed.
The third pair is module versus assembly. The touchpad module is the sensing board plus controller plus click mechanism; the palmrest assembly is the whole top cover including the palmrest, keyboard, speakers and touchpad. The Dell XPS 13 9345 service manual states explicitly that the replacement palmrest assembly comes pre-fitted with the palmrest, speakers, wireless antenna module, touchpad, haptic module and keyboard control sub-board. In other words, on that class of machine, "replace the touchpad" means replacing the whole palmrest assembly at the genuine-parts level; on another class of machine, such as the Dell XPS 13 9365, the touchpad is held by only two screws and can be removed on its own. The two structures carry completely different repair costs and risks, and the model must be checked before quoting — never estimated from experience.
2. The Seven-Layer Model at a Glance
From top to bottom, finger surface to machine interior, the touchpad module divides into seven layers. This division is not any manufacturer's official diagram; it is a diagnostic model assembled from Synaptics, Microsoft, Apple, Dell, HP and Acer documentation, in which each layer is a hardware unit that can fail independently and be tested independently.
| Layer | Name | Main materials and components | Core function | Typical failure modes | Most common symptoms after failure |
|---|---|---|---|---|---|
| L1 | Glass surface and plastic facesheet | Glass or polyester film | Provides the finger sliding surface and protects the sensing layer below | Wear, scratches, cracks, coating peeling, oil and sweat build-up | Local sliding feels rough, dead zones, cursor jumping |
| L2 | Capacitive sensing layer and electrode array | X and Y conductive trace grid on PET film or a glass substrate | Senses finger position by mutual or self capacitance | Trace breakage, inter-layer short circuits, moisture changing dielectric properties, local delamination | Cursor jumping, dead zones, false touches, ghost touches |
| L3 | Controller IC and firmware | Image-sensing ASIC, touch digitiser IC | Scans the electrode array, computes finger centroids, outputs HID reports, runs palm rejection | IC damage, firmware faults, bus communication failure, overheating | Whole panel dead, intermittent failure, gesture failure |
| L4 | Click mechanism and haptic engine | Spring hinge plus tactile dome, or four force sensors plus Taptic Engine | Converts a press into a switch signal, or simulates the feel of a click | Hinge fatigue, dome collapse, foreign objects jammed inside, force sensor drift, haptic engine failure | Click does nothing, loose or rattling click, Force Click failure, one side sinking while the other floats |
| L5 | Flex cable and connector | Flat flex cable, zero-insertion-force connector | Connects the touchpad module to the motherboard, carrying power and data | Cable breakage and wear, gold finger oxidation and corrosion, latch loosening, misalignment | Intermittent failure, whole panel dead, works sometimes and not others |
| L6 | Palmrest structure and bracket | Palmrest, touchpad bracket, fixing screws, adhesive and double-sided tape | Fixes the module, keeps the surface flat, bears palm pressure | Bracket deformation, broken screw posts, palmrest bending, adhesive ageing, swollen battery pushing the module up | One side of the click higher than the other, a hollow feeling when pressed, raised touchpad, changed click travel |
| L7 | Grounding, shielding and power | Grounding tape, shielding layer, power lines | Provides a stable reference ground, shields charger and display noise, supplies power | Grounding tape coming off, shielding failure, charger noise interference, unstable power | Jumps only when the charger is plugged in, cursor drift, false touches, unusual sensitivity to humidity |
3. L1 — Glass Surface and Plastic Facesheet: The Layer the Finger Touches
3.1 Two facesheet materials
The Synaptics ClickPad product brief lists two facesheet options: glass or polyester film, such as Mylar. A glass facesheet is hard, low-friction and wear-resistant, and is the mainstream choice on higher-end machines; a plastic film facesheet is cheaper, lighter and less likely to shatter, but wears less well and tends to go dull with long use. Apple MacBook trackpads belong to the glass class, while a large number of mid-range and low-end Windows laptops use plastic film. The repair significance differs: a cracked glass facesheet usually means replacing the whole module, while a worn plastic film may be only a surface problem, with the sensing layer underneath still healthy.
Synaptics ClearPad documentation also notes that capacitive sensing can operate under glass or plastic, allowing devices to be made thinner and cleaner in appearance. The other side of that statement is that facesheet thickness and dielectric properties affect sensing. A facesheet that is too thick, a non-compliant replacement facesheet, or an air gap between the facesheet and the sensing layer all weaken the sensing signal. That point matters especially with aftermarket parts; see Section 19.
3.2 How the surface fails
Wear and scratches are the most common surface problems. A finger slides over the same spot again and again over long use, and the oleophobic and anti-wear coating gradually thins. Wear on its own does not necessarily kill sensing, but the changed friction makes the surface feel rough or sticky. Repair staff must distinguish a surface problem from a sensing layer that already has a dead zone; the method is in Section 11.
Cracks are a more serious surface problem. A glass facesheet cracks under impact or pressure, and a crack can extend downward and sever sensing traces; the crack edge can also distort the finger's capacitive signal and produce local false touches. A plastic facesheet rarely cracks, but pressure can leave a permanent dent that changes the distance between the sensing layer and the finger in the same way.
Coating peeling and contamination are problems Hong Kong users meet often. Sweat, skin oil, cosmetics and cleaning product residue accumulate on the surface. Salt and oil in sweat are not merely dirt; they change the dielectric properties of the surface and make capacitive sensing drift, and long-term build-up at the edges seeps into the seam between the facesheet and the palmrest, on toward the sensing layer and the flex cable. Sweat and humidity in the Hong Kong context are covered in Section 14.
On surface specifications, this research found no manufacturer publishing a specific thickness, hardness grade or wear-test count for any touchpad glass, so this article writes no such figure. Any figure with no public first-hand source is not written. If a figure is ever needed, it must come from the manufacturer's specification sheet, never from repair experience.
3.3 Telling a surface problem from a sensing problem
A surface problem usually shows visible wear, dull patches or peeling, and the rough sliding spreads across the commonly used area without a fixed boundary; cleaning improves the sliding feel, and pressing feels normal. A sensing layer problem usually leaves the surface looking intact, with a dead zone that has a fixed boundary and a fixed position; cleaning changes nothing, and the dead zone stays in exactly the same place. Cleaning uses only a microfibre cloth with a little water, damp but not dripping, wiped lightly across the surface. Never pour alcohol or cleaning fluid directly onto the touchpad: fluid seeping in at the edges can dissolve adhesive, corrode pins and short the sensing layer, turning a surface problem into a module problem. Wait until the surface is completely dry before testing; testing while wet creates false faults.
4. L2 — Capacitive Sensing Layer: The Heart of the Touchpad
4.1 How capacitive sensing works
A touchpad senses a finger by capacitance, not by pressure. Synaptics' earliest capacitive touchpad patent describes a thin, rigid insulating layer with one set of conductive traces running in the X direction above and another set running in the Y direction below, forming a grid. As a finger approaches, it changes the electric field and the capacitance between the traces, and the controller measures those changes to compute the finger's position. Later patents describe two sensing modes, self-capacitance and mutual capacitance, used together: self-capacitance detects quickly whether a finger is present, and mutual capacitance locates it precisely.
ClearPad documentation explains the same thing in plainer language: a capacitive design uses a grid of conductive traces on a transparent substrate, such as PET film or glass, to report the position and relative pressure of one or more fingers accurately, and it is solid-state and needs no user calibration. "Solid-state" matters: the sensing layer has no moving parts, so in theory it does not wear out. Its failure modes are mainly breakage, short circuits and environmental change, not mechanical wear.
4.2 Image sensing: from a point to a picture
Synaptics ClickPad uses image sensing: an image-sensing ASIC can detect up to five fingers at once and supports multi-touch gestures. The later ClearPad Series 7 claims full-time tracking of up to ten fingers. The "image" here is not an optical image but a two-dimensional map of capacitance change. The controller repeatedly scans the electrode array, builds a heat map of capacitance change, and interpolates to find each finger's centroid. That mechanism explains several common symptoms: a jumping cursor, because the signal from one row or column of electrodes is noisy or intermittent and the centroid calculation jumps between two positions; a dead zone, because the traces in one area are broken, the capacitance change there is always zero, and the controller cannot find the finger, so the cursor stops or skips across that area; and palm rejection failure, because the controller tells fingers from palms by contact area and shape, and if the sensing signal is distorted, the TypeGuard input is wrong, palm rejection fails, and the cursor wanders whenever a palm brushes the pad while typing.
4.3 How the sensing layer fails
Trace breakage is the classic sensing layer fault. The traces are extremely fine, printed on PET film or a glass substrate. A bent palmrest, pressure or a drop can put micro-cracks in them. Micro-cracks are intermittent by nature: a small change in temperature, humidity or pressing force changes whether the two sides of the crack touch, so the symptom is intermittent failure. This is one of the hardest faults to catch in touchpad repair, because a static test can look completely normal.
Inter-layer short circuits and moisture are the second class of fault. The sensing layer is a multi-layer structure, with insulating dielectric between layers. After a spill, liquid seeps between the layers, changes the dielectric constant and can even cause inter-layer leakage. Repair community records contain multiple cases where water drawn between the layers of a touchpad changed its capacitance characteristics and the touchpad could not be repaired, only replaced. That is worth emphasising: once the sensing layer is moisture-damaged, cleaning usually does not help, because the damage is between layers, not on the surface.
Local delamination is the third class. Long-term thermal cycling — heating when powered on, cooling when powered off — combined with humidity gradually weakens the bond between the sensing layer and the layers above and below it, producing bubbles or separation. A delaminated area has different capacitance from a healthy area, and the symptom is usually a local dead zone or local hypersensitivity, where a light touch triggers a response.
On sensing layer specifications, this research found no public disclosure from Synaptics or ELAN of the electrode count, trace spacing, scan rate or capacitance-change threshold for any specific touchpad model. Those figures are manufacturer design parameters and are not published. This article invents none of them. Repair judgement should rest on the distribution of symptoms — which area fails and how large the area is — not on imagined specification figures.
5. L3 — Controller IC and Firmware: From Capacitance Signal to Cursor
5.1 What the controller does
The controller IC is the touchpad's brain. It works in four steps: scan the electrode array, measure capacitance change, compute finger positions and gestures, and send the result to the host in a standard protocol. The Synaptics PS/2 interfacing guide lists the controller's jobs: detecting a finger's presence, detecting its position, filtering position data, detecting movement and detecting tap gestures. On modern machines those jobs are done by an image-sensing ASIC supporting up to five fingers; Apple Force Touch trackpads use dedicated chips, including the STMicroelectronics 32F103 ARM Cortex-M microcontroller and the Broadcom BCM5976 touch digitiser IC.
The communication protocol between controller and host has gone through three generations. PS/2 is the earliest interface, and the Synaptics PS/2 guide was written for that generation; new machines rarely use PS/2 for touchpads, but old machines still turn up in repair. I²C over HID is the mainstream interface for modern Windows Precision Touchpads. Microsoft's Precision Touchpad implementation guide requires the touchpad to communicate with the host using the HID protocol over I²C as the physical bus, and recommends an I²C speed of at least 400 kHz with a dedicated I²C controller, or the bus is easily overloaded. USB HID is the third interface: some models bridge an I²C touchpad over USB, and the bridge must expose the touchpad as a separate device node with its own vendor ID, product ID and version ID.
5.2 Microsoft Precision Touchpad: how a platform specification shapes hardware design
Microsoft's Precision Touchpad implementation guide is not only a driver specification; it directly prescribes the hardware module's design requirements. Its module design section states explicitly that the Windows Hardware Certification Kit requirements for Precision Touchpads affect every aspect of the module, including the sensor, the controller IC and the related mechanical structure. The repair significance is that a Precision Touchpad is not a sensing board plus a driver but a system that must pass a whole certification suite — sensor, controller and mechanical structure must work together. Fitting a non-compliant aftermarket module can produce gesture, accuracy or palm rejection problems even when the sensing layer itself is healthy, because the controller firmware or the mechanical structure does not match.
The Precision specification also requires devices to use confidence reporting to mark unintended contact: when the device judges a contact to be unintended, such as a palm, it should clear the confidence bit in that contact report so the host knows it is not a finger. The Linux kernel's HID multitouch driver documentation records the same mechanism: confidence is mandatory for Windows Precision Touchpad devices, used to mark contacts too large to be a finger. That explains why palm rejection problems are sometimes hardware and sometimes firmware: the confidence judgement is executed by controller firmware, so if the firmware is wrong, palm rejection fails even when the sensing layer is completely healthy.
5.3 ELAN: the other major supplier, and its particular difficulty
Besides Synaptics, ELAN (Elantech) is the other major touchpad controller supplier, widely used in mid-range and low-end ASUS, Acer and Lenovo machines. ELAN's particular difficulty is that the company publishes no complete hardware documentation. The Linux kernel's Elantech driver documentation states at the outset that, because there is no public Elantech documentation, its information is the result of reverse engineering and community collation. That document records four ELAN hardware versions: version 1 uses four bytes per packet; version 2 uses six bytes and supports two fingers and touch width; version 3 uses six bytes and supports up to three fingers; version 4 uses six bytes, can combine status packets with multiple movement packets, and supports up to five fingers.
That version difference has practical repair significance: different years of the same brand and series can use different ELAN controller versions, with different flex cable pinouts, firmware and drivers, and parts cannot be interchanged. Before ordering, the model number and the part number on the touchpad itself must be checked; "an ASUS touchpad" is not enough to order by. ELAN's I²C versions have similar differences, and Linux kernel patch records note that newer Lenovo models with ELAN I²C touchpads need extra width and height parameters to work correctly.
5.4 How the controller fails
Damage to the IC itself is the most direct controller fault. Electrostatic discharge, a spill short circuit or a power surge can damage the controller IC directly. The usual symptom is a whole panel that is completely dead, with no touchpad device visible in Device Manager, or a device with a yellow warning mark. That symptom must be distinguished from a flex cable fault: cable faults are usually intermittent, while IC damage is usually persistent. Both can make the device disappear from Device Manager, so the final confirmation is a substitution test after opening the machine. Disassembly and substitution testing are left to professional inspection; this article does not teach readers to do them.
Firmware faults are the second class of controller failure. Controller firmware handles scanning, filtering, palm rejection and HID reports. Corrupt firmware or a mismatched version can cause gesture failure, cursor drift and intermittent failure. Telling a firmware problem from a hardware problem is one of the easiest steps to get wrong in layered elimination; see Sections 11 and 15.
Bus communication failure is the third class. The I²C bus needs pull-up resistors, a stable clock and clean power. If a pull-up resistor on the motherboard is damaged, or the SDA and SCL traces in the flex cable are broken, the controller cannot talk to the host even though it is healthy. Microsoft's guide requires I²C of at least 400 kHz with a dedicated controller precisely because bus overload causes communication loss. The symptom is intermittent failure, often related to system load: open a few more programs, the CPU gets busy, and the touchpad fails.
On controller specifications, this research found no public source listing the operating voltage, power consumption or scan rate of any specific touchpad controller model. Public material for the Synaptics ClearPad 3000 series mentions 5 mA at full speed, 150 µA in normal operation and 12 µA in deep sleep, but that is a phone touchscreen ClearPad 3000, not a laptop touchpad, and cannot be applied directly. This article does not quote phone figures as laptop figures. Any figure with no public first-hand source is not written.
6. L4 — Click Mechanism and Haptic Engine: From Press to Response
The click mechanism is the most mechanically complex of the seven layers, and the one with the largest brand differences. The Windows camp and the Apple camp took two completely different paths, and they must be described separately.
6.1 The Windows camp: spring hinge plus tactile dome
The Synaptics ClickPad mechanism is a spring hinge plus a tactile dome. The whole touchpad module pivots on a hinge at the top, and the bottom can be pressed down; at the bottom of the travel, the tactile dome collapses and triggers a switch signal. The Synaptics product brief stresses that this reinforced hinge-spring mechanism delivers consistent click performance, even at the corners, by reducing flexure across the design. The ClickPad 2.0 press release goes further, saying the new design eliminated the activation dead zones commonly found at touchpad corners, and made the touchpad thinner and less prone to bending.
The physical consequence of this design is the diving board effect: because the hinge is at the top, the closer to the top, the more force a press needs; the closer to the bottom, the easier it is. A Framework community discussion puts it in one sentence: the closer to the top you push, the closer to the hinge, the more force is needed, and very close to the top it is almost impossible to make it click. That is not a fault; it is a design characteristic. Repair staff must know how to tell a design characteristic from a fault: if a user complains that the top will not click, first confirm whether this is within the normal range of the diving board effect, or an abnormal dead zone caused by hinge fatigue or bracket deformation. The method is to compare the press feel on the left and right sides and against a healthy machine, and to check whether the click travel is symmetrical.
The libinput ClickPad documentation also records the ClickPad software button areas: a strip about 10 mm high at the bottom of the touchpad is divided into left, middle and right button areas, and a click is interpreted as left, middle or right according to finger position. That figure of about 10 mm comes from libinput documentation and is a software-level convention, not a hardware specification; the actual button area height differs between models, and it should not be used as a measurement standard in repair.
6.2 The Apple camp: Force Touch plus Taptic Engine — a click with no mechanical button
Apple's Force Touch trackpad, introduced in 2015, abandoned the diving board structure entirely. Reporting at the time noted that Apple discarded the old trackpad's diving board design in favour of four sensors, allowing the user to press anywhere on the trackpad. An iFixit teardown found a set of electromagnets under the trackpad that rapidly push and pull a metal rail beneath it to produce subtle vibration feedback, while strain gauges at the four corners measure the force the user applies.
Apple Support's official description is clearer: Force Click and haptic feedback are features of the Force Touch trackpad; pressing firmly until you feel a deeper second click after the first click is Force Click; haptic feedback is the tactile response felt when pressing, and also appears when moving objects into alignment in supported applications. Two sentences are decisive: a trackpad without Force Touch uses a mechanical button rather than Force Click and offers no haptic feedback; and a Force Touch trackpad does not click, does not Force Click and does not provide other haptic feedback when the machine is powered off. The second point is an important basis for layered elimination: if a MacBook trackpad feels completely rigid and unmoving when the machine is off, like a stone, that is normal, not a fault. Many users meeting a Force Touch trackpad for the first time mistake it for a jammed trackpad, when it is simply not powered on.
The Taptic Engine is essentially a linear actuator: a spring-mounted mass driven sideways by an electromagnetic coil, oscillating back and forth instead of rotating. Because the mass moves on only one axis, the actuator can start and stop within a few milliseconds and can be driven with arbitrary waveforms to produce different sensations — a crisp single tap, a double tap, a slight resistance as a slider reaches a detent, and more. Apple publishes no detailed hardware specification for the Taptic Engine's output figures, and this article invents none. Any figure with no public first-hand source is not written.
6.3 How the click mechanism fails
Hinge fatigue and dome collapse are the most common mechanical faults on Windows ClickPads. The spring hinge and the tactile dome are mechanical parts with a fatigue life. Pressing the same spot for a long time, usually the bottom centre, gradually robs the dome of its springiness: the click feel goes from crisp to soft and finally to no response at all. Hinge fatigue makes the touchpad sink on one side and float on the other, with asymmetrical click travel. These are mechanical wear and cannot be fixed by software; the module or the click mechanism must be replaced. Press-life counts for hinges and domes have no public first-hand source, and this article writes no such count.
Foreign objects jamming the mechanism are the second class of click fault. Dust, food crumbs and hair can seep in through the seam between the touchpad and the palmrest and lodge between the hinge and the dome. The symptoms are a rattling click, shortened travel, or one side that will not press down. Cleaning sometimes resolves it, but if the foreign object has already deformed the dome, replacement is still needed after cleaning. Cleaning and disassembly inspection are left to professional inspection; readers should not prise open the touchpad edge themselves.
Force sensor drift is a fault specific to Apple Force Touch. If one of the four corner force sensors, the strain gauges, drifts out of calibration, Force Click force judgement goes wrong: a light press becomes a Force Click, or a hard press fails to trigger one. Sensor drift can be caused by impact, pressure or liquid ingress. Because the force sensors are integral to the trackpad module, repair usually means replacing the whole module.
Taptic Engine failure is the other Apple-specific fault. When the Taptic Engine itself fails, the symptoms are that pressing still senses, the cursor still moves and taps still respond, but there is no click vibration at all, or the vibration becomes weak, intermittent or abnormally loud. Taptic Engine failure must be distinguished from haptic feedback being switched off in settings: Apple Support notes that the Trackpad settings contain a "Force Click and haptic feedback" switch, and checking the setting is the first step of layered elimination.
A swollen battery pushing the touchpad up is a cross-layer fault involving both the click mechanism and the palmrest structure. An ageing lithium battery swells and pushes upward against the touchpad module from below, shortening click travel, making the click unpressable, or raising the touchpad. Repair community records and multiple repair sources document this: a swollen battery can make the trackpad unclickable, separate the bottom case, and even deform the chassis. Safety warning: if the touchpad, keyboard or bottom case shows bulging, heat, odour, smoke or leakage, stop using and charging the machine immediately, arrange inspection, and do not keep pressing or open the battery yourself. A swollen battery is not a touchpad fault; it is a battery safety issue, and the order of handling is completely different. Full identification is in Section 17.
| Click problem | More like a mechanical fault | More like a settings or software problem |
|---|---|---|
| Click travel asymmetrical left and right | Hinge fatigue, bracket deformation | Settings cannot cause asymmetrical travel |
| Rattling click or hollow feeling when pressed | Foreign object jammed, adhesive ageing, broken screw post | Settings cannot cause rattling |
| Top will not click, bottom normal | Diving board effect, possibly a design characteristic | Check whether the design characteristic is being misunderstood |
| Will not click when powered off, MacBook | Not a fault, Force Touch has no haptic feedback when off | Check the Force Click switch in Trackpad settings |
| Tap works, press does nothing | Dome collapse, force sensor drift | Rule out settings first, then talk hardware |
7. L5 — Flex Cable and Connector: The Thinnest, Most Fragile, Most Overlooked Layer
7.1 What the flex cable is
The touchpad module and the motherboard are connected by a flat flex cable. One end plugs into the connector on the touchpad module, and the other end plugs into the zero-insertion-force connector on the motherboard. The zero-insertion-force connector works by flipping up the latch, inserting the cable, and closing the latch to hold it; to remove the cable, the latch must be flipped up first, and pulling hard will damage the cable and the connector.
Service manuals from every brand describe the cable in almost identical terms, which proves this is a cross-brand standard structure. The Dell XPS 13 9365 states: open the latch on the touchpad connector, disconnect and remove the cable; the touchpad is held to the palmrest by only two M2x2 screws. The Dell XPS 15 9510 states: flip up the black latch holding the touchpad cable and disconnect the touchpad cable; the touchpad is held by six 3 mm screws. Replacing the Dell XPS 13 9345 palmrest assembly requires lifting the latch and disconnecting the capacitive touch panel and haptic module cables. The HP EliteBook 2560p states: release the touchpad cable from the zero-insertion-force connector, then remove the cable. The HP ProBook 455R G6 states: disconnect the cable from the zero-insertion-force connector on the touchpad, lift the cable, remove the adhesive holding the cable to the touchpad, lift the two silver tapes on the touchpad, and remove six M2.0x2.0 broad-head screws. The HP ZBook Firefly 14 G7 touchpad has four cables — the motherboard cable, the middle cable, the touchpad button board cable and the motherboard zero-insertion-force cable — all of which must be disconnected one by one. The Acer Aspire 5000 states: pull back the tape covering the touchpad flat cable, disconnect the touchpad cable and remove it; the touchpad bracket is held by four screws. The Lenovo ThinkPad X390 states: after removing the battery, disconnect the touchpad from the motherboard and use a plastic pry tool to lift the black plastic cover to release the cable.
HP's service manual also states explicitly that the touchpad parts kit does not include the touchpad bracket or the touchpad cable; the cable must be ordered separately as part of the Cable Kit. That matters greatly for quoting: a user who thinks "replace the touchpad" is one part's price may find the cable is charged separately; conversely, if only the cable is broken, replacing the cable costs far less than replacing the whole touchpad module. Cable prices are quoted only after inspection, in a written quotation; this article invents none.
7.2 How the flex cable fails
Breakage and wear are the most common cable faults. The cable is very thin and has a limited bend radius. Every disassembly, every palmrest compression and every flexing of the chassis can put micro-cracks in it. Cables usually run along the edge of the palmrest, and the bends are where they break most easily. The symptom is intermittent failure: move the machine, open and close the screen, and the touchpad works sometimes and not others.
Gold finger oxidation and corrosion are the second class of cable fault. The gold fingers at the two ends of the cable are the metal parts that contact the connector. Humidity, sweat and liquid ingress oxidise or corrode them, and repair community guidance explicitly advises checking the gold fingers at both ends of the touchpad cable for burn or corrosion, and ordering a new cable if there is any. Corroded gold fingers raise contact resistance, so the signal comes and goes; the symptoms look very similar to a broken cable, but the repair differs: a break needs a new cable, light oxidation can sometimes be cleaned, and severe corrosion needs a new cable as well. Inspection and cleaning are left to professional inspection.
A loose or damaged zero-insertion-force latch is the third class of fault. The latch is a plastic part that breaks or loosens if handled wrongly during disassembly. Once loose, the cable moves slightly inside the connector and causes intermittent contact failure. The Dell XPS 13 9365 repair guide specifically warns to handle the fragile touchpad cable with care, precisely because this is the point most easily damaged during disassembly.
Misalignment is the fourth class, usually a human error after repair. If the cable is not pushed fully home, is inserted crooked, or the latch is not closed properly, the touchpad will be completely dead or intermittently fail. Layered elimination should check this first; see Section 11.
Replacing a flex cable means matching the pin count, the pitch and the direction. Repair community discussion notes that a replacement cable must match the pitch, commonly 0.5 mm or 1.0 mm, and the direction, forward or reversed — not only the length and the pin count. A cable or module with the wrong pins may simply not fit, or worse, may burn the controller if inserted wrongly. The correct method is to match parts by the full model number plus serial number plus the original part number, never by series name alone, and to compare the old part's pins, length and latch direction before ordering. Matching and ordering are left to professional inspection.
7.3 Why a cable fault is most easily misdiagnosed as a "broken touchpad"
A cable fault's symptom range is extremely broad: from completely dead, to intermittent failure, to a jumping cursor, almost every touchpad symptom can be caused by the cable. Conversely, the cable is also one of the cheapest and easiest parts to replace. By repair logic, the cable should be excluded before the touchpad module is replaced, because replacing the cable costs and risks far less than replacing the module. HP's service manual listing the cable as a separate Cable Kit is the embodiment of that logic. The layered elimination process puts cable inspection as the first step after opening the machine, for exactly this reason. On some models the touchpad, keyboard, power button and fingerprint sensor share one cable — for example the Framework 13 input cover cable — so a damaged cable can make several parts fail together, and they must not be treated as two separate faults to be replaced separately.
8. L6 — Palmrest Structure and Bracket: The Layer That Fixes the Module and Bears Palm Pressure
8.1 What the palmrest is
The palmrest, also called the top cover, upper case or keyboard deck, is the structural part of the laptop's top cover: the keyboard and the touchpad are both mounted on it, and the user's palms rest on it while typing. The touchpad module is fixed to the palmrest by a bracket, screws, adhesive or double-sided tape. The palmrest's structural rigidity directly affects the touchpad's feel and lifespan: a rigid palmrest means the touchpad does not bend with it when pressed; a palmrest that is too soft or bent means the touchpad moves with it, and click travel and sensing are both affected.
Brand service manuals describe the palmrest and touchpad relationship clearly. The Dell XPS 13 9345 palmrest assembly comes pre-fitted with the touchpad and haptic module, and replacing it means replacing the whole assembly. The Dell XPS 13 9365 touchpad is held to the palmrest by two screws and can be removed on its own. The HP ProBook 455R G6 touchpad is held by six M2.0x2.0 screws plus two silver tapes, which are grounding tapes. The HP ProBook x360 11 G1 touchpad kit does not include the bracket, and the bracket is not a separate spare part; replacing the touchpad means peeling off the tape strips that hold the touchpad and the cable, plus two grounding tapes. The Acer Aspire 5000 touchpad bracket is held by four screws, and after the bracket is removed, the touchpad circuit board is separated with a flat screwdriver.
8.2 How the palmrest structure fails
Bracket deformation and broken screw posts are the most common palmrest-layer faults. The touchpad bracket is usually a metal plate or a plastic part held to the palmrest by screws. Drops, squeezing and long-term one-sided force can deform the bracket or break the screw posts. Once the bracket is deformed, the touchpad module is no longer level: one side sits high and the other low, click travel is asymmetrical left and right, and in severe cases the touchpad bulges upward or sinks downward.
Palmrest bending is the second class of fault. The palmrest itself is a thin structural part that gradually bends under long-term palm pressure and chassis twisting. A bent palmrest changes the contact angle between the touchpad and the finger, putting local pressure on the sensing layer and producing dead zones or false touches. More importantly, a bent palmrest changes the cable's routing path and raises the risk of cable breakage: a palmrest-layer problem propagates to the flex cable layer.
Adhesive ageing is the third class. On some models the touchpad is fixed to the palmrest with adhesive or double-sided tape. Once the adhesive ages, the touchpad loosens, and pressing produces a hollow feeling, a rattle, or a lifted edge. HP's service manual specifically warns during touchpad installation to make sure the protective tape is layered correctly over the touchpad, which shows that the tape's position and layering are specified, not a matter of sticking it anywhere.
A swollen battery is the most dangerous failure mode of the palmrest layer, covered in detail in Section 17. A battery swelling from below lifts the palmrest and the touchpad, and handling order is safety first, diagnosis second.
8.3 How the palmrest structure decides "module alone" versus "whole assembly"
The palmrest structure directly decides the repair option. When the touchpad is screwed to the palmrest and can be removed on its own, such as the Dell XPS 13 9365 and HP ProBook 455R G6, only the touchpad module can be replaced, at lower cost. When the touchpad is glued to the palmrest, or belongs to a pre-fitted assembly, such as the Dell XPS 13 9345 palmrest assembly, the whole palmrest assembly must be replaced, at higher cost, but the palmrest, touchpad and haptic module are then all new. When the touchpad bracket is not a separate spare part, such as the HP ProBook x360 11 G1, a broken bracket cannot be ordered on its own and must be handled together with other parts. Before quoting, the model must be checked, the service manual consulted and parts availability confirmed; a touchpad price cannot be quoted directly. Touchpad and palmrest assembly prices are quoted only after inspection, in a written quotation.
9. L7 — Grounding, Shielding and Power: The Invisible Layer That Decides Whether Sensing Is Stable
9.1 What grounding and shielding do
Capacitive sensing measures extremely small capacitance changes, and any electromagnetic noise interferes with the measurement. Grounding and shielding give the sensing layer a stable reference ground and isolate it from noise from the charger, the display and other motherboard circuits. HP service manuals mention grounding tape repeatedly: the ProBook x360 11 G1 touchpad is fixed to the keyboard and top cover with two grounding tapes; the ProBook 455R G6 touchpad has two silver tapes to lift. Those tapes are not decoration; they are part of the grounding path. Peeling them off and not putting them back, putting them in the wrong place, or the conductive adhesive ageing and losing conductivity all raise sensing noise.
9.2 How grounding and shielding fail
Need a laptop repair expert?
Free diagnosis · Transparent pricing · No fix, no fee · 180-day warranty
Grounding tape coming off or ageing is the most common grounding-layer fault. Tapes are peeled off during disassembly, forgotten during reassembly, or their conductive adhesive ages, and grounding fails. The usual symptom is "it only happens when the charger is plugged in": normal on battery, but the cursor jumps, drifts or false-touches as soon as the charger is connected. The cause is charger noise with no grounding path to drain through, interfering directly with the sensing layer.
Shielding layer damage is the second class. Some touchpad modules have a shielding film on the back that isolates them from electromagnetic interference from the motherboard and the battery. A torn, shifted or missing shielding film raises sensing noise in the same way.
Unstable power is the third class. The touchpad controller needs stable power. If the motherboard's power circuitry has a fault, or an ageing battery makes voltage unstable, the controller's scanning and computation are affected, and the symptom is intermittent failure or cursor drift. Power problems must be distinguished from controller faults: power problems usually affect other parts at the same time, such as the keyboard or USB, while a controller fault usually affects only the touchpad.
9.3 "It only jumps when the charger is plugged in" is the most diagnostically valuable symptom
If a user says the machine is fine on battery and the cursor jumps as soon as the charger is plugged in, that almost directly identifies the grounding layer. The mechanism is that the charger, especially an aftermarket or ageing charger, couples switching power supply noise into the chassis ground, contaminating the sensing layer's reference ground, so the capacitance changes the controller measures are full of noise. In layered elimination, first test with a genuine charger, then check the grounding tape, and only then consider replacing the touchpad module. Skipping that step and replacing the module directly is the most common waste. Many Hong Kong users run an aftermarket charger, a power strip or a universal adapter at home and a genuine charger in the shop; with different leakage and grounding, the touchpad can behave completely differently in the two places. Bring the home charger and power strip to the inspection so the environment comparison can be done.
| Power situation | Touchpad behaviour | Most suspect layer |
|---|---|---|
| Normal on battery, normal on genuine charger | Normal on both power sources | Not the grounding layer, continue other elimination |
| Normal on battery, jumps only on aftermarket charger | Charger noise | Charger or grounding layer |
| Jumps on battery too, worse on charger | Noise on both power sources | Sensing layer or grounding tape |
| Improves after changing socket | Grounding environment differs | Socket grounding or power strip |
| Improves after switching to genuine charger | Aftermarket charger leakage | The charger itself |
10. Symptom-to-Mechanism Cross-Reference: From What the User Says to the Most Suspect Layer
The table below is the most useful tool in this article: on the left, the symptoms users describe; on the right, the most suspect layer, the mechanism, and the next test. It covers sixteen symptoms. The same symptom can be caused by more than one layer, so the table lists the most common and highest-priority layer, not the only possible one. Final confirmation rests on the layered elimination process in Section 11.
| No. | Symptom, in the user's words | Most suspect layer | Mechanism | Priority test and next step |
|---|---|---|---|---|
| 1 | Cursor jumping, cursor moving on its own | L2, L7 | Noise in the signal from one row or column of sensing electrodes makes the centroid calculation jump back and forth; or poor grounding and charger noise interfering with sensing | First test on battery with the charger unplugged; then compare with an external mouse; have grounding tape checked during disassembly, by professional inspection |
| 2 | Local dead zone, one corner or one area not responding | L2, L1 | Sensing traces broken in that area, or a crack or dent in the surface changing the sensing distance | Scan the whole panel finger by finger and map the dead zone; check the surface for cracks |
| 3 | Whole panel completely dead | L3, L5 | Controller IC damage, firmware fault, broken flex cable or loose latch, motherboard I2C communication failure | Check whether Device Manager shows a touchpad device; restart, test in BIOS or UEFI; have the cable and latch checked after disassembly, by professional inspection |
| 4 | Intermittent failure, works sometimes and not others | L5, L2, L3 | Micro-cracks in the flex cable making and breaking contact; micro-cracks in sensing traces; controller bus communication loss | Test while moving the chassis and opening and closing the screen; check cable gold fingers; substitution test with a spare cable, by professional inspection |
| 5 | Click does nothing, sensing normal but pressing has no response | L4 | Tactile dome collapse, hinge fatigue, click switch damage, Force Touch force sensor drift | Test tap and press separately; check whether click travel is symmetrical; on Apple machines, check the Force Click setting |
| 6 | Loose or rattling click, hollow feeling when pressed | L4, L6 | Hinge fatigue, bracket deformation, adhesive ageing, foreign object jammed, broken screw post | Press all four corners and compare travel and sound; check whether the palmrest is bent; have the bracket and screws checked after disassembly, by professional inspection |
| 7 | Top will not click, corners will not click | L4, design characteristic or fault | Diving board effect: the closer to the hinge, the more force is needed; or hinge fatigue widening the dead zone | Compare with a healthy machine and the normal range; check whether click travel is symmetrical; do not mistake a design characteristic for a fault |
| 8 | Tap works but press does not, or the reverse | L4, L3 | Sensing and clicking are two separate systems, and one can fail while the other works | Test tap and click separately; confirm whether sensing or clicking is broken, then decide which layer to replace |
| 9 | Palm rejection failure, cursor wandering while typing | L2, L3 | Distorted sensing layer signal makes TypeGuard and confidence judgement wrong; or firmware palm rejection algorithm fault | Check the sensing layer for local damage; update the driver and firmware and test again; check palm contact area judgement |
| 10 | False touches and ghost touches, moving or clicking with no touch | L2, L7, L1 | Moisture in the sensing layer changing dielectric properties; poor grounding; surface contamination making capacitance drift | Clean the surface; test with the charger unplugged; check for liquid ingress; have the sensing layer and grounding checked after disassembly, by professional inspection |
| 11 | Jumping and drifting only when the charger is plugged in, normal on battery | L7 | Charger noise coupling into the chassis ground and contaminating the sensing reference ground | Test with a genuine charger; check whether the grounding tape has come off; check the charger itself |
| 12 | Failure after liquid ingress, immediately or days later | L2, L5, L3 | Liquid seeping between sensing layers changing dielectric properties; cable gold finger corrosion; controller IC short circuit | Power off immediately and do not test by powering on again; have the corrosion range checked after disassembly; check cable, sensing layer and controller layer by layer, by professional inspection |
| 13 | Raised touchpad, stiff click, bottom case separating | L6, swollen battery | Swollen battery pushing the touchpad module and palmrest up from below | Safety handling: stop using and charging, arrange inspection; do not press it down and do not open the battery yourself |
| 14 | Force Click failure, no haptic feedback, Apple | L4, L3 | Force sensor drift, Taptic Engine failure, setting switched off, or powered-off state which is normal | First confirm the machine is powered on and Force Click is enabled in settings; then test an ordinary press; have the Taptic Engine and force sensors checked after disassembly, by professional inspection |
| 15 | Gesture failure, two-finger scroll and three-finger switching dead while single-finger movement is normal | L3 | Controller firmware gesture recognition fault, or Precision Touchpad driver and firmware version mismatch | Update the driver and firmware; check the Precision Touchpad settings; confirm whether it is a firmware problem or a controller hardware problem |
| 16 | Cursor drift, cursor keeps moving for a while after the finger leaves | L2, L3 | Residual charge in the sensing layer, controller filtering algorithm fault; the Acer service manual notes that light, steady pressure can cause brief spontaneous cursor movement, which is not a hardware problem | First rule out residual palm or finger pressure; clean the surface; check the sensing layer for moisture; then consider the controller |
The minimum standard for recording symptoms has six items, and no conclusion should be drawn with any of them missing: when it first appeared — sudden or gradual, where sudden points more at an update, a setting or a loose cable, and gradual points more at battery swelling, palmrest deformation or wear; the trigger conditions — present at power-on, only after sleep, only while charging, only while typing, or only in a specific area; the scope — whole panel failure, local dead zone, only the click, only gestures, or only taps; the external mouse comparison — whether an external mouse is completely normal, because if it also jumps, the problem may be at system level rather than in the touchpad; what changes after restart, sleep or unplugging — brief normality after a restart that then fails again points at the driver or power management, while no change after a restart points at settings, firmware or hardware; and appearance — bulging, cracks, palmrest deformation, a bottom case that will not close, or a machine that rocks on a flat table, where any one of these means stopping use immediately and jumping to the battery safety check, with no more software testing.
11. The Eight-Step Layered Elimination Process: Outside In, Cheap to Expensive
The principles of layered elimination are software before hardware, outside before opening the machine, cheap before expensive, and substitution testing before parts replacement. The eight steps below are the recommended process, each with a clear pass and fail standard: pass and move to the next step; fail and stop at that layer and deal with it.
| Step | Layer | What to do | Pass standard | If it fails, handle it this way |
|---|---|---|---|---|
| 1 | Software comparison | Confirm the touchpad is enabled, check the Fn shortcut and settings, restart once, compare with an external mouse | External mouse normal, touchpad problem stands alone | External mouse also faulty, possibly a system or motherboard problem, not the touchpad |
| 2 | L4 and L3, Apple | On Apple machines: confirm the machine is powered on, check that Force Click and haptic feedback are enabled in Trackpad settings | Settings correct, problem still present | Setting was off, enable it and test again; not clicking when powered off is normal, not a fault |
| 3 | L7 | Unplug the charger and test on battery; test with a genuine charger | Normal on battery, fails only on charger, locks in L7 | Faulty on both power sources, move to the next step |
| 4 | L1 | Clean the surface with a dry or slightly damp cloth, no corrosive cleaner; check the surface for cracks and dents; scan the dead zone cell by cell | Recovers after cleaning, surface contamination | Dead zone fixed in place and matching a crack location, L1 or L2 problem |
| 5 | L3, firmware and driver | Update or reinstall the touchpad driver, check Precision Touchpad settings, test in BIOS or UEFI or a live USB environment | Normal in the live environment, software or driver problem | Faulty in the live environment too, hardware problem, open the machine, by professional inspection |
| 6 | L6, appearance and structure | Before opening: check whether the palmrest is bent, the touchpad raised, the bottom case separated, or the machine rocks on a flat surface | Appearance normal, proceed to disassembly inspection, by professional inspection | Raised touchpad or separated bottom case, check for a swollen battery first, handle safely |
| 7 | L5, flex cable | Open the machine, disconnect power, check both ends of the cable gold fingers for oxidation or corrosion, the latch for looseness, the cable for creases; reseat the cable and test again; if a spare cable is available, substitution test | Recovers after reseating or replacing the cable, L5 problem | Cable normal, problem still present, move to the next step |
| 8 | L2, L3, L4, module | Check the touchpad module: sensing layer moisture or delamination, controller IC burn marks, click mechanism travel symmetry, bracket deformation; substitution test with a replacement touchpad module | Recovers after module substitution, module problem, decide between module and assembly per Section 18 | Still faulty after module substitution, motherboard problem including I2C communication, power supply or connector, needs motherboard-level inspection |
The second decision point is step 7, the cable substitution test. The cable is the cheapest part and also the most easily broken part. A cable substitution test costs far less than a module substitution test and should come first. HP's service manual listing the cable as a separate Cable Kit exists to support exactly this repair logic.
The third decision point is step 8, the module substitution test, which is the last step in confirming a diagnosis. If the problem persists after the module is substituted, the problem is not in the touchpad but in the motherboard, including I²C communication, power supply or a damaged connector. At that point, stop replacing touchpads and move to motherboard-level inspection. Replacing a second or third touchpad will not solve the problem; it only wastes parts. Motherboard chip-level repair is a confirmed price from HK$880, but whether a touchpad-related motherboard problem counts as chip-level repair is quoted only after inspection, in a written quotation.
Steps 7 and 8 involve opening the machine, disconnecting power and inspecting the cable and the module, and are left entirely to professional inspection. This article does not teach readers to open their own machines, disconnect their own batteries or handle flex cables. What readers can do is the non-disassembly checks in steps 1 to 6, and recording symptoms and results to bring to the inspection.
12. Brand Differences: Touchpad Structure Across Six Major Brands
Touchpad structures differ greatly between brands, and the model must be checked before repair. The table below combines verified service manuals and repair guides to list the mainstream structural characteristics of six major brands. Note that different series and years within the same brand can have completely different structures; the table shows the mainstream, not the whole range, and the specific model number must be checked against the service manual before quoting.
| Brand | Mainstream controller | Click mechanism | How the touchpad is fixed | Cable characteristics | Repair points |
|---|---|---|---|---|---|
| Lenovo, ThinkPad | Synaptics or ELAN, depending on model | ClickPad diving board style; some models keep physical TrackPoint buttons | Screwed to the palmrest; X390 requires removing the battery first and lifting the black plastic cover to release the cable | Touchpad cable and fingerprint sensor cable run separately, take care during palmrest disassembly | When TrackPoint and touchpad share the ClickPad, tell which system is faulty; ELAN versions differ greatly and parts cannot be interchanged |
| Dell, XPS and Latitude | Synaptics or ELAN, depending on model | ClickPad diving board style; XPS 9345 uses a haptic module | XPS 9365 uses two screws and can be removed alone; XPS 9345 is a pre-fitted palmrest assembly part and the whole assembly must be replaced | Zero-insertion-force connector, fragile cable, handle with care during disassembly; XPS 9345 has two cables, one for the capacitive touch panel and one for the haptic module | First check whether the model is "replaceable alone" or "assembly only"; the two costs differ greatly |
| HP, EliteBook, ProBook, ZBook | Synaptics or ELAN, depending on model | ClickPad diving board style; some models have a separate touchpad button board | Screws plus grounding tape; ProBook 455R G6 uses six screws; ZBook Firefly 14 G7 uses four screws | Touchpad cable belongs to the Cable Kit and must be ordered separately; ZBook Firefly 14 G7 has four cables; the touchpad button board has its own cable | Cable and bracket are not included in the touchpad kit, quote them separately; the button board and the sensing board are two parts, diagnose them separately |
| Apple, MacBook | Broadcom BCM5976 plus ST 32F103 and others | Force Touch: four force sensors plus Taptic Engine, no mechanical button | Module fixed inside the top case, usually in the same top case assembly as the battery and keyboard | Touchpad cable connects to the motherboard, plus a separate Taptic Engine cable | Not clicking when powered off is normal; a swollen battery pushes the trackpad up, safety first; Force Click failure needs separate checks of the force sensors and the Taptic Engine |
| ASUS | Mainly ELAN, Synaptics secondary | Mainly ClickPad diving board style | Screws plus cable; W2W-A1 requires removing the keyboard before removing the touchpad cable | Cable connects the touchpad and the motherboard, handle with care during disassembly | ELAN versions differ greatly, match parts by model number; on some models the touchpad is glued tightly to the palmrest |
| Acer | Synaptics or ELAN, depending on model | ClickPad diving board style; some older models have separate left and right buttons | Bracket plus screws; Aspire 5000 bracket uses four screws; Aspire 4937 has a separate touchpad bracket removal step | Touchpad flat cable must have its tape pulled back before disconnecting; some models have a touchpad lock board | The Acer service manual has a complete Touchpad Check procedure, follow the manual's order during repair; parts supply for older models must be confirmed first |
Second, Apple is another world. The Apple Force Touch trackpad differs from the Windows camp on all three layers — sensing, clicking and controller: sensing uses four force sensors plus capacitance, clicking is simulated by the Taptic Engine, and the controller uses a Broadcom and ST combination. Windows repair experience cannot be applied directly to a MacBook, or the reverse.
Third, the dividing line between "replaceable alone" and "assembly only" matters more than the brand. Within one brand, different series can have completely different structures. The Dell XPS 9365 touchpad can be replaced alone, while the Dell XPS 9345 needs the whole palmrest assembly, and the two models differ by one model number while the repair cost can differ several-fold. Checking the service manual before quoting is basic professional practice, not an optional step. Touchpad and palmrest assembly prices are quoted only after inspection, in a written quotation.
13. Liquid Ingress and Corrosion: The Most Dangerous Failure Mechanism
13.1 How liquid destroys a touchpad
Liquid damage to a touchpad proceeds in three stages, spanning from immediately to days or weeks. The first stage is immediate short circuit. Liquid, especially sugary, salty or acidic drinks, seeps into the touchpad module and forms unintended conductive paths between powered traces, causing a short circuit. Repair community records note that water causes corrosion and provides paths for current where it should not go, damaging components. The symptoms at this stage are immediate failure: the touchpad suddenly stops responding, the cursor jumps wildly, or the whole machine powers itself off.
The second stage is spreading corrosion. Even after the visible liquid has been wiped away, residue left on the cable gold fingers, the connector and between the sensing layers keeps corroding the metal. The mechanism is electrochemical: water plus salt plus voltage gradually turns copper traces into green verdigris, which stops conducting; once the copper under a gold finger corrodes, the gold layer peels and contact resistance rises. Repair community guidance advises checking both ends of the cable gold fingers for burn or corrosion after a spill, and cleaning all affected parts with isopropyl alcohol of 90 percent or higher. Cleaning and inspection are left to professional inspection; readers should not open their own machines to wash parts with alcohol.
The third stage is inter-layer damage. If liquid seeps between the sensing layers and changes their dielectric properties, the touchpad cannot be fixed by cleaning. Another repair community case notes that water drawn between the layers of a touchpad changed its capacitance characteristics and the touchpad was unrepairable and had to be replaced. This is the most important judgement in liquid damage repair: cleaning can handle corrosion on surfaces and connectors, but it cannot repair dielectric damage between layers or an internal short circuit in the controller IC.
| Stage | Timing | Mechanism | Symptoms | Handling direction |
|---|---|---|---|---|
| Stage one, immediate short circuit | At the moment of the spill | Liquid forms conductive paths between powered traces | Sudden no-response, jumping cursor, automatic power-off | Power off immediately, do not power on again to test, leave to professional inspection |
| Stage two, spreading corrosion | Hours to days | Residual liquid keeps electrochemically corroding gold fingers and traces | Intermittent failure, widening dead zones, abnormal clicking | Open the machine, check the corrosion range, clean or replace the cable, by professional inspection |
| Stage three, inter-layer damage | Days to weeks | Liquid seeps between sensing layers and changes dielectric properties | Fixed dead zones, distorted sensing, still faulty after cleaning | Cleaning does not work, substitution test with a replacement module, by professional inspection |
13.2 The correct order of handling after a spill
The first step is to power off immediately. Do not wait for a normal shutdown; hold the power button to force the machine off and unplug the charger. Repair community guidance stresses that the first step is not to power on, to limit further damage. Removing a battery involves opening the machine and is left to professional inspection; readers only need to hold the power button to force the machine off and unplug the charger.
The second step is not to power on again to test. Every power-on test lets residual liquid keep corroding while powered. The correct method is to open the machine, clean and dry it, and only then test. Opening, cleaning and drying are left to professional inspection.
The third step is to open the machine and check the corrosion range: the cable gold fingers, the zero-insertion-force connector, the touchpad circuit board and the area around the motherboard touchpad connector, looking for white or green crystals, discolouration or burn marks. Inspection is left to professional inspection.
The fourth step is cleaning and substitution testing. Clean corroded areas with isopropyl alcohol of 90 percent or higher; after cleaning, substitution test with a replacement cable; if it still fails, substitution test with a replacement touchpad module; if it still fails after module replacement, check whether the motherboard connector is burnt. A burnt connector needs motherboard-level repair, meaning micro-soldering to replace the connector, and repair community records note that this needs professional tools and skill and is not recommended for anyone doing motherboard repair for the first time. Motherboard chip-level repair is a confirmed price from HK$880, but whether a touchpad-related motherboard problem counts as chip-level repair is quoted only after inspection, in a written quotation.
The fifth step is not to use rice. Rice cannot draw out liquid residue that has already seeped between layers and into connectors, and it cannot stop corrosion. The correct method is to open the machine and clean it, not to put it in rice.
13.3 The honest boundary of liquid damage repair
Liquid damage repair has an honest boundary: cleaning can handle corrosion on surfaces and connectors; cleaning cannot handle dielectric damage between sensing layers or an internal short circuit in the controller IC. If cleaning and cable replacement still leave the touchpad faulty, the user should be told honestly that the touchpad module needs replacing, instead of repeating cleaning and testing and wasting time and money. If the module is replaced and it still fails, check the motherboard connector rather than fitting a second module. Touchpad module and motherboard repair prices are quoted only after inspection, in a written quotation.
The most common mistake users make after a spill is the urge to power on and test. Each power-on accelerates corrosion and can turn a problem that might have been only cable corrosion into simultaneous damage to the sensing layer and the controller. The correct order is always power off, stop using, and send it for inspection. When sending it in, state the kind of liquid, the approximate amount, the approximate time, and whether the machine has been powered on since — those details directly help judge the corrosion range.
14. The Hong Kong Context: Humidity, Commuting Vibration, Sweat and Salt
14.1 Humidity: Hong Kong's most common and most underestimated touchpad killer
Hong Kong's relative humidity stays high for much of the year, especially in summer. Humidity affects a touchpad through three slow mechanisms, not simply "the machine got wet." The first is condensation. When a laptop moves from an air-conditioned room to the outdoors, or into a humid MTR carriage, the temperature difference between the inside and outside of the machine makes moisture condense on the touchpad module and the cable connector. Condensation itself is pure water with low conductivity, but it dissolves salt and dust from the air and becomes a conductive liquid, causing slow chronic corrosion of gold fingers and connectors over time.
The second is moisture absorption. The PET film sensing layer and the cable's insulating layers absorb moisture, changing their dielectric properties and making sensing drift. The symptom is "much worse on humid days, fine again when the weather is dry" — weather-related intermittent failure is the classic signature of humidity.
The third is mould and dust. A humid environment accelerates the build-up of dust and organic matter at the touchpad edge, and once that build-up absorbs moisture it becomes a conductive path that makes the sensing layer produce false touches.
The repair significance of humidity is that a touchpad fault does not necessarily have a clear "it broke at this moment" point. Many Hong Kong users' touchpads get slowly worse: occasional jumping first, then widening dead zones, then complete failure. That gradual process matches the time scale of humidity corrosion. During repair, it is worth asking where the machine is usually kept, whether it spends long periods in a damp place, and whether it is taken straight from an air-conditioned room to use outdoors. The answers to those questions are often more diagnostically valuable than "when did it start failing."
14.2 Commuting vibration and squeezing: the MTR, the bus and the backpack
Hong Kong users commute every day, and their laptops live in vibration and squeezing: MTR vibration, bus bumps, squeezing against other items in a backpack, and knocks when getting on and off. Those physical stresses affect touchpads in three ways. First, flex cable micro-cracks. Long-term vibration repeatedly bends the cable at its turns, gradually producing micro-cracks. The symptom is intermittent failure tied to moving the machine: fine on a desk, failing when picked up or used on a lap.
Second, palmrest and bracket loosening. Long-term squeezing slightly deforms the palmrest, loosens screws and ages adhesive, and the touchpad's click feel gradually changes, with one side sinking and the other floating. Third, facesheet and sensing layer delamination. Long-term vibration and temperature cycling gradually weaken the bond between the facesheet and the sensing layer, producing local delamination and dead zones.
The repair lesson is that asking how the machine is usually carried is useful. A laptop that spends its life at the bottom of a backpack squeezed under heavy items fails in a completely different pattern from a laptop that sits on an office desk: the first shows more cable and palmrest problems, the second more wear and ageing problems.
14.3 Sweat and salt corrosion: a Hong Kong summer problem
Hong Kong summers are hot and humid, and users sweat more. Sweat contains salt, mainly sodium chloride, plus urea, lactic acid and skin oil. Sweat affects a touchpad on two levels. On the surface, sweat and oil build up on the facesheet, changing friction and dielectric properties and making sensing drift and false-touch. Regular surface cleaning reduces this.
At the seepage level, sweat enters through the seam between the touchpad and the palmrest and stays in long-term contact with the cable gold fingers and the connector, causing slow corrosion. The process is slow but irreversible: once a gold finger is corroded, cleaning can only improve it temporarily and cannot restore the original contact resistance.
The repair significance is that cleaning the touchpad edge matters more than cleaning the centre of the surface. Sweat stains in the centre are visible and users wipe them themselves; sweat stains in the edge seam are invisible and cannot be wiped, and they seep inside after long build-up. Checking the touchpad edge for sweat stains and salt crystals during repair is an important clue for sweat corrosion. Internal inspection and cleaning are left to professional inspection.
14.4 Local parts supply realities
Hong Kong laptop parts supply has three realities that must be considered before quoting. First, the difference between genuine and aftermarket parts is real. A genuine touchpad module combines a Synaptics or ELAN controller with a genuine sensing layer and genuine mechanical structure, and passes Microsoft Precision Touchpad certification; an aftermarket module may use a different controller, a different sensing layer and a different mechanical structure, so even with identical physical dimensions, the feel, the accuracy and the palm rejection can differ. Aftermarket parts are not unusable, but the user has the right to know whether the part fitted is genuine or aftermarket, and what the difference is. A repair quotation should state the parts source; an aftermarket part must not be described as genuine.
Second, supply differs between a module alone and a whole palmrest assembly. Some models' touchpads can be ordered separately, while others are only available as a whole palmrest assembly. On some models the touchpad bracket is not a separate spare part, so a broken bracket must be handled together with other parts. Parts supply must be checked first and quoted after, never quoted first and discovered to be unavailable later.
Third, parts supply for older models gradually shrinks. For models more than five years into production, genuine parts may already be discontinued, leaving only aftermarket parts or parts removed from another machine. Before repair, the user must be told honestly about the parts source and supply situation, so the user can decide whether repair is worthwhile or whether replacing the machine should be considered.
| Hong Kong situation | Main layers affected | Typical symptoms | Prevention and handling |
|---|---|---|---|
| Long-term humidity and condensation | L2, L5 | Much worse in humid weather, intermittent failure, widening dead zones | Avoid sharp hot-cold transitions; send for inspection promptly after moisture exposure |
| Commuting vibration and squeezing | L5, L6 | Fails only when the machine is moved, one side of the click sinking and the other floating | Use a padded laptop bag; avoid heavy pressure at the bottom of a backpack |
| Sweat and salt | L1, L5 | Rough surface sliding, corrosion seeping in at the edges | Clean the surface regularly; edge cleaning is left to professional inspection |
| Aftermarket chargers and power strips | L7 | Jumping only when the charger is plugged in | Compare with a genuine charger |
| Older models, parts discontinued | All layers | Long ordering times, only aftermarket or removed parts available | Check parts supply before quoting |
15. Software Elimination E1 to E22: The Checklist That Must Be Finished Before Opening the Machine
No hardware conclusion is a guess until the software layered elimination is complete. Work through the list in order, and record the result of each item — worked, did not work, or no such setting — and never change several settings at once. Changing several at once means not knowing which one worked, and the fault cannot be reproduced next time it recurs. When one item fixes the problem, stop; do not carry on through the rest. The purpose of the checklist is to find the cause, not to do everything on it. Any item that needs opening the machine, disconnecting the battery or touching a flex cable means stopping immediately and leaving it to inspection. Every item on the list is a no-disassembly step. Before starting, connect an external mouse or prepare keyboard operation — Windows key, Tab, arrow keys, Enter, and Shift plus F10 instead of right-click — or the touchpad being disabled will leave the settings unreachable.
E1 is the physical shortcut key. Look for a touchpad icon on F1 to F12, usually a rectangle with a finger and often a diagonal line, press Fn plus that key once, wait two seconds, and test. Lenovo's official documentation states that most models use F6 or Fn plus F6 to toggle the touchpad; HP documentation states that some models use Fn plus F5, F6 or F9, while others toggle with a double-tap on the top-left corner of the touchpad. Accidental presses happen while cleaning the keyboard, carrying the machine or a child touching it, with no memory of it afterwards. Note that Fn Lock can reverse the function key behaviour on some machines: if one press does nothing, try pressing the key without Fn. Do not press several times in a row — press once, wait, test — or the touchpad will be switched on and then off again.
E2 is the Windows touchpad master switch. Go to Settings, Bluetooth and devices, Touchpad, confirm the master switch at the top is on, and on the same page tick "Leave touchpad on when a mouse is connected." If that option is unticked, plugging in any USB mouse, including a forgotten wireless receiver, disables the touchpad, and unplugging it brings it back. If the whole Touchpad category is missing from Settings, that is not "switched off" but Windows no longer recognising the touchpad hardware; jump to the driver layer in E5 and E6 instead of circling the settings page.
E3 covers taps, scrolling and sensitivity, tested separately for movement, tapping and scrolling. On the same settings page, check three groups separately: Taps, meaning a single-finger tap equals a single click; Scroll and zoom, meaning drag two fingers to scroll; and Touchpad sensitivity, medium or high. "Cursor moves but tap does nothing" and "cursor moves but scrolling does nothing" are two different faults. The first is usually taps switched off; the second is usually the scroll gesture switched off or the driver downgraded. Lenovo's official documentation warns that sensitivity set too low makes users think the touchpad is broken. Set sensitivity to high for testing, and return it to the user's usual medium setting after diagnosis.
E4 covers palm rejection and typing delay. On the touchpad settings page, check sensitivity and typing delay; with a Synaptics manufacturer driver, go through Control Panel, Mouse, the Device Settings or TouchPad tab, and Settings to find the PalmCheck or SmartSense slider. Lenovo's official glossary defines palm rejection as using algorithms and sensors to distinguish intended input from palm contact; Synaptics official documentation defines the PalmCheck slider as controlling the touchpad's detection of accidental pointing movement. A cursor wandering while typing is most often caused by palm rejection being too weak or a driver too old for the setting to take effect — not by a broken sensing layer. Temporarily switch off "tap once to click" and type a paragraph; if the wandering stops, the mechanism is false touch, not hardware. Move the PalmCheck slider one notch toward minimum and test again; do not drag it all the way, because over-aggressive filtering blocks normal taps and creates another fault. Windows Precision Touchpads have no separate PalmCheck slider; palm rejection is built into the driver and firmware. If the settings page shows no related option, that does not mean the feature does not exist, only that the interface does not expose it — do not conclude from that alone that hardware must be replaced.
E5 is finding the touchpad device in Device Manager, including hidden devices. Press Win plus X, open Device Manager, expand both "Mice and other pointing devices" and "Human Interface Devices," and look for Synaptics, ELAN, HID-compliant touchpad, or I2C HID Device; if nothing is found, click View and then Show hidden devices and look again. A device being "missing" and a device showing a yellow warning mark are two different faults: the first points at firmware, the cable or Windows failing to detect it, the second at a damaged driver. A device present with no warning means the driver looks normal and the problem may be in settings or hardware; a yellow warning or an error code such as Code 10, Code 24 or Code 45 should be noted down before jumping to E6 and E8; a device that appears greyed out only after showing hidden devices was installed before but is not detected now, which strongly suggests the cable or firmware, to be judged with E13 and E17; if neither category shows anything, do E13 for the BIOS first, then E17 for the Linux comparison, and do not reinstall Windows directly.
E6 is disabling and then re-enabling the device in Device Manager, and it should not be skipped. Right-click the touchpad device, choose Disable device, wait five seconds, then choose Enable device. This is the cheapest driver reload. A driver can hang in a bad state, and disabling and re-enabling makes Windows re-initialise the controller without restarting the machine. Test immediately after enabling; if it works immediately but dies again after waking from sleep, that points at power management in E14, not at the driver itself.
E7 is identifying whether the machine uses a Precision Touchpad or a manufacturer driver — identify first, then talk about gestures. Open Settings, Bluetooth and devices, Touchpad. If there are sections for Taps, Scroll and zoom, three-finger gestures, four-finger gestures and advanced gestures, it is a Precision Touchpad; if only a basic switch is shown, or a link at the bottom leads to the traditional mouse properties panel with a Synaptics, ELAN or ClickPad tab, it is a manufacturer driver. This is the core identification step. Precision failures are usually caused by the driver being replaced; manufacturer driver failures are usually caused by the control panel being overwritten by Windows Update or settings being reset. Not all hardware supports Precision. HP's official community reply notes that some models do not support Precision at all, and force-installing a Precision driver may not work. Do not treat "no Precision settings page" as directly meaning "the driver is broken" — first confirm which type the model shipped with.
| Item | Precision Touchpad, Microsoft standard | Manufacturer driver, Synaptics or ELAN |
|---|---|---|
| Gesture settings location | Windows Settings, Bluetooth and devices, Touchpad | Manufacturer tab in traditional mouse properties |
| Three and four finger gestures | Separate sections in the settings page | Inside the manufacturer control panel, names vary |
| Driver provider | Microsoft or a manufacturer Precision-compatible driver | Synaptics or ELAN manufacturer driver |
| Common change after Windows Update | Replaced by a generic HID driver, gesture page disappears | Control panel disappears or settings are reset |
| Palm rejection interface | Sensitivity in settings plus a built-in algorithm, no separate slider | PalmCheck or SmartSense slider adjustable |
| After fitting an aftermarket module | Depends on whether the controller firmware supports Precision | Usually only basic movement plus single click remains |
| Diagnostic meaning | Missing gesture page equals a driver-layer problem, not broken hardware | For gesture faults, check the manufacturer control panel first |
E9 is rolling the driver back, the first choice when failure follows an update. In Device Manager, right-click the touchpad device, open Properties, go to the Driver tab, choose Roll Back Driver, select a reason, confirm and restart. If the fault appeared immediately after a Windows Update or driver update, rolling back works better than reinstalling the same new version, because the problem is not "the driver is missing" but "the new driver does not suit this machine." If the Roll Back Driver button is greyed out, Windows has no older driver backup; that means there is nothing to roll back to, not that rolling back is forbidden — jump to E10 to install an older version manually, and do not keep pressing the button.
E10 is reinstalling the driver: uninstall, with the option to delete the driver software, then restart. In Device Manager, right-click the touchpad device and choose Uninstall device; if the dialog offers "Attempt to remove the driver software for this device," do not tick it the first time — restart and let Windows reinstall automatically; if it still fails, tick it the second time, restart, and install manually from the manufacturer's website per E8. Not ticking it the first time keeps a known driver version as a comparison; ticking it immediately can make Windows install an even older generic driver and make the problem harder to trace. After restarting, check whether the driver version and date in Device Manager have changed; if the version is unchanged but the symptom is gone, the cause was driver state corruption rather than a version problem — note that down so the same action can be repeated if it recurs.
E11 is uninstalling the I2C HID device and the chipset driver, the hidden upstream of Precision Touchpads. In Device Manager under Human Interface Devices, find I2C HID Device, right-click and uninstall it without ticking delete, then restart; if it still fails, check the manufacturer's website for a newer chipset or Serial IO driver and update that too. Modern Precision Touchpads mostly connect to the motherboard over the I²C bus rather than legacy PS/2. When the I2C HID driver is damaged, the touchpad device itself may not appear at all, or may appear but not respond. Be careful with this step: do not uninstall all HID devices at once; do them one at a time with a restart each time, or it will be impossible to know which one was the cause.
E12 is checking for conflicting software with a clean boot comparison. Use the system configuration tool to perform a clean boot keeping only Microsoft services, restart, and test the touchpad; if it works in the clean boot, re-enable third-party services in batches to find the conflicting one. Lenovo's official documentation states that some third-party applications or utilities can interfere with touchpad function; HP's official community process also includes a clean boot test. Common conflicting software includes third-party gesture tools, mouse enhancement tools, remote desktop tools and game overlays. A normal clean boot means a software conflict, not hardware; a still-faulty clean boot means third-party software is excluded, so continue downward. Remember to restore normal startup afterwards; do not stay in clean boot mode long-term.
E13 is the BIOS and UEFI check, confirming that the Internal Pointing Device is enabled. Restart, enter BIOS or UEFI — common keys are F2, Delete, Escape or F10 depending on brand — find Internal Pointing Device, Touchpad or Trackpad under Configuration, Advanced or Devices, confirm it is Enabled, and save and exit. The BIOS can switch the touchpad off below Windows. If the BIOS has it set to Disabled, Windows settings, drivers and reinstallation are all useless, because the hardware is never handed to Windows. HP UEFI hardware diagnostics, opened with Escape then F2 at power-on, can test the touchpad directly in the UEFI environment: if the touchpad works in UEFI but not in Windows, it is almost certainly a Windows software layer problem; if it fails in UEFI too, the hardware suspicion rises sharply. That is another decisive comparison alongside E17.
E14 is power management: USB selective suspend plus "Allow the computer to turn off this device." Go to Control Panel, Power Options, Change plan settings, Change advanced power settings, USB settings, USB selective suspend setting, and set "Plugged in" to Disabled for testing; in Device Manager, open the touchpad, I2C HID or USB Root Hub properties, go to the Power Management tab, and untick "Allow the computer to turn off this device to save power" for testing. The most common software cause of "dead after waking or after idling" is power management. After changing, idle for fifteen minutes, wake from sleep once, then idle for fifteen minutes again; only three passes count as a pass. One test is not enough, because power management faults are themselves intermittent. When testing is finished, if power management is confirmed as the cause, keep the Disabled setting and record it; if not, restore the original setting and do not leave power saving switched off long-term.
E15 is the sleep and hibernation specialist: Fast Startup and driver wake-up. Go to Control Panel, Power Options, Choose what the power buttons do, Change settings that are currently unavailable, and untick "Turn on fast startup" for testing, then restart; in Device Manager, on the touchpad device's Power Management tab, confirm the "Allow this device to wake the computer" setting; then perform a full shutdown — hold Shift while shutting down — rather than an ordinary shutdown, and power on to test. Windows Fast Startup is a hybrid shutdown, and driver state is kept on disk; if the touchpad driver hangs during a sleep or Fast Startup cycle, an ordinary restart will not clear it, and only a full shutdown will. That is the standard explanation for "a restart does nothing, but shutting down and powering on works." Normal after a full shutdown but faulty after an ordinary restart points at a driver wake-up or Fast Startup problem, not hardware.
E16 is the BIOS and UEFI update and Windows Update uninstall route, the two ways back when an update caused the failure. Check the manufacturer's support site to compare the installed BIOS version with the latest version; if the manufacturer's update notes explicitly mention fixing the touchpad or fixing I²C, back up data first and then update the BIOS. If the fault appeared immediately after a Windows cumulative update, go to Settings, Windows Update, Update history, Uninstall updates, and remove the most recent update to test. Microsoft has fixed touchpad problems in cumulative updates — for example, one update fixed the device stopping during touch gestures and another fixed the right-click area — and by the same token, updates can also introduce touchpad problems. A BIOS update carries risk: a power cut can brick the machine, so this article must state clearly not to update the BIOS without a backup and without mains power, and not to update the BIOS blindly for a touchpad unless the manufacturer's notes mention the touchpad.
E17 is the Linux live USB comparison test, the decisive evidence and the strongest test that needs no disassembly. Make a live USB with Ubuntu or any mainstream distribution, do not install, only try it, boot to the desktop, and test touchpad movement, tapping, scrolling and clicking. A Linux live environment uses a completely different driver stack — modern distributions use libinput by default, and the old synaptics driver has been replaced. If the touchpad works completely normally in Linux but not in Windows, the hardware — glass surface, sensing layer, cable and controller — can almost be excluded, and the problem is locked to the Windows driver, settings or update. If the same dead zone or the same click failure reproduces exactly in Linux, the hardware suspicion rises sharply and opening the machine is worth it. Practical details: the commands libinput list-devices and libinput debug-events show whether the system detects the touchpad and whether there are live events when the finger moves. No events at all in debug-events while the finger moves points at the kernel driver layer not detecting the hardware; events present but the cursor not moving points at the desktop environment settings. Tap may be switched off by default in Linux, so a tap not working in Linux does not mean broken hardware — enable tap in settings first and test again. Gestures are limited in Linux by nature, so do not conclude hardware is broken from three-finger gestures failing in Linux; the comparison test only compares movement, tap, click and dead zones. Some newer touchpads need a newer kernel for support; if the live USB is an old version and the touchpad does not appear at all, try a newer live USB version first and do not condemn the hardware immediately. E17 is the only test in this report that can be described as almost excluding hardware. E17 normal plus Windows faulty means do not replace the touchpad; E17 also faulty means replacement is worth discussing.
E18 is the macOS comparison, for MacBook and Boot Camp users only. On an Intel MacBook running Boot Camp Windows, return to macOS first and test the trackpad; if it is normal in macOS but faulty in Windows, the problem is in the Boot Camp driver. Apple's Windows Support Software is what lets Windows use Mac hardware, including the keyboard, trackpad and Wi-Fi. Boot Camp supports Intel Macs only; Apple Silicon, M1 and later, does not support Boot Camp. To reinstall Boot Camp support software, open Boot Camp Assistant in macOS, choose Action and Download Windows Support Software, save it to a USB drive, and run Setup.exe in Windows. Do not install Boot Camp drivers on an ordinary Windows laptop, and do not download so-called Boot Camp driver packs from third-party websites. Apple's official Boot Camp documentation is mainly for Windows 10, and Windows 11 on Boot Camp is not formally supported by Apple; that must be stated plainly, and full gestures on Windows 11 must not be promised.
E19 is the external mouse comparison, separating a touchpad problem from a whole pointer system problem. Plug in a USB mouse — wired is the most reliable — and test movement, left and right clicks and the scroll wheel; then try a Bluetooth mouse if one is available. A completely normal external mouse points at the touchpad itself, including settings, driver and hardware; an external mouse that also jumps, lags or fails intermittently points at the system layer, including CPU load, driver conflicts, USB power, or even a display driver slowing the whole desktop. This comparison costs nothing but can avoid the wasted money of replacing a touchpad only to discover a system problem. During testing, unplug all other USB devices, including hubs and flash drives, and exclude them one by one. A wireless mouse receiver can itself be the interference source: as E2 noted, a forgotten receiver makes Windows think a mouse is connected and disables the touchpad.
E20 is the environment comparison: charger, grounding, static and surface contamination. Unplug the charger and test on battery for ten minutes; plug the genuine charger back in and test for ten minutes; if an aftermarket charger is available, test it for comparison; wipe the touchpad surface lightly with a clean microfibre cloth to remove grease, sweat and dust; try another desk and another socket. A capacitive touchpad works by detecting capacitance changes caused by a finger. A leaking poor-quality charger, poor grounding, accumulated static and surface oil can all make the sensing layer misjudge, producing a jumping cursor, false touches and local failure. The signature of this class of fault is that changing the environment makes it better, with no connection to the driver or the cable. Jumping only while charging and normal when unplugged points first at the charger or grounding, not at the touchpad. Surface cleaning uses only a microfibre cloth with a little water; never pour alcohol or cleaning fluid directly onto the touchpad. Wait until the surface is completely dry before testing; testing while wet creates a false fault.
E21 is the swollen battery safety check, to be done before and after all software elimination. Power off, unplug, and inspect by eye and by hand: is the touchpad raised above the palmrest surface; has click travel become shorter or stiffer, with the press not springing back; is the bottom case no longer closing properly, with widening gaps; does the machine rock when placed on a flat table; is the middle of the keyboard raised. Any one of these means stopping use immediately. Dell's official swollen battery guidance lists a touchpad or keyboard that will not press, feeling raised, and a machine that rocks when placed flat as warning signs, requiring the battery to be stopped immediately, the machine powered off, the AC adapter unplugged, and no further use. Full identification is in Section 17.
E22 is the last software resort: a new Windows user account plus system file checking. Create a completely new local Windows user account, log into it and test the touchpad; then, as an administrator, run the system file checker (sfc /scannow), followed by the deployment image servicing and management tool (DISM /Online /Cleanup-Image /RestoreHealth) to restore health, which needs an internet connection. A new account test separates a damaged user profile from a system-wide problem: a normal new account means the old account's settings or startup programs are the problem, with no need to reinstall Windows; a faulty new account too means a system layer or hardware layer problem. The system file checker can repair damaged system files, including files related to the input stack. These two steps are the end of software elimination. Only when E1 to E22 are all done, and the touchpad is faulty in Windows, Linux and UEFI diagnostics all three, can it be said that hardware suspicion is extremely high and opening the machine for inspection is warranted. Any conclusion of "replace the touchpad" that skips E17 and E21 is incomplete elimination.
| E item | In one sentence | If it fixes it | If not, next step |
|---|---|---|---|
| E1 Shortcut key | Accidentally switched off | Stop, note which key | E2 |
| E2 Settings master switch | Setting off, or mouse connection disabling | Stop | E5 |
| E3 Tap, scroll, sensitivity | Individual functions switched off | Stop | E7 |
| E4 Palm rejection | Typing false touches | Adjust and stop | E8 |
| E5 Device Manager appearance | Driver missing or error code | Note the error code | E6 or E13 |
| E6 Disable and re-enable | Driver hung | Stop | E8 |
| E7 Identify the driver | Precision or manufacturer driver | Identify it, then treat accordingly | E8 or E9 |
| E8 Update the driver | Driver too old | Stop | E9 |
| E9 Roll back the driver | New driver does not suit the machine | Stop, note the version | E10 |
| E10 Reinstall the driver | Driver damaged | Stop | E11 |
| E11 I2C HID and chipset | Upstream bus fault | Stop | E12 |
| E12 Clean boot | Third-party software conflict | Find the conflicting software | E13 |
| E13 BIOS enabled | BIOS switched it off | Stop | E17 |
| E14 Power management | Dies after waking | Keep the setting and record it | E15 |
| E15 Fast Startup | Wake-up failure | Stop | E16 |
| E16 BIOS and update rollback | Update introduced the problem | Note the update number and BIOS version | E17 |
| E17 Linux live USB | Decisive comparison | Linux normal means do not replace hardware | Linux also faulty means open for inspection |
| E18 macOS and Boot Camp | Mac users only | Reinstall support software | Send for inspection |
| E19 External mouse | System or touchpad | External normal means focus on the touchpad | External also faulty means check the system |
| E20 Environment comparison | Charger, static, dirt | Change charger or clean | E21 |
| E21 Swollen battery check | Safety check | Any bulge means stop using | No bulge, continue |
| E22 New account and system file check | Profile or system file damage | Stop | Open for inspection |
16. Misdiagnosis Traps M1 to M24
Each item below states the misdiagnosis, why it is wrong, and the correct action. Readers can use them as a self-check list; each one has an action that can be verified immediately.
M1 — Treating a driver problem as broken hardware. The misdiagnosis: "The touchpad will not move, it must be broken, replace it." Why it is wrong: Microsoft's official documentation states first that touchpad failure may be a missing or outdated driver. Driver problems appear suddenly, usually follow an update, and change with a restart or a rollback; hardware failure is gradual, fixed in position, and reproduces across systems. Judging hardware broken before doing E5 to E10 is like ordering surgery before a blood test. The correct action is to complete E1 to E10, especially the E9 rollback and the E17 Linux comparison. The cost is replacing the module while Windows still fails, because the driver problem was never solved, and the old module may have been healthy and is wasted.
M2 — Treating a loose cable as a broken motherboard. The misdiagnosis: "The touchpad works sometimes and not others, the motherboard controller is broken, replace the motherboard." Why it is wrong: the cable connects through a zero-insertion-force connector, and vibration, drops, disassembly or a swollen battery pushing from below can loosen it or oxidise its pins. Repair guidance warns that the touchpad cable connector is quite fragile and needs care during disassembly; community cases show a bent or poorly contacting touchpad cable making the touchpad and the keyboard fail together, which is not a broken motherboard. The correct action is to do the E17 comparison first; during disassembly inspection, check the cable socket, latch and pins for oxidation, bending or breakage, reseat and test, and only then talk about the motherboard. Disassembly inspection is left to professional inspection. The cost is a motherboard-direction quotation and repair time far above a cable-direction one.
M3 — Treating a swollen battery pushing the touchpad up as a broken touchpad. The misdiagnosis: "The touchpad will not press down, the touchpad is broken, replacing it will fix it." Why it is wrong: the battery usually sits directly under the touchpad; as it swells, gas expands the cells and pushes upward against the touchpad, eating the click travel, raising the touchpad and even pressing on the cable. Dell guidance explicitly lists a touchpad that will not press and feels raised as a swollen battery warning. Replacing the touchpad will not shrink a swollen battery, and continuing to use it carries a safety risk. The correct action is the E21 eye and hand check; any bulge means stop use, deal with the battery first, and test the touchpad after. The battery is a confirmed price from HK$580, and other charges are quoted only after inspection, in a written quotation. The cost is replacing the touchpad and still being unable to press it, then paying for a battery as well — double charging — and worse, the safety risk of continuing to use a swollen battery.
M4 — Treating palmrest deformation as a broken sensing layer. The misdiagnosis: "The left side of the touchpad does not respond, the sensing layer is broken." Why it is wrong: the palmrest is the touchpad module's support structure. Deformation from drops, long-term one-sided pressure or a swollen battery pushing from below leaves the touchpad module permanently tilted, so the sensing layer is locally pressed and a fixed position fails. The sensing layer itself may be healthy; the broken thing is the support geometry, and replacing the sensing layer will not correct a bent palmrest, so the replacement will tilt the same way. The correct action is to check during disassembly inspection whether the palmrest is deformed, the touchpad module sits flat, and the screw posts are broken. The cost is the symptom returning after a module-only replacement, and finally replacing the whole palmrest assembly as well — doing the job twice.
M5 — Treating a static or grounding problem as a broken controller. The misdiagnosis: "The cursor jumps around by itself, the controller is broken." Why it is wrong: a capacitive touchpad is sensitive to electric field changes. Accumulated static, a leaking poor-quality charger, poor grounding and nearby strong electromagnetic interference can all make the sensing layer misjudge, producing a jumping cursor, false touches and intermittent failure. The signature of this class is that changing the socket or unplugging the charger makes it better, with no connection to the controller. The correct action is the E20 environment comparison: a genuine charger, a different socket, and a test on battery. The cost is that replacing the controller or the motherboard will not fix a leaking charger; the user goes home, plugs the same poor charger back in, and the fault returns immediately.
M6 — Treating "gestures disappeared" as "the touchpad is too old, replace the machine." The misdiagnosis: "Three-finger gestures do not work, the machine is too old, buy a new one." Why it is wrong: gestures belong to the driver function layer. After Windows Update replaces a Precision driver with a generic HID driver, the gesture settings page disappears while cursor movement stays completely normal. The hardware is completely healthy at that point; only the driver has been downgraded. The correct action is E7 to identify the driver, then E8, E9 and E10. Confirm whether the hardware supports Precision at all, since some older models do not. The cost is a user replacing a machine because of a driver problem — the most expensive misdiagnosis.
M7 — Treating "the touchpad is missing" as "the motherboard cannot detect it, replace the motherboard." The misdiagnosis: "Device Manager cannot find the touchpad, the motherboard is broken." Why it is wrong: a missing device can mean the BIOS switched it off, the I2C HID driver is damaged, the cable is loose, or Windows Update installed the wrong driver — not necessarily the motherboard. Microsoft's question-and-answer reply advises using Show hidden devices first; HP UEFI diagnostics can test the touchpad outside Windows. The correct action is E5, E13, E11 and E17, in that order, before talking about hardware. The cost is a motherboard-direction quotation and repair time far above a BIOS, driver or cable direction.
M8 — Using alcohol or cleaning fluid that seeps into the touchpad. The misdiagnosis: "The touchpad is dirty, pour some alcohol on it and wipe it." Why it is wrong: alcohol, glass cleaner and disinfectant spray can seep directly into the glass edge, the click mechanism gaps and the cable connector, dissolving adhesive, corroding pins and shorting the sensing layer. Damage from seeping cleaner may not be visible immediately but becomes intermittent failure days later, and is then mistaken for natural damage. The correct action is a microfibre cloth with a little water, damp but not dripping, wiped lightly across the surface; never spray any liquid directly onto the touchpad; wait until it is completely dry before powering on to test. The cost is one wrong cleaning turning "dirty" into "needs a new module."
M9 — Opening the machine yourself and tearing the cable latch. The misdiagnosis: "Just open it and have a look, it cannot be hard." Why it is wrong: the touchpad cable uses a zero-insertion-force connector, which is very fragile: the wrong move tears the latch, bends the pins, or even tears the connector socket off the motherboard. Repair guidance specifically warns that the flat cable connector is quite fragile; community cases record latches breaking and the cable then being unable to stay fixed, causing intermittent disconnection. The correct action is not to open the machine if the zero-insertion-force connector is unfamiliar; stop and send it for inspection if in doubt. The cost is that a broken latch may need chip-level repair of the motherboard connector socket, and bent cable pins may need a new cable. One do-it-yourself attempt can turn a loose cable into a motherboard repair.
M10 — Ordering the wrong model: same series, different year, different cable pins. The misdiagnosis: "It is the same ThinkPad T480 or HP Pavilion 15, so the touchpad should be interchangeable." Why it is wrong: the same series and generation, in different years or configurations — with or without a fingerprint reader, different touchpad sizes, buttons or ClickPad — can use different touchpad modules, with different pin counts, pitches, commonly 0.5 mm or 1.0 mm, and forward or reversed orientation. Community discussion notes that replacing a cable means matching pitch and direction, not only length and pin count. A cable or module with the wrong pins may not fit at all, or worse, may burn the controller if inserted wrongly. The correct action is to match parts by the full model plus serial number plus the original part number, never by series name; remove the old part and compare pins, length and latch direction before ordering. The cost is returning and reordering the wrong part, waiting, and opening the machine again; inserting the wrong part can damage the motherboard connector.
M11 — Aftermarket module gesture loss: discovering only after replacement that three and four finger gestures are gone. The misdiagnosis: "An aftermarket touchpad is cheaper, the functions should be the same." Why it is wrong: touchpad gestures need the controller firmware plus the driver plus Windows, all three working together. An aftermarket module may provide only basic HID movement and single click, without Precision gestures, or its firmware version may not match the manufacturer driver, so the gesture settings page does not appear, palm rejection does not work, or the scroll direction is wrong. That does not mean aftermarket is always worse; it means an aftermarket module's compatibility range must be verified model by model, and no public first-hand source can guarantee that all aftermarket modules support all gestures. The correct action is to ask before replacing: does this module support Precision, what is the gesture list, and is there a real-machine test record; after replacement, check the E3 and E7 gesture pages on the spot and test each item. The cost is a user saving money on an aftermarket part and then losing the three-finger switching they use every day, finally needing a genuine part as well, at a higher total cost. See Section 19.
M12 — Treating a charger problem as a touchpad problem. The misdiagnosis: "It only fails at home, it works fine in the shop, is it an intermittent hardware fault?" Why it is wrong: many Hong Kong users run an aftermarket charger, power strip or universal adapter at home and a genuine charger in the shop. Different charger leakage and grounding make the touchpad behave completely differently. That is why the environment comparison must be done in both the home and the shop. The correct action is to bring the home charger and power strip to the inspection; test once in the shop with a genuine charger, then once with the user's own charger. The cost is replacing the touchpad, going home, plugging the same charger back in, and watching the fault return, while the user believes the repair did not work, when the touchpad was never the cause.
M13 — Treating "the touchpad locks while typing" as a broken touchpad. The misdiagnosis: "The touchpad will not move while I am typing, is it broken?" Why it is wrong: Synaptics PalmCheck and SmartSense are designed to suppress the touchpad while typing, to prevent palm false touches. If PalmCheck is set too aggressively, or the driver sets the typing delay too long, the touchpad locks for several hundred milliseconds after every keypress, which feels like breakage. That is a settings problem, not a hardware problem. The correct action is E4: adjust the PalmCheck slider and the typing delay, and temporarily switch off tap-to-click and type to test. The cost is that replacing hardware will not change the PalmCheck setting, so the replacement locks the same way.
M14 — Treating "the surface is scratched" as "the sensing layer is broken," and the reverse, treating a crack as a scratch. The misdiagnosis: "The touchpad surface is scratched, so it cannot sense." Why it is wrong: light scratches are usually only surface coating wear and do not affect capacitive sensing; what really affects sensing is a crack cutting the sensing grid, or conductive contamination on the surface such as metal dust or liquid residue. The reverse is also common: a fine crack is dismissed as a scratch, and the dead zone keeps growing. The correct action is to inspect the surface under angled light: a scratch is shallow with no step; a crack is deep, has a step, and may let light through. Combine that with the E17 dead zone comparison: no response in the same place in Linux means a physical dead zone. The cost is replacing a module for a scratch, which is a waste, or ignoring a crack and doing only software elimination, which is a delay.
M15 — Using a third-party driver updater for a one-click update. The misdiagnosis: "Use a driver tool to update everything in one click, it should help." Why it is wrong: Microsoft's official question-and-answer reply states explicitly that third-party driver update tools install incompatible and damaged device drivers, are a major source of computer problems, and should absolutely not be used. Lenovo's official documentation requires updating only through Lenovo Vantage or the official support site. A third-party tool can install the wrong Synaptics or ELAN driver for the model, turning a healthy touchpad faulty, or replace a Precision driver with a generic one. The correct action is to use only Windows Update or the manufacturer's official support site, per E8. If a third-party tool has already been used, do E10 to reinstall the manufacturer driver first, then E9 to roll back. The cost is a one-click update changing several drivers at once, making it hard to trace which one caused the problem; in the worst case, each driver must be restored one by one.
M16 — Reinstalling Windows as a cure-all. The misdiagnosis: "Reinstall Windows, that fixes everything." Why it is wrong: reinstalling Windows can fix software problems, but it cannot fix a BIOS switched off, a swollen battery, a loose cable, a bent palmrest or a cracked glass surface. Reinstalling without the E17 Linux comparison and the E21 battery check leaves the machine still faulty after reinstalling, while the user also loses data, settings and the time spent reinstalling software. The correct action is to consider reinstalling only after E1 to E22 are done and E17 proves the problem is in the Windows layer; back up data and record the driver version before reinstalling. The cost is the risk of data loss, hours of reinstallation time, and an unsolved problem.
M17 — Treating intermittent failure as a single cause. The misdiagnosis: "It works sometimes and not others, it must be a loose cable." Why it is wrong: intermittent failure can be a hung driver, a power management wake-up failure, a loose cable, a swollen battery intermittently pushing from below, accumulated static, or surface contamination. The six causes have completely different triggers: driver problems follow updates, power problems follow sleep, cable problems follow vibration or opening and closing, battery problems follow heat or charging, and static problems follow ambient humidity. Judging the cause without recording the trigger conditions has a low hit rate. The correct action is to record when it fails, what was being done, what was plugged in, whether it had just woken, and whether it was hot, then compare against the symptom navigation table and exclude items one by one. The cost is replacing the cable and discovering the cause was power management, with the intermittent failure continuing.
M18 — Assuming a new touchpad must bring Precision back. The misdiagnosis: "Replace the touchpad with a new one, and the gestures should all come back." Why it is wrong: Precision needs hardware controller support plus firmware plus the driver, all three together. Some older models never shipped as Precision, and no module replacement will make them Precision. Aftermarket modules may also not support Precision. The correct action is to confirm the machine's original factory identity per E7 before replacing, and to check the settings page for a gesture section immediately after replacement. The cost is a user expecting a result and believing the repair failed.
M19 — Overlooking the top-left double-tap switch, HP only. The misdiagnosis: "The HP touchpad suddenly stopped working, the driver must be broken." Why it is wrong: some HP touchpads have a small sensor area at the top-left corner, and double-tapping it toggles the touchpad, with an LED indicator beside it. Cleaning the touchpad, wiping the desk or placing something on the touchpad can trigger it by accident. This is an HP-specific design, and not knowing it makes the fault look like a driver or hardware failure. The correct action is to double-tap the top-left corner once, watch whether the LED changes, and test again. This applies only to HP models that support the feature. The cost is reinstalling a driver, or even sending the machine for repair, because of one double-tap.
M20 — Treating "touchpad and keyboard failing together" as two separate faults. The misdiagnosis: "The touchpad is broken and the keyboard is broken too, both need replacing." Why it is wrong: on some models the touchpad, keyboard, power button and fingerprint sensor share one cable — for example the Framework 13 input cover cable. A damaged cable can make several parts fail together; they are not each broken separately. Replacing two parts separately will not fix the shared cable problem. The correct action is to check the shared cable and the connector socket, and to compare against the manufacturer's repair manual cable diagram. The cost is replacing two parts without success, and only then discovering the cable.
M21 — Buying a used or removed touchpad without testing gestures and click travel. The misdiagnosis: "A used genuine part is cheaper, it should be the same as new." Why it is wrong: a used touchpad may come from a dropped or liquid-damaged machine; the sensing layer may have hidden damage, the click mechanism may already be fatigued, and the cable may have hidden creases. Fitting it without testing gestures, click travel and dead zones means discovering the problem only after installation, and opening the machine again. The correct action is to test it on the bench before fitting — movement, tap, scrolling, gestures, click and dead zones, six items — and only fit it when all six pass; test again after fitting. The cost is repeated disassembly raising the risk of latch damage, plus an untraceable part of unknown origin. No public first-hand source can guarantee the remaining life of a used part, and this article makes no lifespan promise.
M22 — Treating "the touchpad is slow" as a broken touchpad, when it is system load. The misdiagnosis: "The touchpad lags badly, the touchpad is ageing." Why it is wrong: touchpad lag can be a fully loaded CPU, a fully loaded disk, a display driver problem, a system update in progress, or even Bluetooth interference. The external mouse comparison in E19 can tell them apart: if the external mouse lags the same way, the problem is not in the touchpad. The correct action is E19 plus checking CPU and disk usage in Task Manager, and closing a large update or antivirus scan before testing again. The cost is that replacing the touchpad will not make the CPU faster.
M23 — Ignoring warranty and manufacturer diagnostic tools. The misdiagnosis: "Go straight to a street shop for a replacement, no need for the manufacturer." Why it is wrong: for a machine still under warranty, opening it may affect the warranty — terms differ by brand, this article makes no general statement, and no public first-hand source supports a blanket statement. Manufacturer diagnostic tools, including HP UEFI diagnostics, Lenovo diagnostics and Dell SupportAssist, can provide hardware test results without opening the machine, and are important evidence before sending it in. Skipping that step and opening the machine directly can void the warranty and lose the manufacturer's test record. The correct action is to check the warranty status first, then run the manufacturer's UEFI or system diagnostics, record the test results, and bring them to the inspection. The cost is a voided warranty and repeated inspection.
M24 — Treating "an article or forum says this works" as "this works on this machine." The misdiagnosis: "The internet says editing the registry or installing a Precision driver works, I will do the same." Why it is wrong: registry edits, force-installing another brand's driver and third-party gesture tools are all cases that worked for a specific model and version, not universal solutions. Microsoft's question-and-answer replies warn that force-installing a Precision driver may not work, and HP officially advises against it. A wrong registry edit can destabilise the system or even stop it booting. The correct action is to follow only official documentation — Microsoft, Lenovo, HP, Dell and Apple; back up the registry and create a restore point before any registry change; and never download drivers from a forum. The cost is system damage, worse driver conflicts, and warranty disputes.
| Misdiagnosis | Wrong direction | Correct direction | How to avoid it |
|---|---|---|---|
| M3 Battery treated as broken touchpad | Replace the touchpad | Replace the battery first, then test the touchpad | E21 eye and hand check |
| M2 Cable treated as broken motherboard | Replace the motherboard, chip-level repair | Check the cable socket and latch first | E17 plus disassembly cable check |
| M6 Gestures gone treated as replace the machine | Replace the machine | Roll back or reinstall the driver | E7 plus E9 |
| M1 Driver treated as broken hardware | Replace the module | E1 to E10 software elimination | E17 Linux comparison |
| M9 Opening the machine yourself, torn latch | Do-it-yourself disassembly | If the zero-insertion-force connector is unfamiliar, send it for inspection | See the latch direction clearly before touching it |
| M10 Wrong model ordered | Order by series name | Order by full model plus part number | Match pins, pitch and direction |
| M15 Third-party driver tool | One-click update | Official channels only | E8 |
| M8 Alcohol seepage | Pour liquid to clean | Microfibre cloth plus a little water | Never spray liquid directly |
17. Swollen Battery Identification: Safety First
Swollen battery identification is the most important distinction in touchpad diagnosis — there is no other like it. Dell's official swollen battery guidance explicitly lists a touchpad or keyboard that will not press and feels raised as a warning sign, and requires stopping use immediately. Dell's service manual restates that a swollen battery can affect laptop performance, and to prevent further damage to the chassis or internal parts, use should stop and the battery should be discharged and handled; the battery must not be squeezed, bent or punctured.
The check is a no-disassembly eye and hand inspection, done after powering off and unplugging. Is the touchpad raised above the palmrest surface; has click travel become shorter or stiffer, with the press not springing back; is the bottom case no longer closing, with widening gaps; does the machine rock when placed on a flat table; is the middle of the keyboard raised. Any one of these means stopping use immediately. This check should be done before and after all software elimination, because a battery can swell or worsen at any time.
There are four absolute prohibitions, to be remembered in bold: do not force the touchpad flat, do not try to close the bottom case, and do not tape it down; do not puncture the battery to release gas, and do not bend or squeeze the battery; do not keep charging to see whether it gets better; if the battery is hot, smoking, smelling or leaking, do not touch it and do not move it, keep away and seek help.
The decision significance is that replacing the touchpad when a battery is swollen is entirely the wrong direction: the new touchpad will be pushed up the same way, and continuing to use the machine carries a safety risk. The correct order is to deal with the battery first, and then test whether the touchpad click has recovered. In many cases, once the battery is replaced, the click returns to normal and the touchpad never needs replacing. The battery is a confirmed price from HK$580; whether the touchpad also needs replacing is quoted only after inspection, in a written quotation.
| Sign | More like a swollen battery | More like a touchpad fault |
|---|---|---|
| Touchpad raised above the palmrest | Yes, first suspect | Will not raise the surface |
| Click travel shorter and stiffer | Yes, the battery pushes from below | A collapsed dome goes soft, not stiff |
| Bottom case will not close, gaps widening | Yes | Will not affect the bottom case |
| Machine rocks on a flat table | Yes | Will not make the machine rock |
| Middle of the keyboard raised | Yes, the same battery pushes it up | A keyboard fault will not raise it |
| Fixed dead zone, sensing failure | Not a typical battery sign | Sensing layer or cable problem |
| Jumping only when the charger is plugged in | Not a typical battery sign | Grounding layer problem |
18. Decision Framework: Module Alone, Whole Palmrest Assembly, External Mouse, or a New Machine
18.1 The decision tree
The touchpad decision tree has three levels. The first level is the swollen battery check: if there is swelling, stop use, deal with the battery, and test the touchpad again; if the touchpad is normal after the battery is replaced, the job is done and the touchpad does not need replacing; if it is still faulty after the battery is replaced, move to the hardware branch. The second level is the Linux comparison: if it is normal, enter the software branch, covering E1 to E16 and E22 — fixed means done, not fixed means considering a Windows reinstall or sending the system layer for inspection; if Linux is also faulty, enter the hardware branch. The third level is the hardware branch: click failure or bulging means checking the battery, the click mechanism and the palmrest; a fixed dead zone means checking the glass cracks and the sensing layer; intermittent failure means checking the cable and the connector socket; a completely dead panel means checking the cable, the controller and the motherboard connector. One level further down: a loose or oxidised cable only means reseating or replacing the cable; a broken module with a healthy palmrest means replacing the touchpad module alone; a bent palmrest, broken screw post or damaged module seat means replacing the whole palmrest assembly; a damaged motherboard connector socket means chip-level or motherboard-level inspection.
Three rules govern the decision tree: every branch needs evidence before moving to the next branch, and no branch is skipped on feeling; the dividing line between the software branch and the hardware branch is E17, not "I tried reinstalling Windows"; and the battery branch takes priority over every other branch, because it involves safety.
18.2 Four options compared
| Option | When it applies | Advantages | Disadvantages and risks | Hong Kong reality |
|---|---|---|---|---|
| A. Replace the touchpad module alone | E17 confirms hardware failure; palmrest healthy; cable normal; parts available for the model | Lowest cost relative to the assembly; keeps the original palmrest | Must match model and pins accurately; aftermarket gesture risk; disassembly risk | Ordering time depends on the model; popular models may be in stock, uncommon models must be ordered; quoted only after inspection, in a written quotation |
| B. Replace the whole palmrest assembly | Palmrest bent, screw post broken, module seat damaged; module and palmrest glued and inseparable; several parts sharing one cable damaged | Solves structure and module in one job; less repeated disassembly | Higher cost; must match colour, material, fingerprint hole and keyboard layout; longer ordering time | Palmrest assemblies usually need ordering; a wrong colour or version must be returned and exchanged; quoted only after inspection, in a written quotation |
| C. Use an external mouse as a substitute | Not yet decided whether to replace; waiting for parts; tight budget; mainly used at a fixed desk | No disassembly, usable immediately; lowest cost | Loses portability; does not solve safety problems such as a swollen battery; inconvenient long-term | An external mouse can be bought any time; but it must not be treated as "fixed" |
| D. Replace the machine | Several hardware parts ageing at once, including battery plus screen plus touchpad; motherboard connector socket damaged with high repair cost; high machine age, repair cost close to residual value | Solves all ageing problems at once | Highest cost; data migration time; a new machine needs setting up again | Back up data before replacing the machine; dispose of the old machine's data properly |
18.3 Seven questions to ask before ordering parts
First, what is the genuine part number — not just the series name. Second, do the cable pin count, pitch and orientation match the old part. Third, does this module support Precision, and what is the gesture list. Fourth, is the palmrest bent, and are the screw posts broken. Fifth, is the battery swollen. Sixth, which six items will be tested on the spot after replacement: movement, tap, scrolling, gestures, click and dead zones. Seventh, if gestures do not return after replacement, what happens — agree that before the work, not after. Ask all seven before ordering. If any are unanswered, do not rush to replace.
On prices, readers can first look at /pricing for the confirmed charges, including battery from HK$580, screen from HK$1,280, motherboard chip-level repair from HK$880, and keyboard from HK$480. Touchpad modules, palmrest assemblies, flex cables and other charges are quoted only after inspection, in a written quotation. For the inspection process, see /diagnostic.
18.4 The upgrade myth: can a touchpad be upgraded
Upgrading from non-Precision to Precision has no public first-hand source supporting the idea that replacing a module can do it. Precision needs the controller firmware plus the driver plus Windows, all three together; replacing one sensing layer is not enough. This article states plainly: do not replace a touchpad for the sake of gestures, because the expectation will be disappointed. Upgrading from a small touchpad to a large one is impossible because the palmrest opening is a fixed size and a large panel will not fit a small hole; do not try cutting the palmrest. Upgrading from no fingerprint reader to one needs a palmrest with a fingerprint hole, a cable with fingerprint wiring, and a motherboard with a fingerprint interface — all three are required, and in most cases it is not feasible. The genuinely workable upgrade is an external Precision touchpad or mouse, such as an external touchpad, which needs no disassembly, gives gestures immediately, and is the most practical upgrade path for an older non-Precision machine.
19. Aftermarket Gesture Loss Risk
The most common cost of an aftermarket module is not "whether it works" but "whether the gestures come back." Precision gestures need the controller firmware plus the driver plus Windows, all three working together; replacing only a sensing layer without matching the model, the firmware and the cable pins can leave only basic movement and single click. An aftermarket module may use a different controller, a different sensing layer and a different mechanical structure, so even with identical physical dimensions, the feel, the accuracy and the palm rejection can differ.
The three most common aftermarket types in Hong Kong should be separated. Aftermarket new modules are new and not made by the original manufacturer; the risk is missing gestures and inconsistent quality; the advice is to ask for the gesture list before replacing and to test each item on the spot after replacement. Removed genuine parts taken from another machine carry the risk of hidden damage and click fatigue; the advice is to test the six items before fitting and test again after fitting. Universal or "compatible" modules claim compatibility with several models; the risk is that the pins or dimensions may not match; the advice is not to order on the word "compatible" alone, but to match the part number.
| Aftermarket type | Characteristics | Risks | Advice |
|---|---|---|---|
| Aftermarket new module | New, not made by the original manufacturer | Gestures may be missing; quality varies | Ask for the gesture list before replacing, test each item on the spot after |
| Removed used genuine part | Taken from another machine | Hidden damage, click fatigue | Test the six items before fitting, test again after fitting |
| Universal or "compatible" module | Claims compatibility with several models | Pins or dimensions may not match | Do not order on "compatible" alone, match the part number |
After a replacement, the on-the-spot test should cover six items: movement, tap, scrolling, gestures, click and dead zones. Movement should be tested at all four corners and the centre; tap with a single-finger tap; scrolling with two-finger scrolling; gestures with three-finger switching; click with the travel and sound at all four corners; dead zones by scanning cell by cell. Only when all six pass is the replacement complete. If gestures do not return, the reason and the follow-up should be explained on the spot, not discovered by the user after going home.
20. Pre-Inspection Self-Check List and the Inspection Report
20.1 Checks the user can do without opening the machine
The following checks need no disassembly, and the user can do them and bring the results to the repair, which speeds up diagnosis. Is the external mouse normal — separating a touchpad problem from a system problem. Does the problem remain after a restart. Does the problem disappear on battery with the charger unplugged — separating a grounding layer problem. Does the touchpad surface have cracks, dents or obvious wear. Scan the whole panel finger by finger: where is the dead zone, and how large is it. Do tap and press fail separately — separating sensing from clicking. Press all four corners: is the travel and sound symmetrical, and is one side unusually loose or stiff. Is the touchpad raised, is the bottom case separated, does the machine rock on a flat table — if so, stop using it and arrange inspection. Was there liquid ingress, and was the machine powered on again after it. Apple users: is the machine powered on, and is Force Click and haptic feedback enabled in Trackpad settings. When did the problem start — suddenly or gradually — and is it related to humid weather.
Five things to prepare before sending the machine in. First, back up data; before any disassembly repair, back up, and do not assume repair will not affect data. Second, record the symptoms, using the six items in Section 10, and bring them to the inspection. Third, bring the charger, so the inspection can do the environment comparison. Fourth, note the driver version: in Device Manager, open the touchpad, go to the Driver tab, and photograph the version number and date. Fifth, check the warranty status: enter the serial number on the manufacturer's website, and bring the result to the inspection.
20.2 What a proper inspection report should contain
A proper touchpad inspection report should at least state: which of E1 to E22 were done and what the results were; the E17 Linux comparison result, normal or faulty; the E21 battery check result, whether there is bulging; the visual results for the cable, latch, palmrest and click mechanism after disassembly; which of options A, B, C or D is recommended and why; and the part number, ordering time and written quotation. If an inspection report only says "the touchpad is broken, replace it," with none of the above, the reader has the right to ask for the missing items.
Hong Kong repair parts supply has three tiers: in stock, meaning popular models and common parts; local warehouse, meaning days; and overseas ordering, meaning days to weeks. Touchpad modules and palmrest assemblies are model-specific parts, not common parts, and ordering time depends on how popular the model is, its year, its colour and configuration, and whether it is genuine or aftermarket. This article makes no specific lead-time promise, because no public first-hand source can guarantee ordering times for all models; the correct wording is that it is quoted only after inspection, in a written quotation, and the ordering time is the one on the quotation. Any promise of "definitely in stock today" that has not matched the part number is unreliable.
20.3 Shop information
Laptop King is located at Room 1209, Dali Plaza, Shek Mun, Shatin, telephone +852 2186 8010, WhatsApp +852 6558 6806, opening hours 12:00–19:00. Readers can first look at /pricing for the confirmed charges, then look at /diagnostic for the inspection process, and bring this article's self-check results and symptom records to the inspection.
Safety reminder: if the touchpad, keyboard or bottom case shows bulging, heat, odour, smoke, leakage or liquid ingress, stop using and charging the machine immediately, do not power it on again to test, do not open the battery yourself, and arrange inspection. Disassembly, measurement, flex cable swapping and soldering are left entirely to professional inspection.
Frequently Asked Questions
Q1: My touchpad is completely dead. Does that mean it is broken and must be replaced?
A: Not necessarily. A completely dead touchpad can be an accidentally pressed Fn shortcut, a Windows setting switched off, a BIOS setting switched off, a damaged driver, a damaged I2C HID driver, a loose cable, or a damaged controller. The correct order is to complete the E1 to E22 software elimination first, especially E5 in Device Manager, E13 in the BIOS, and the E17 Linux comparison. Only if it is completely dead in Linux as well does hardware suspicion rise sharply enough to warrant disassembly inspection. Disassembly inspection is left to professional handling.
Q2: My touchpad will not press down. Is the touchpad broken?
A: Not necessarily; first check whether the battery is swollen. A swollen battery pushes upward against the touchpad from below, eating the click travel and raising the touchpad. The check is an eye and hand inspection after powering off and unplugging: is the touchpad raised, has click travel become shorter and stiffer, is the bottom case no longer closing, does the machine rock on a flat table. Any one of these means stopping use immediately, dealing with the battery first, and testing the touchpad after. The battery is a confirmed price from HK$580. Do not force the touchpad flat, do not puncture the battery, and do not keep charging.
Q3: After replacing my touchpad with an aftermarket one, three-finger gestures do not come back. Was the wrong part fitted?
A: Possibly the aftermarket module does not support Precision gestures. Precision gestures need the controller firmware plus the driver plus Windows, all three together, and an aftermarket module may provide only basic movement and single click. Before replacing, the questions to ask are whether the module supports Precision and what the gesture list is; after replacing, check the gesture section in the settings page on the spot and test the six items — movement, tap, scrolling, gestures, click and dead zones — one by one. If those questions were not asked before replacement, return to the inspection and ask for the reason and the follow-up.
Q4: My touchpad got wet, I dried it and it works again. Is it definitely fine now?
A: Not necessarily. Liquid damage proceeds in three stages: immediate short circuit, spreading corrosion, and inter-layer damage. After the surface is dried, residual liquid can keep corroding the cable gold fingers, the connector and between the sensing layers, becoming intermittent failure or a fixed dead zone days later. The correct action is to power off immediately after a spill, not to power on again to test, and to send it for inspection as soon as possible. Disassembly inspection of the corrosion range, cleaning and substitution testing are left to professional inspection. Do not use rice; rice cannot draw out liquid residue from between layers and connectors.
Q5: The cursor only jumps when the charger is plugged in, and is normal on battery. Is the touchpad broken?
A: Usually the touchpad module is not broken; it is a grounding layer problem. An aftermarket or ageing charger couples switching power supply noise into the chassis ground, contaminating the sensing reference ground, so the capacitance changes the controller measures are full of noise. The correct action is to test first with a genuine charger, then with a different socket, and to bring the home charger to the inspection for the environment comparison. Checking whether the grounding tape has come off is left to professional inspection. Skipping this step and replacing the module directly is the most common waste.
Need Professional Laptop Repair?
Laptop King has 15+ years of repair experience in Shek Mun, Sha Tin. Free diagnosis, transparent pricing, no fix no fee. 180-day warranty for your peace of mind.